Felt Leaf Wreath
Most of my projects only come into being after a long period of prior contemplation. I like to be sure I’m really excited about an idea before I sink time and resources into it. Some ideas rise to the top of my list and eke their way into existence, while others fall away as I lose interest over time. Today’s project was an anomaly in that it was entirely spur of the moment.
I was gifted a couple of multipacks of felt recently, each with tons of gorgeous colors, so the need for a felt-centric project had been on my radar. One day while scrolling on Instagram, a felt leaf wreath popped up on my feed. I had seen these before and entirely forgotten about them. What a perfect project for a big stack of felt and a lazy Saturday afternoon!
Being that it was a spontaneous effort, I used what I had on hand, which was simply…
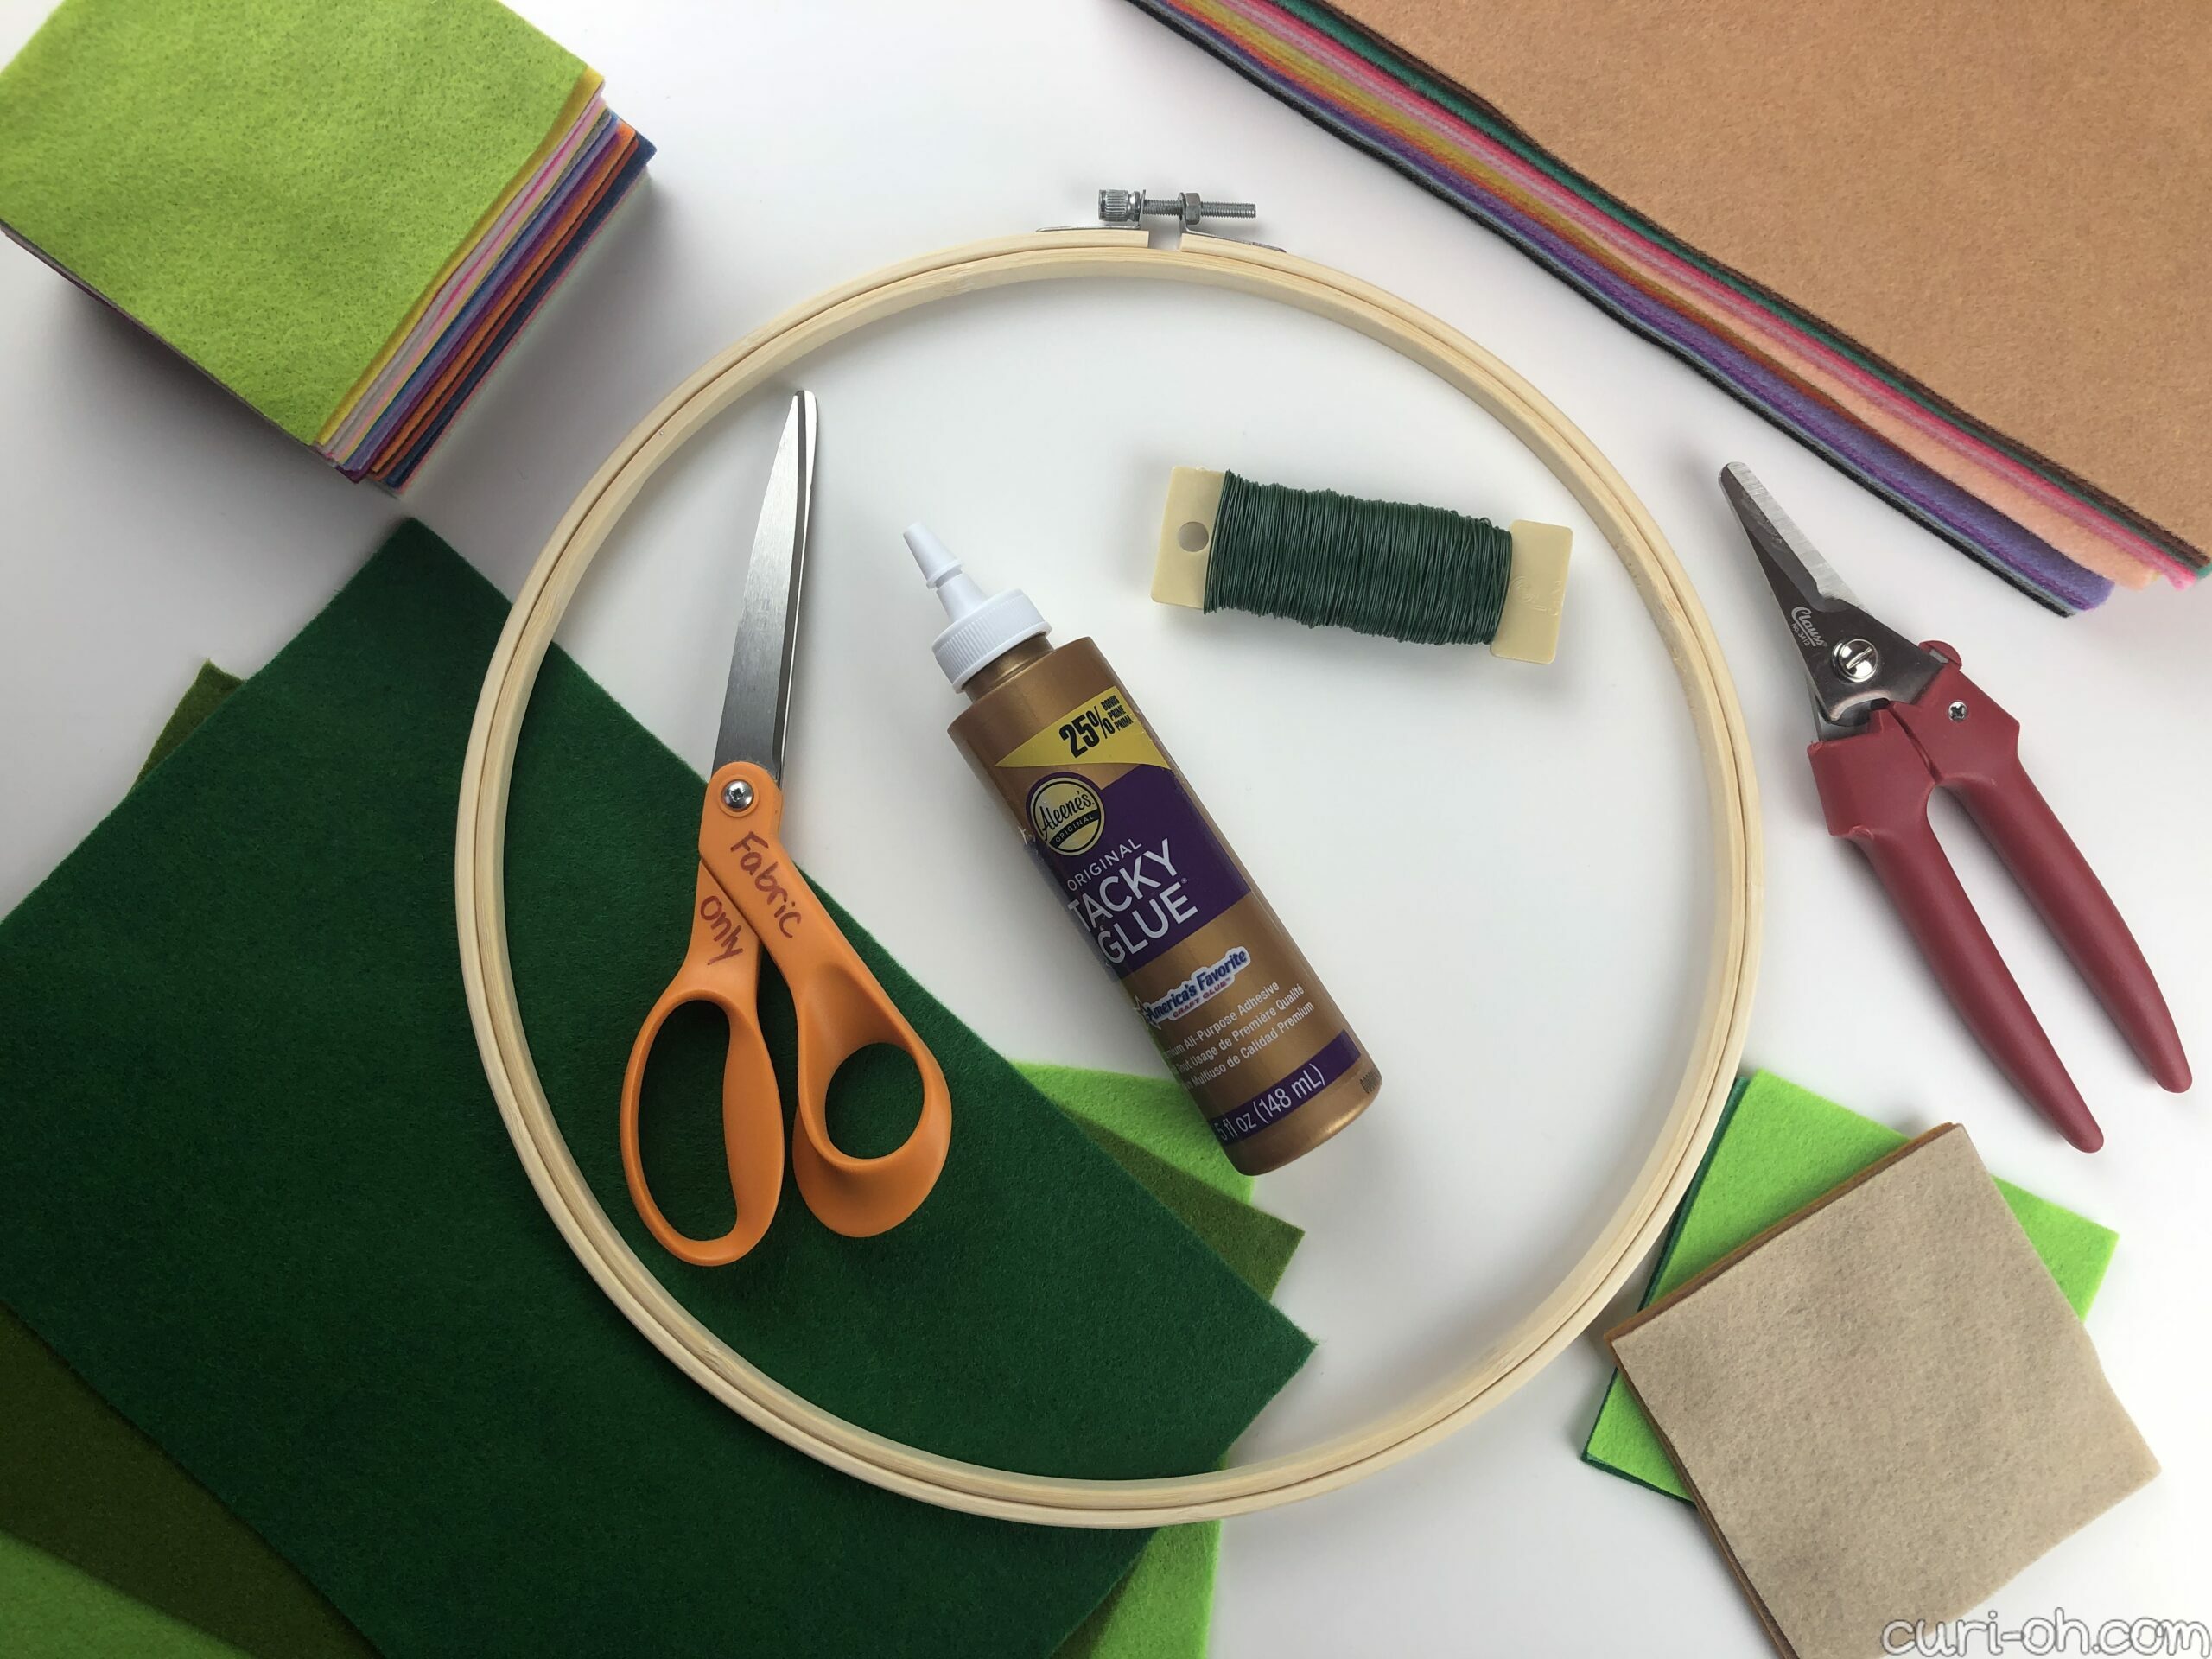
- Felt
- Wooden embroidery hoop
- Floral wire (+wire cutters)
- Craft glue
- Scissors
- Paper and pencil
- Needle nose pliers
- Twine to create a hanging loop
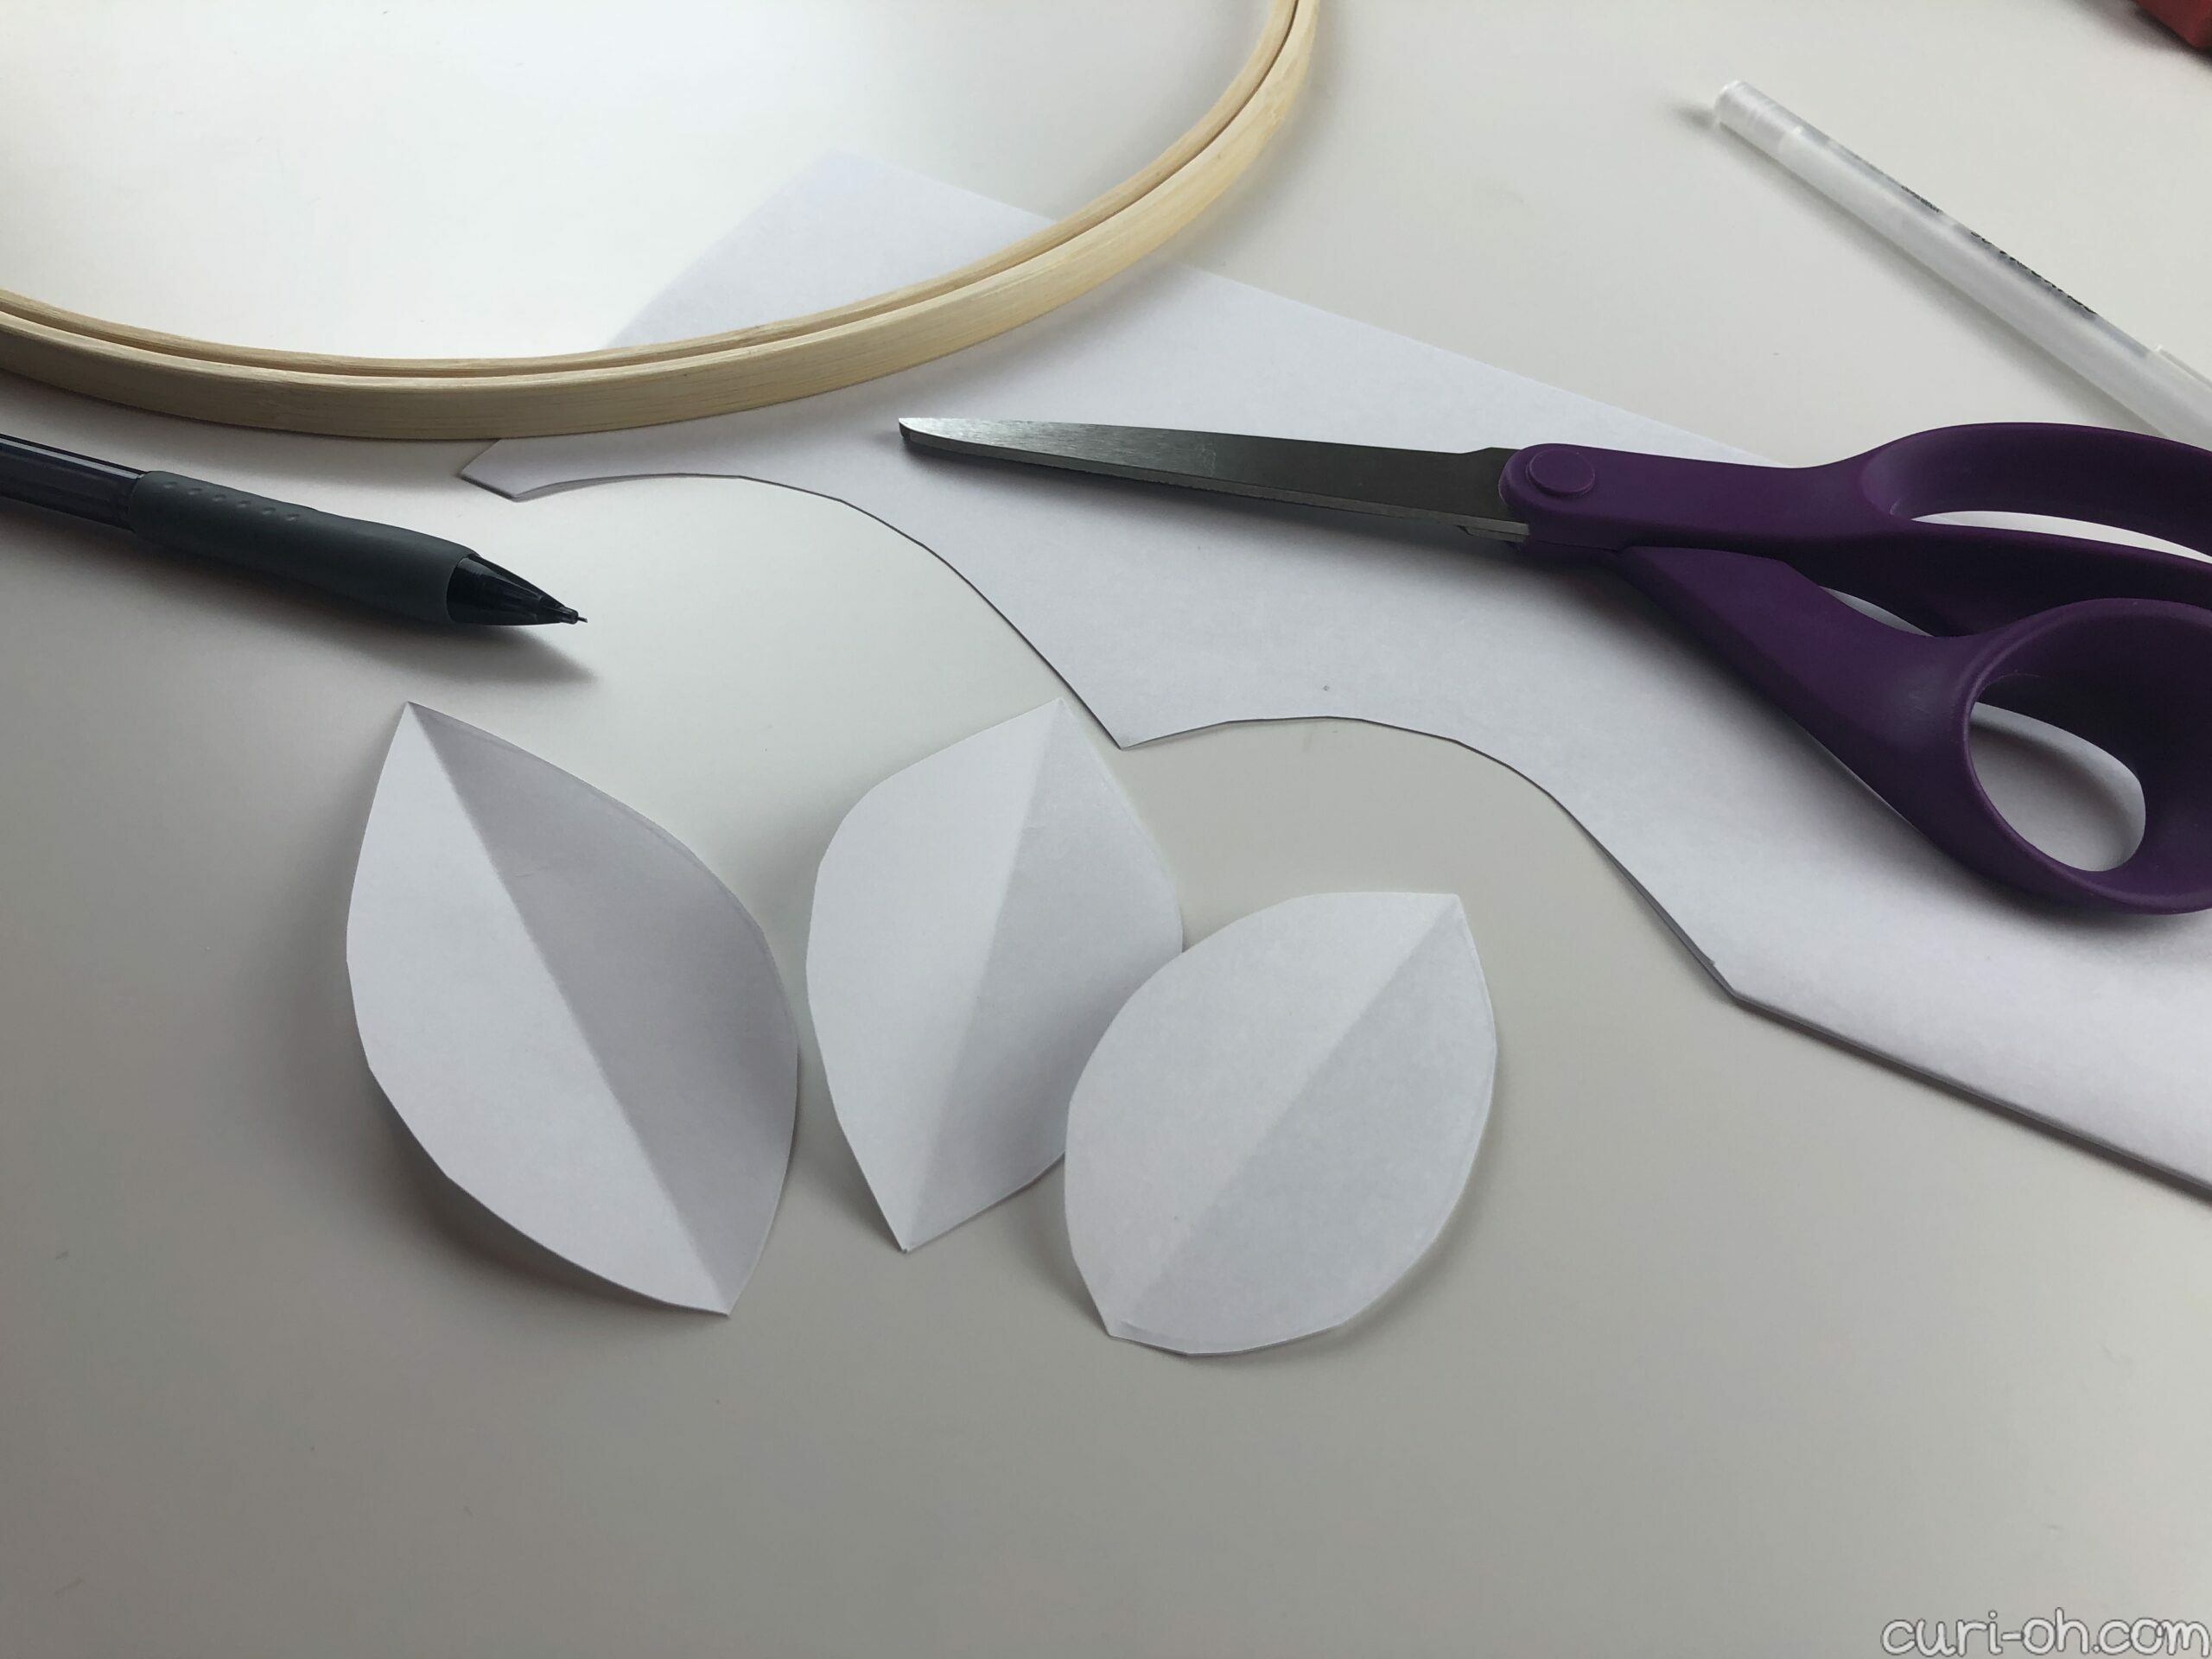
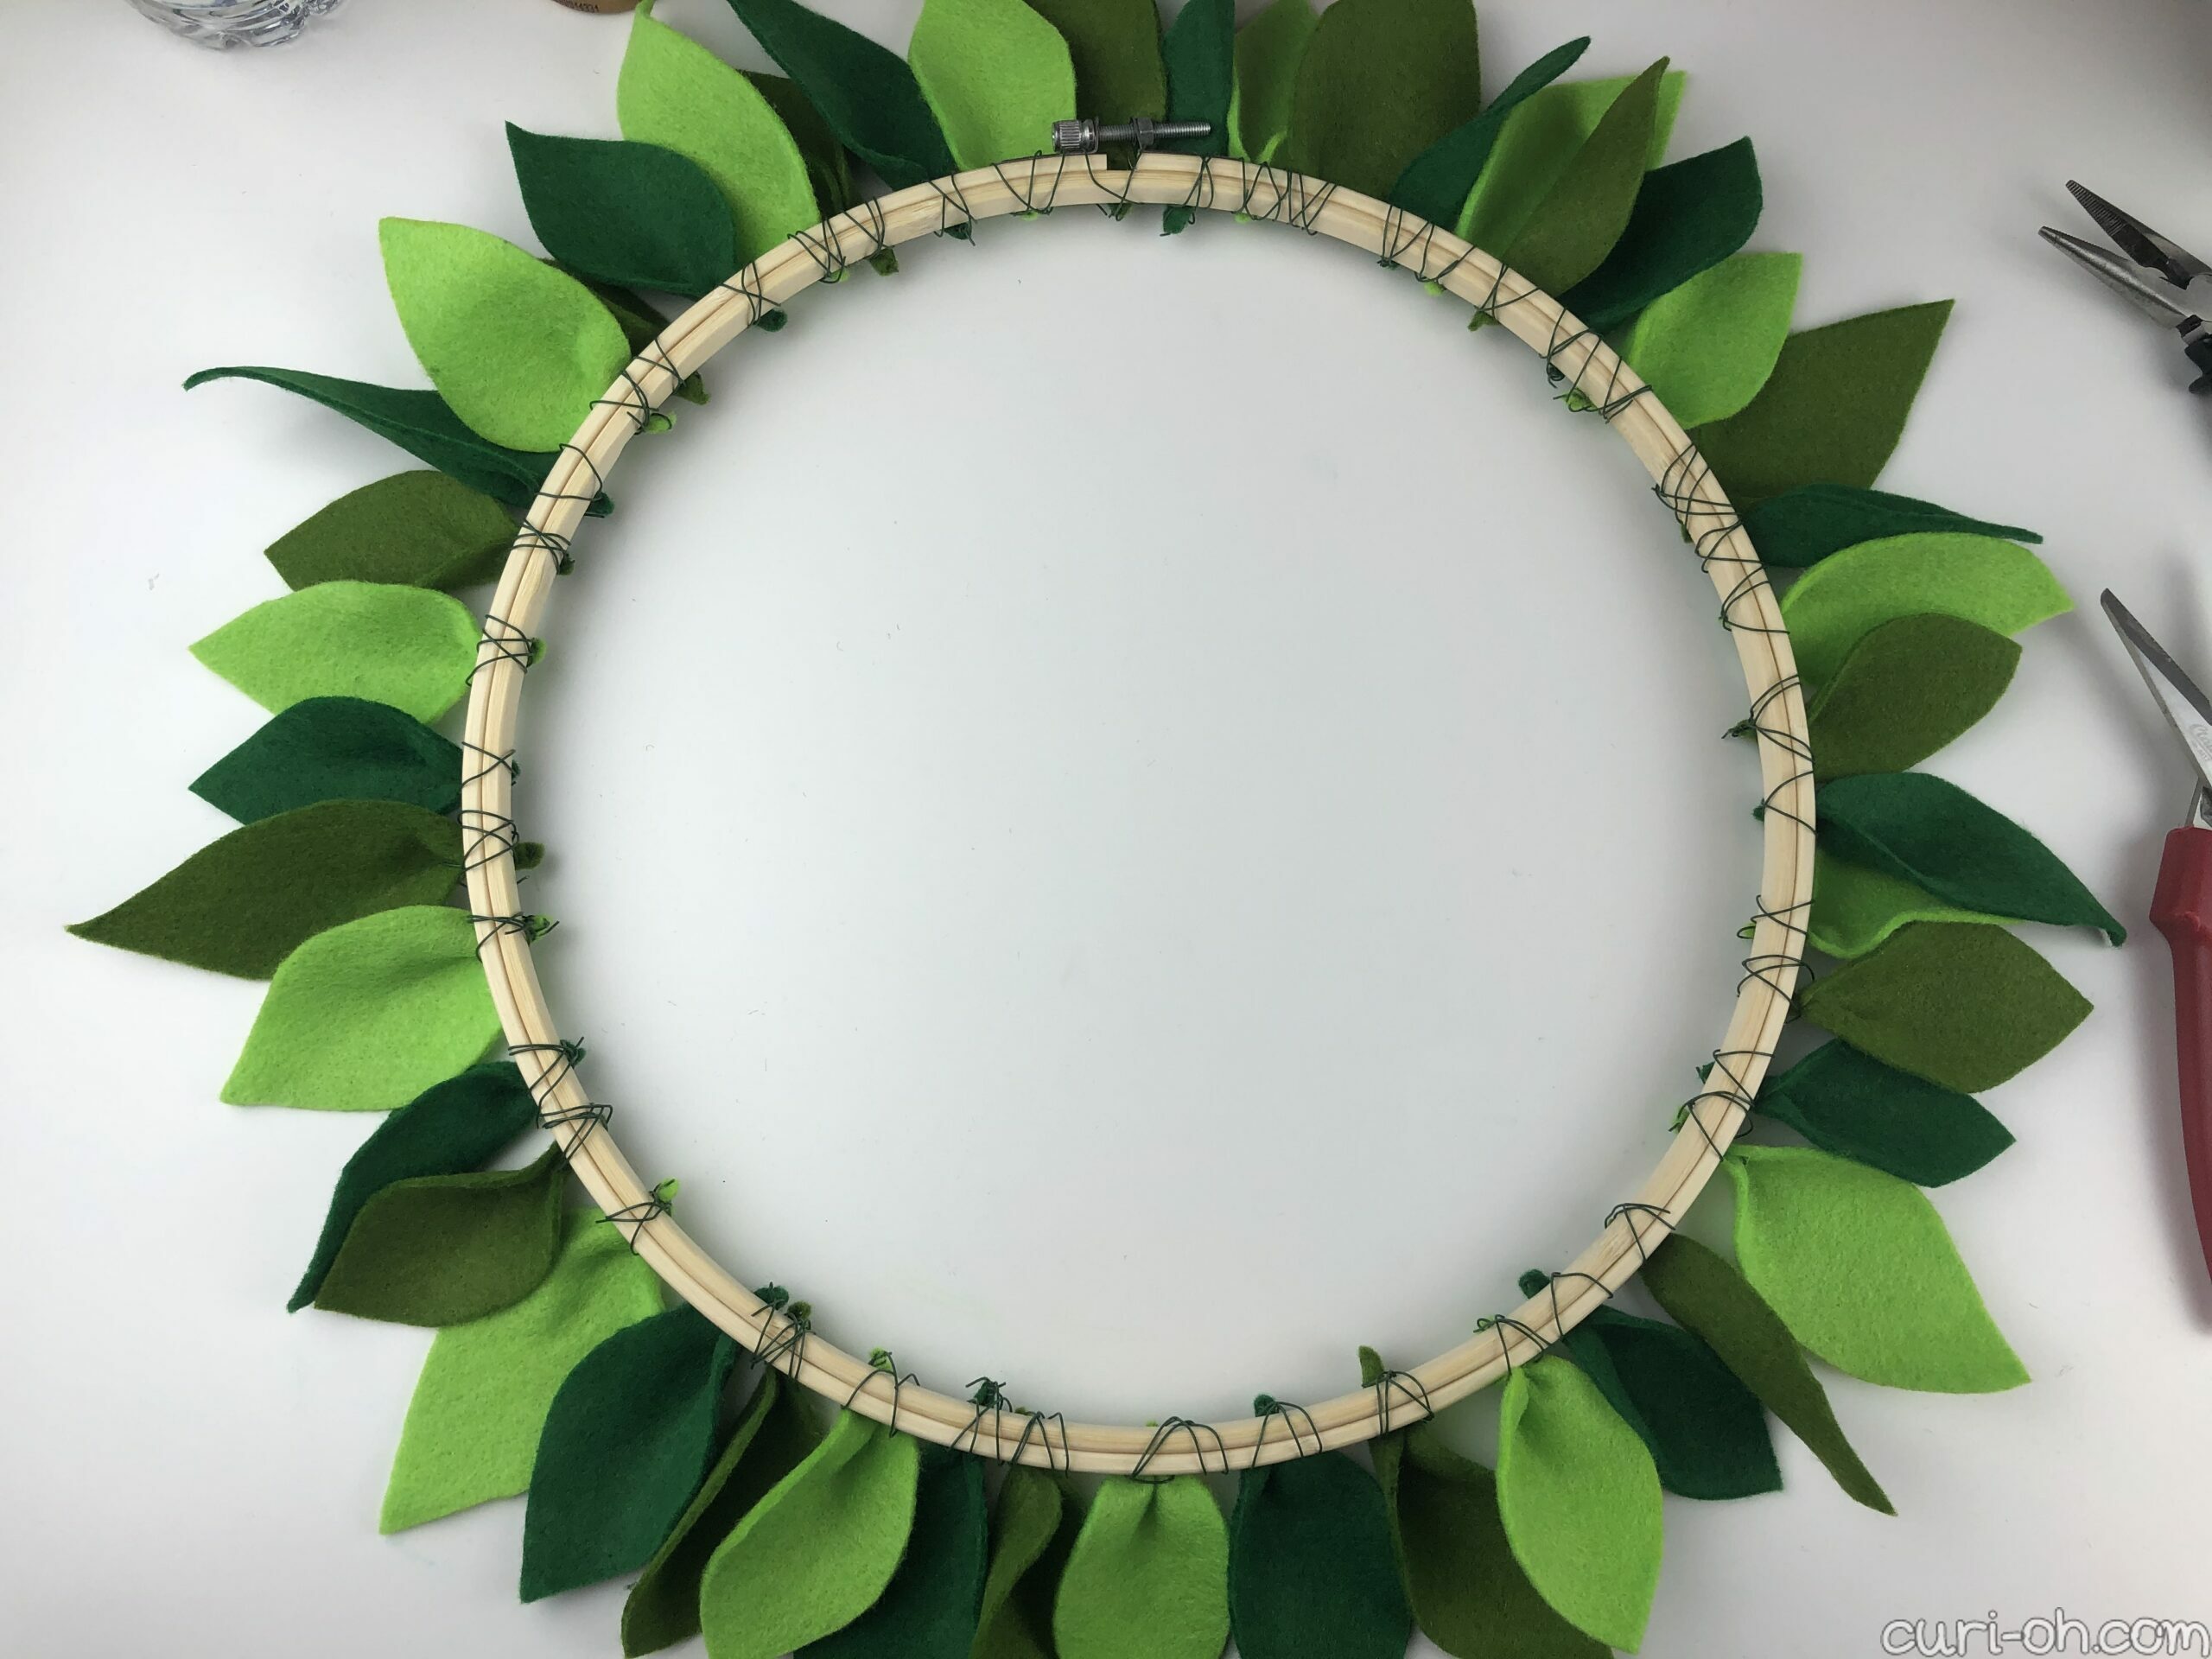
I decided to use three different colors of green felt and created three different leaf stencil shapes. I simply folded a sheet of paper in half and drew a leaf shape I liked along the one (creased) side so that when I cut it out, it would be symmetrical on both sides of the leaf. I created one leaf which was long and skinny, one which was rounder and wider, and a third which was pretty regularly proportioned.

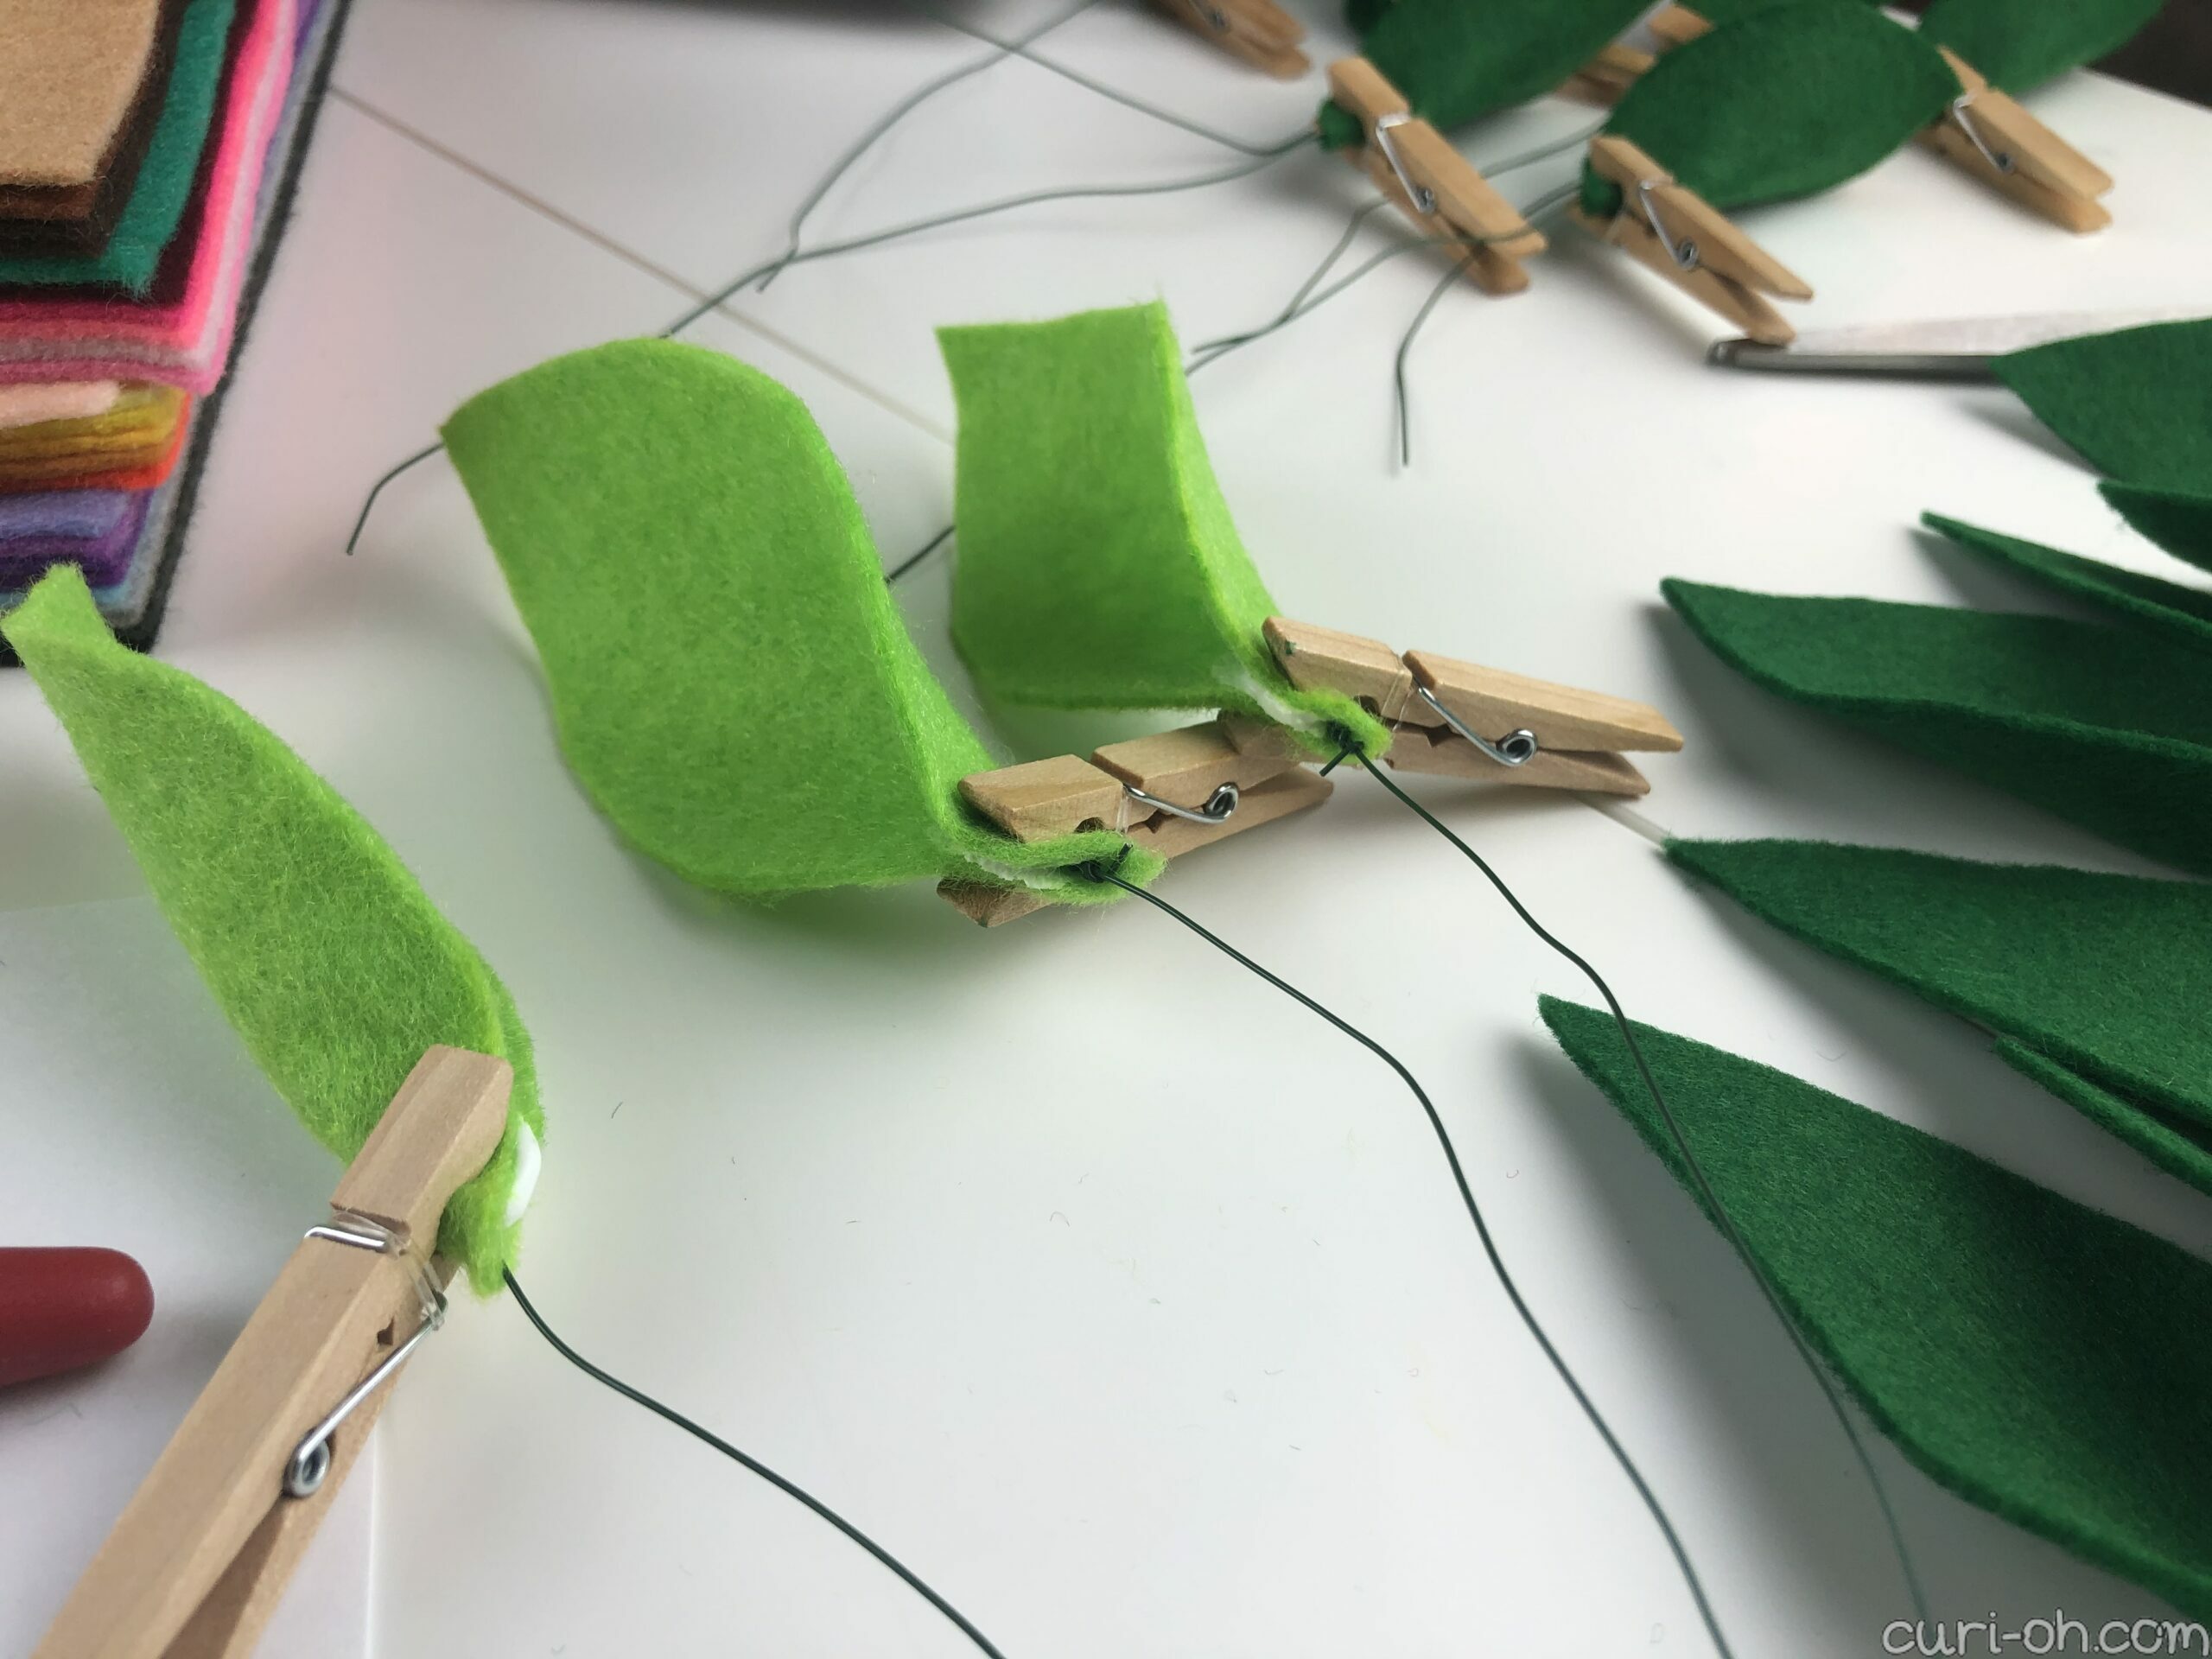
Next I began tracing my stencils and cutting out dozens of leaves. I didn’t limit one felt color to one stencil shape – I wanted a lot of variety with my leaves – so I used all three stencil shapes on all three colors of felt. It’s difficult for me to advise you on how many leaves you might need. The size of your hoop or other wreath base, the size of your leaves, and the size of your sheets of felt all factor in here! My 12″ hoop used 45 leaves around the perimeter which were cut from 3 sheets of felt each measuring about 12″ x 8″.
When I was finished cutting all of my leaves from the felt, it was time to give them a “stem” that would be used to attach them to the hoop. About half of my wreath uses one method for creating this stem, and the other half uses another…
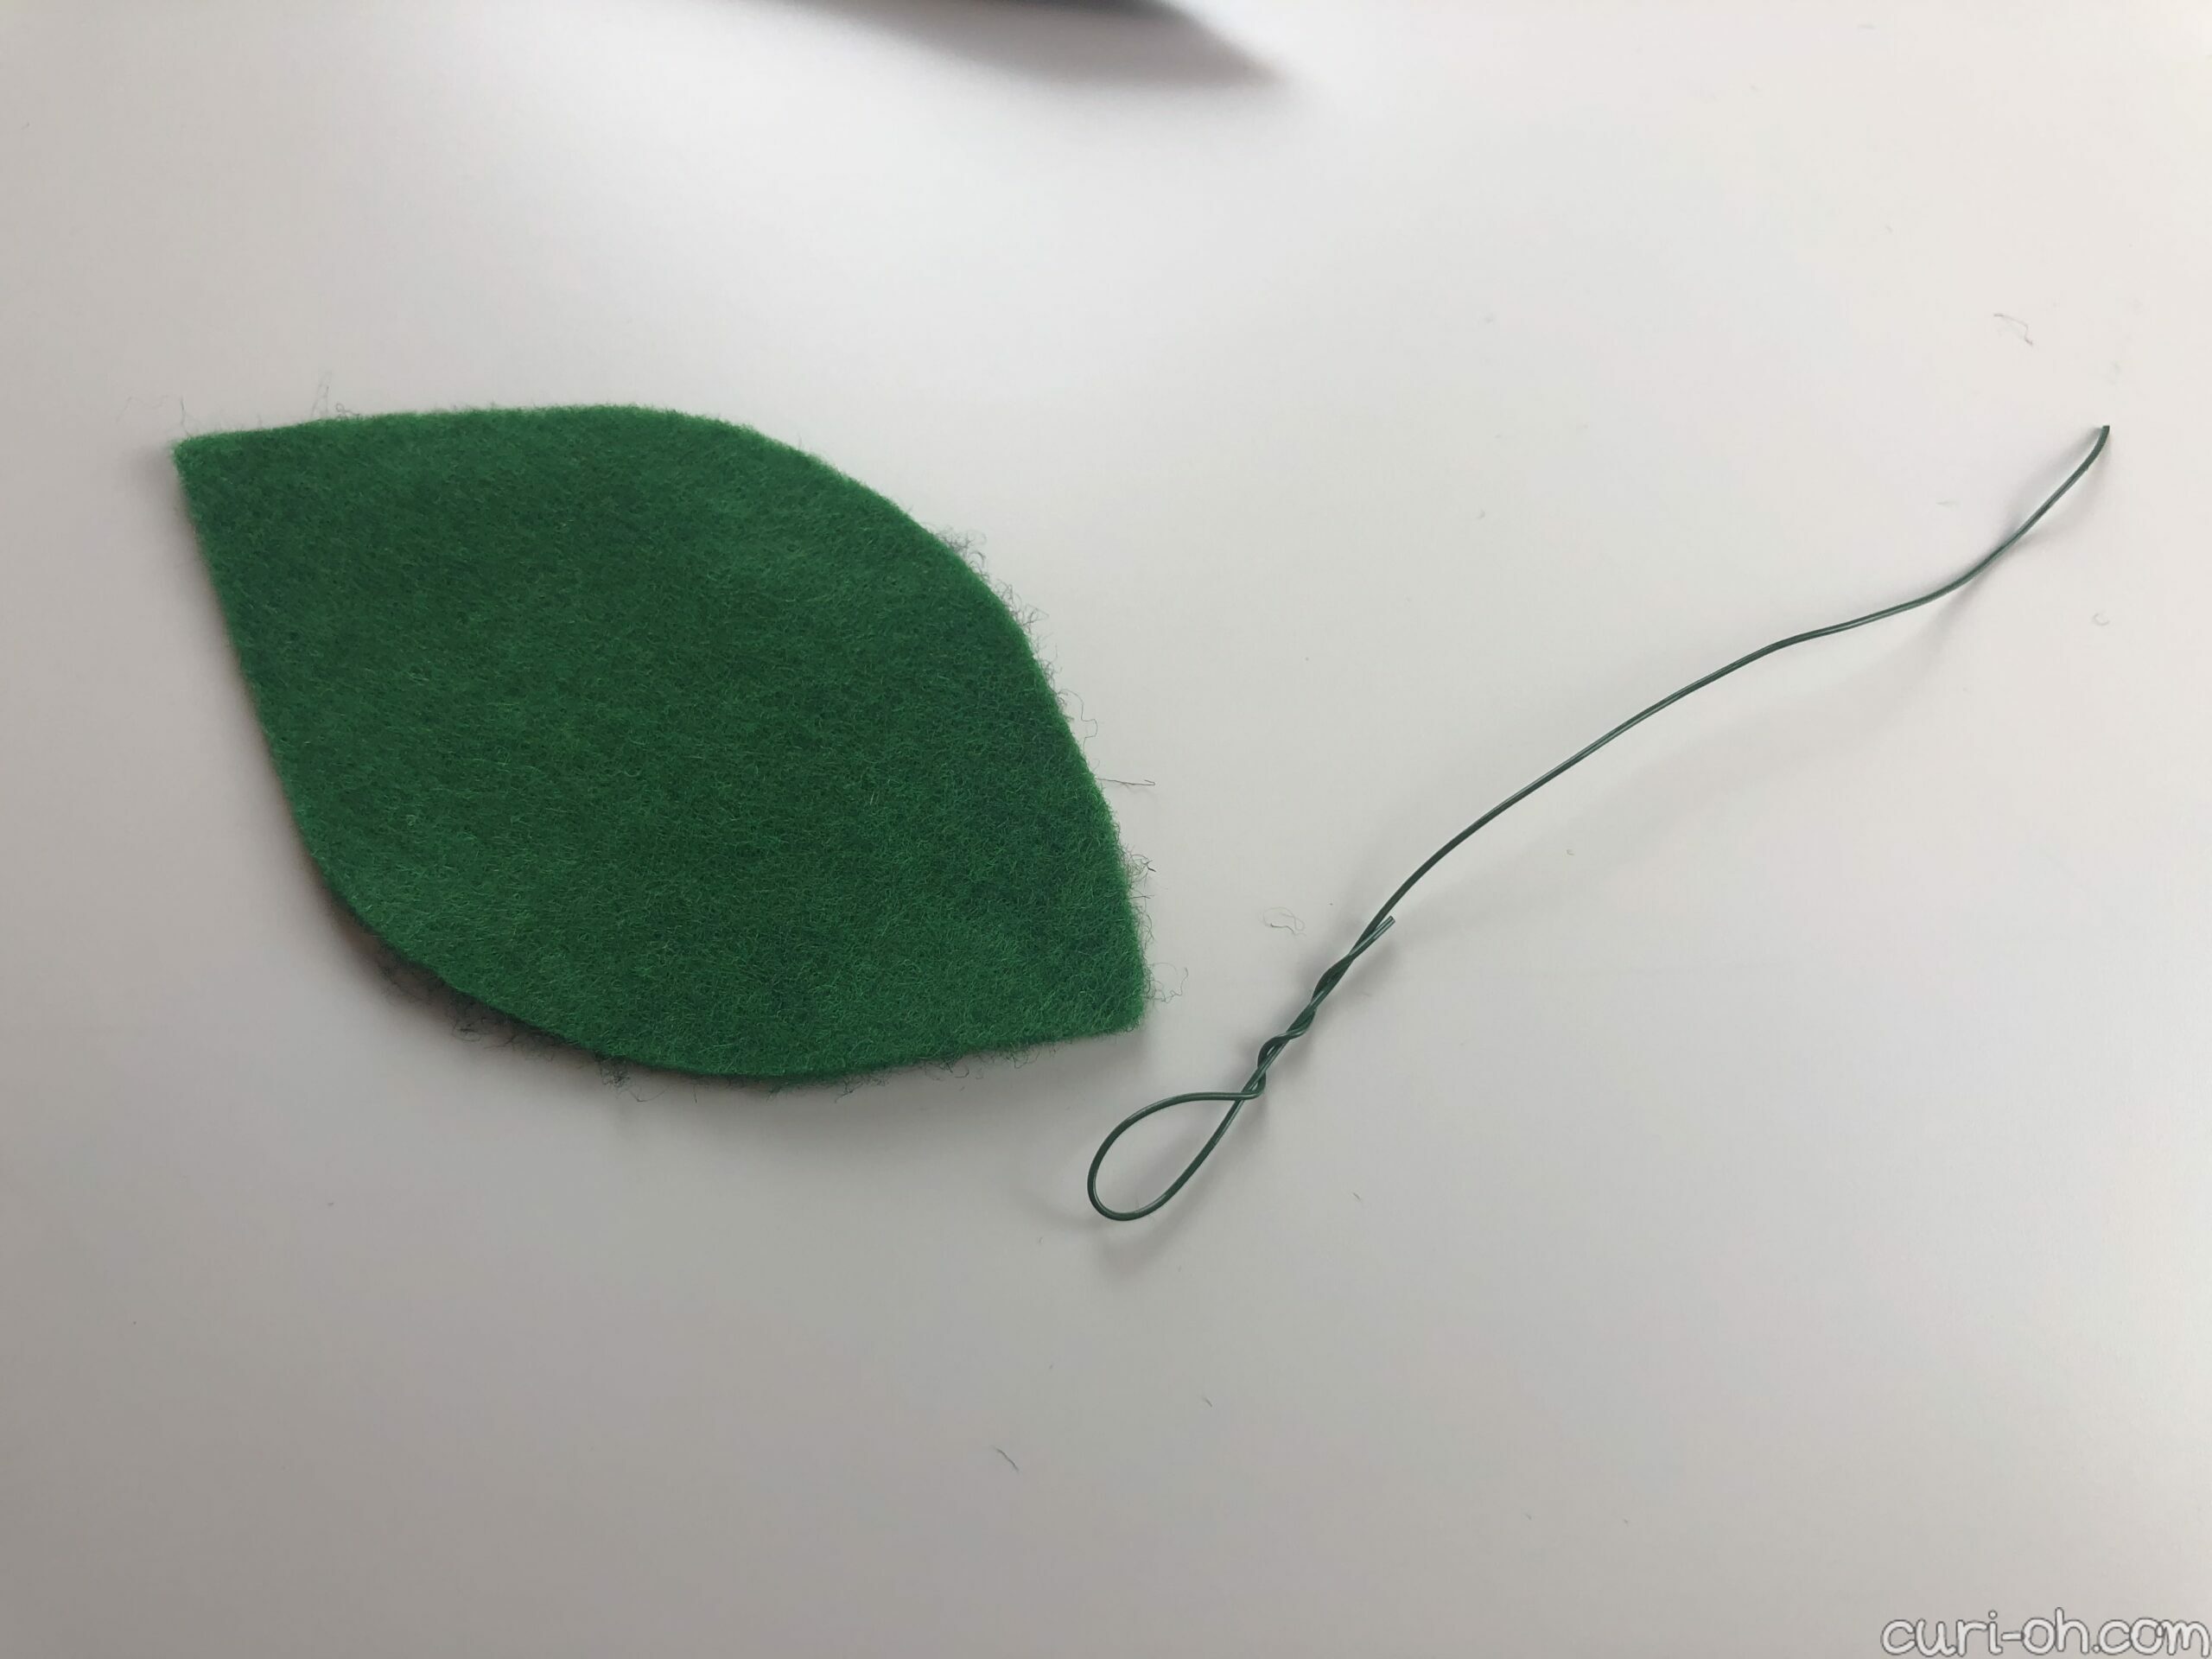
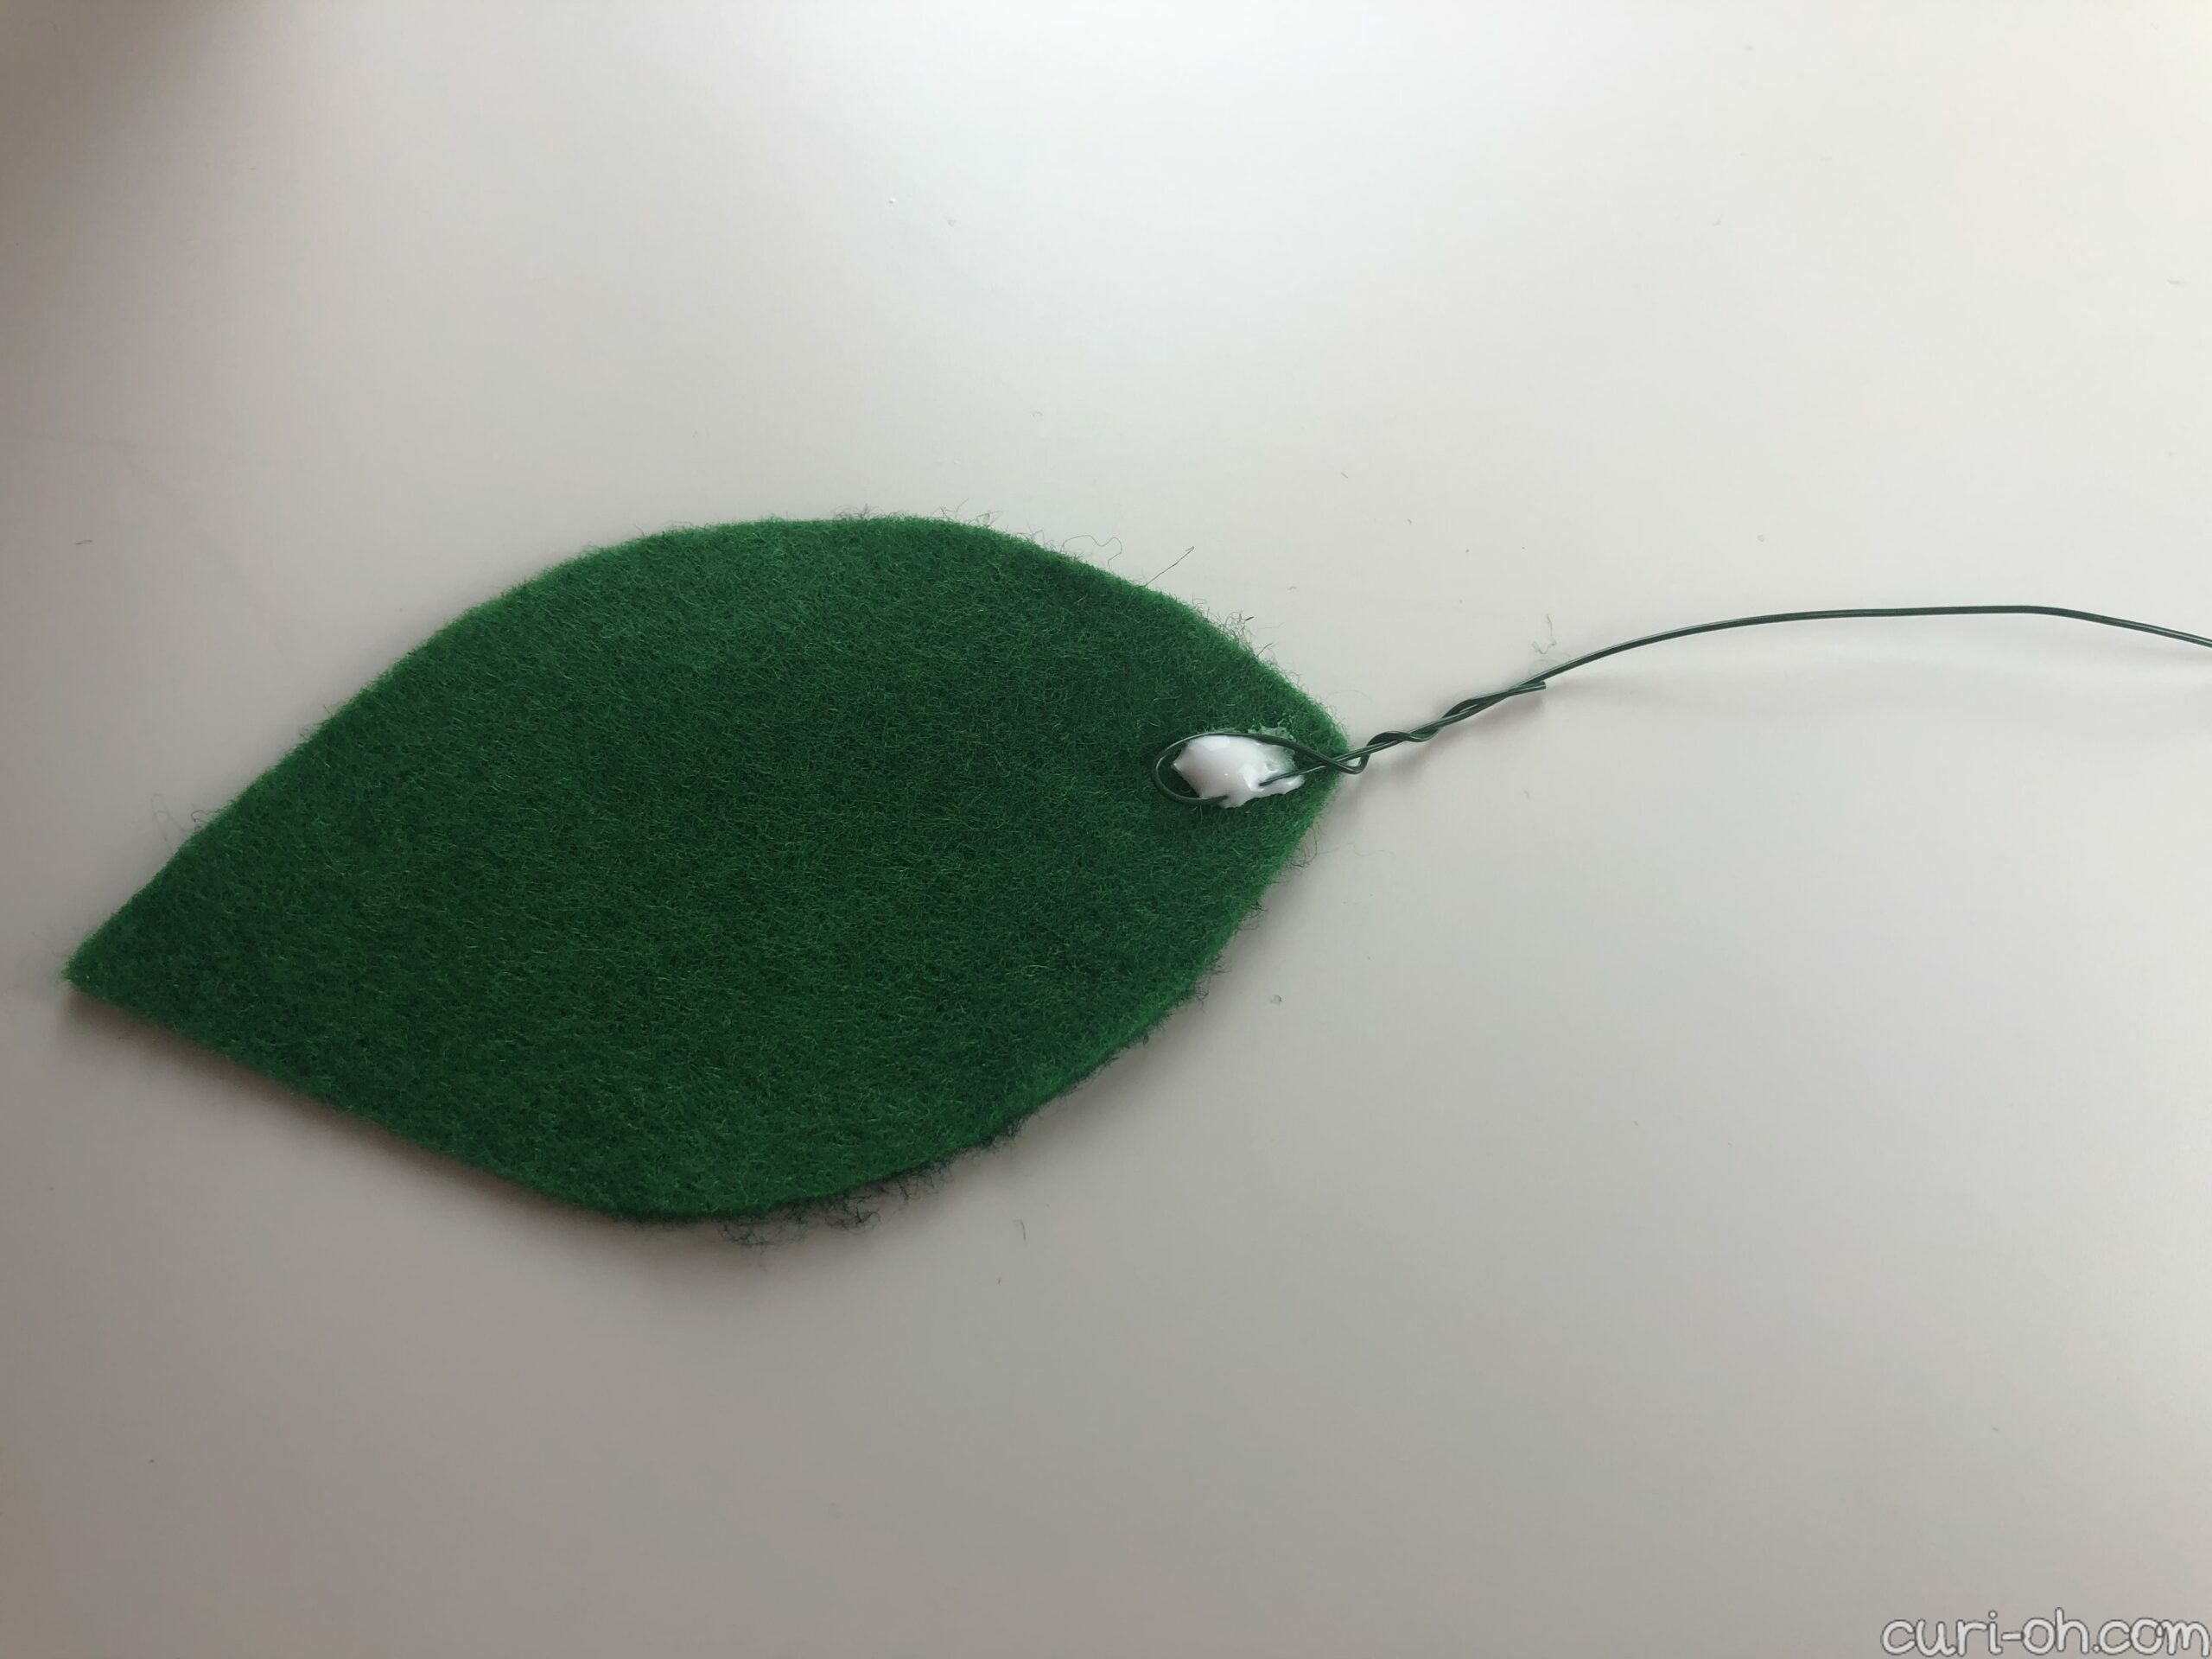
To begin, I cut strips of wire and created a small loop on one end. I then glued this loop to the base of the leaf and pinched it shut to dry using a clothespin. After a dry time, the leaves would hold that little pinched shape that’s necessary to give them some dimension.
While I was hard at work doing this, my husband comes into my office and watches what I’m doing. “Surely there must be a better way to do this?” he wonders aloud. Well I’m halfway done and this has worked fine, but I hand him a leaf and a wire, tell him the two have to be connected and there has to be a pinch, and he’s welcome to find a better way.
Well he sits there about two minutes and does it, ha! It’s so simple that I felt pretty dumb for not thinking of this to begin with. Honestly I was just taking pointers from what I had seen others do online and hadn’t put much thought into it, but here goes…

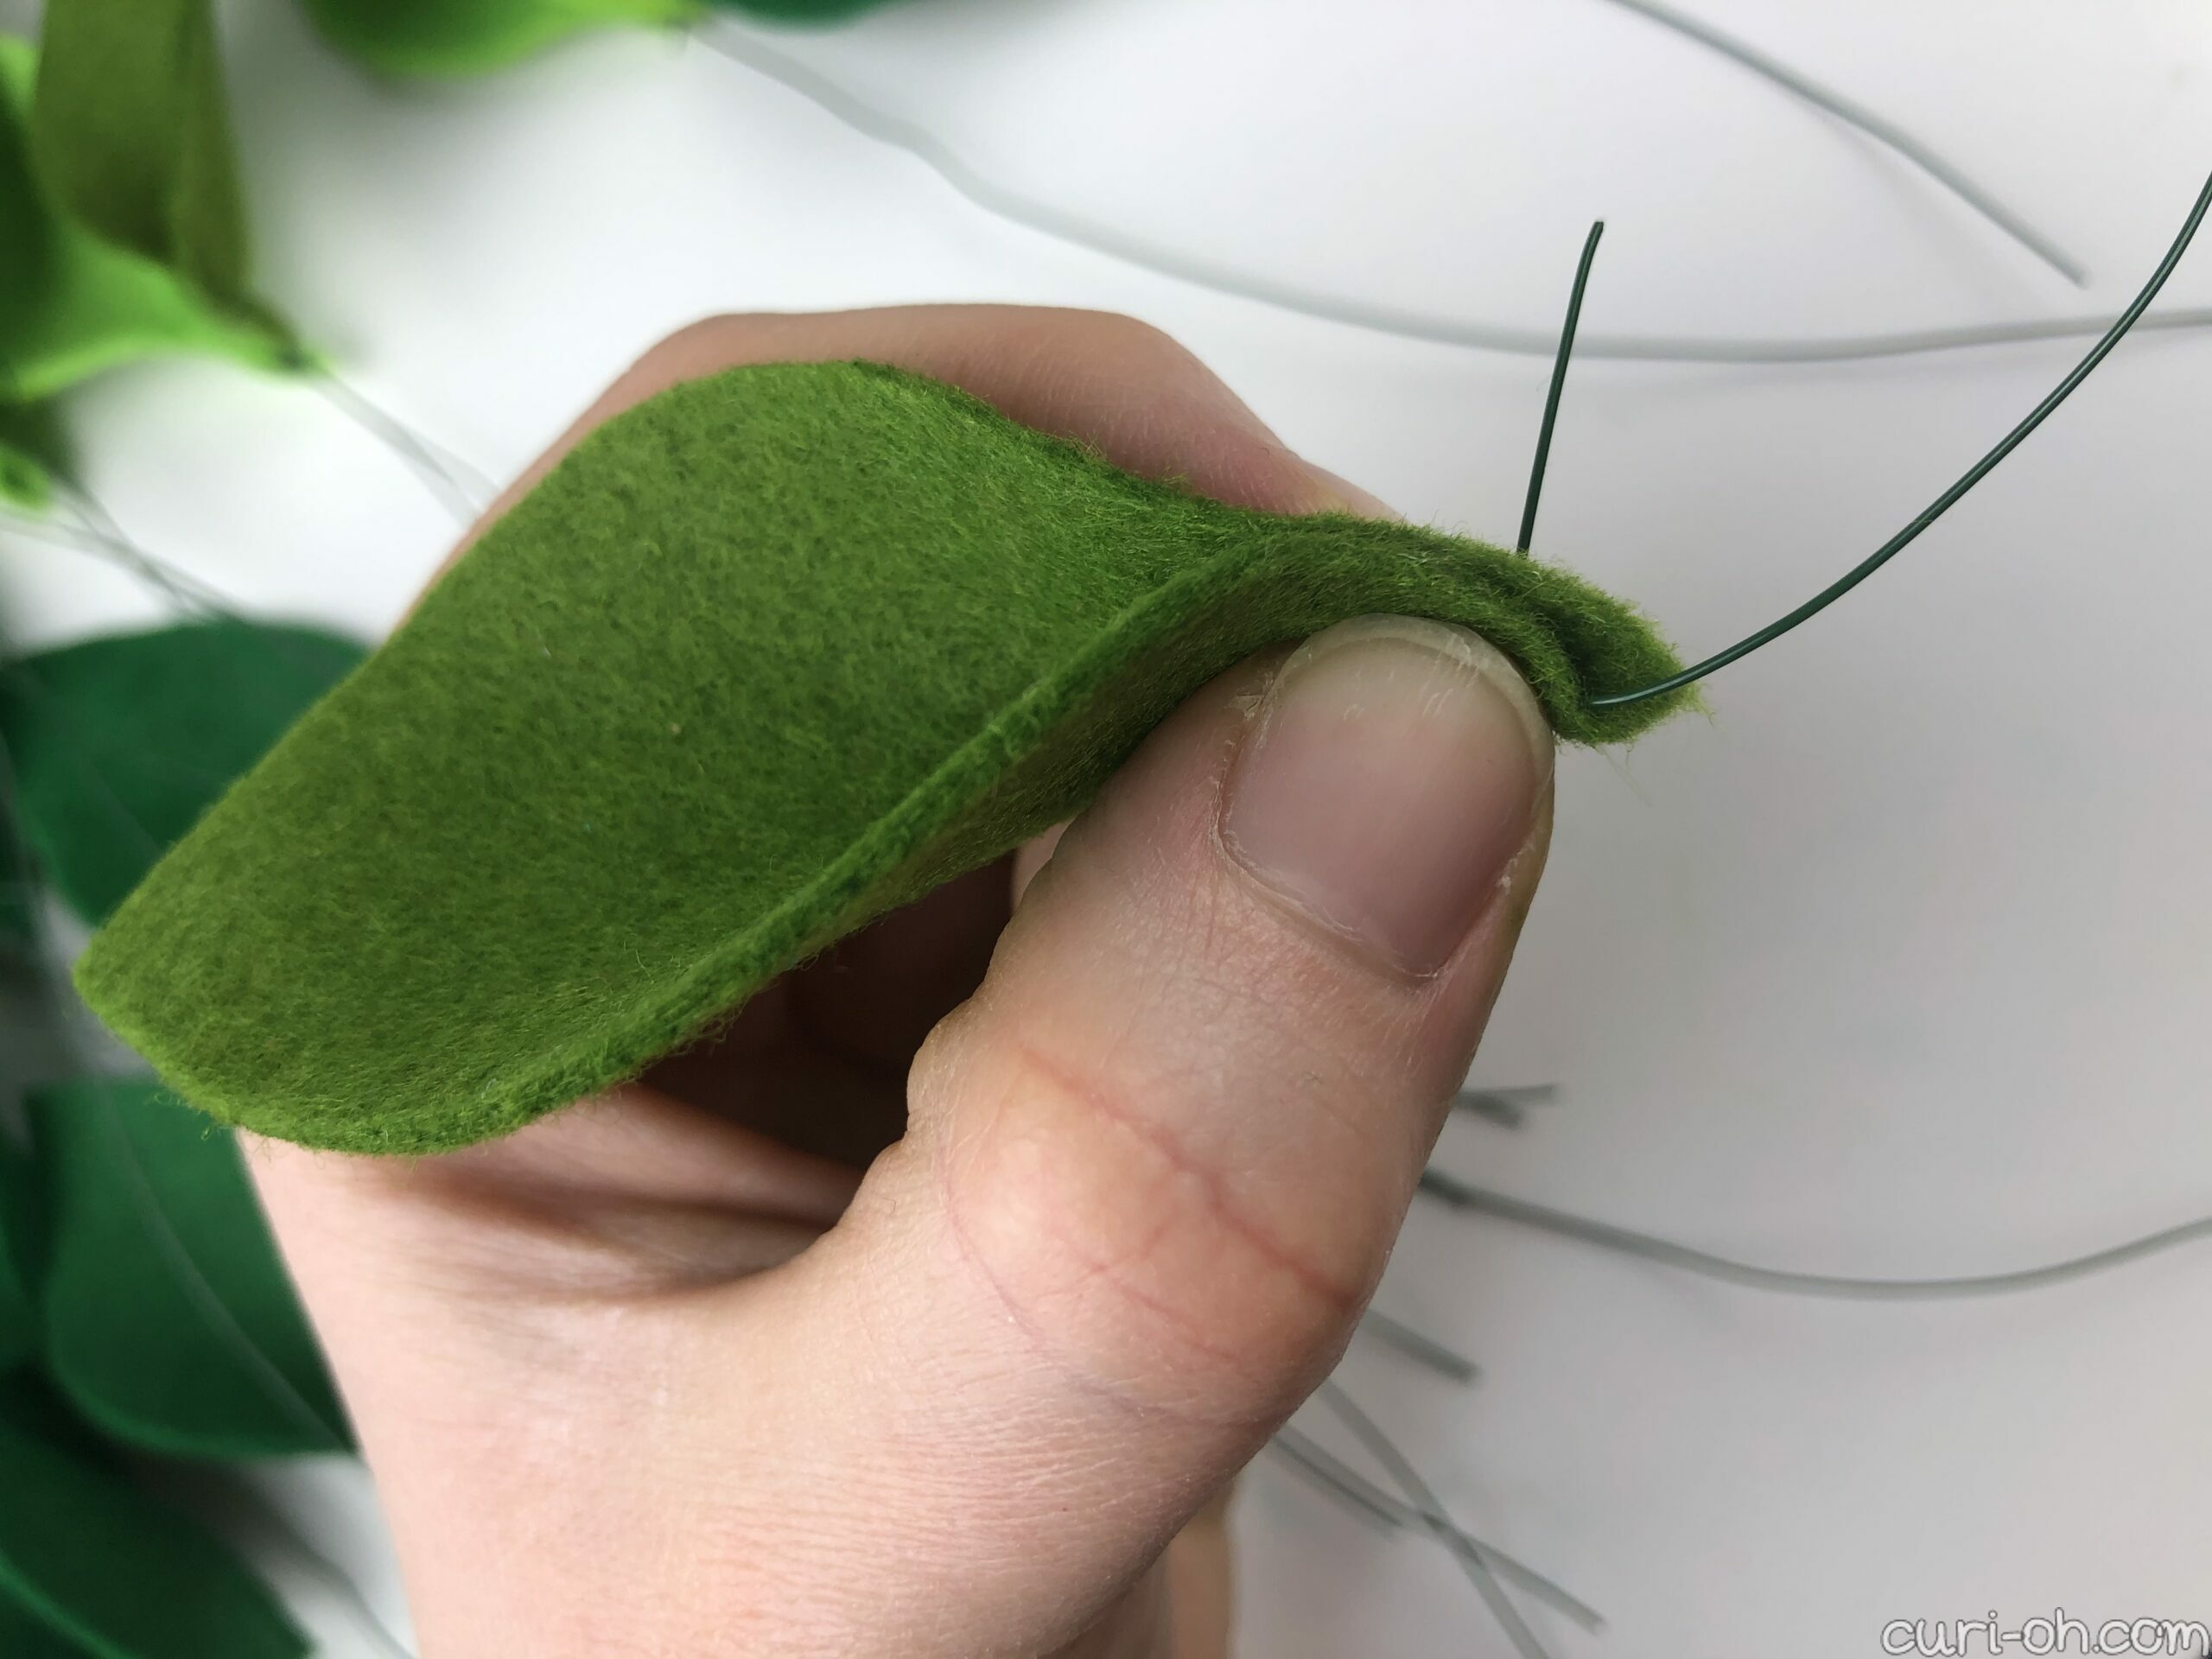

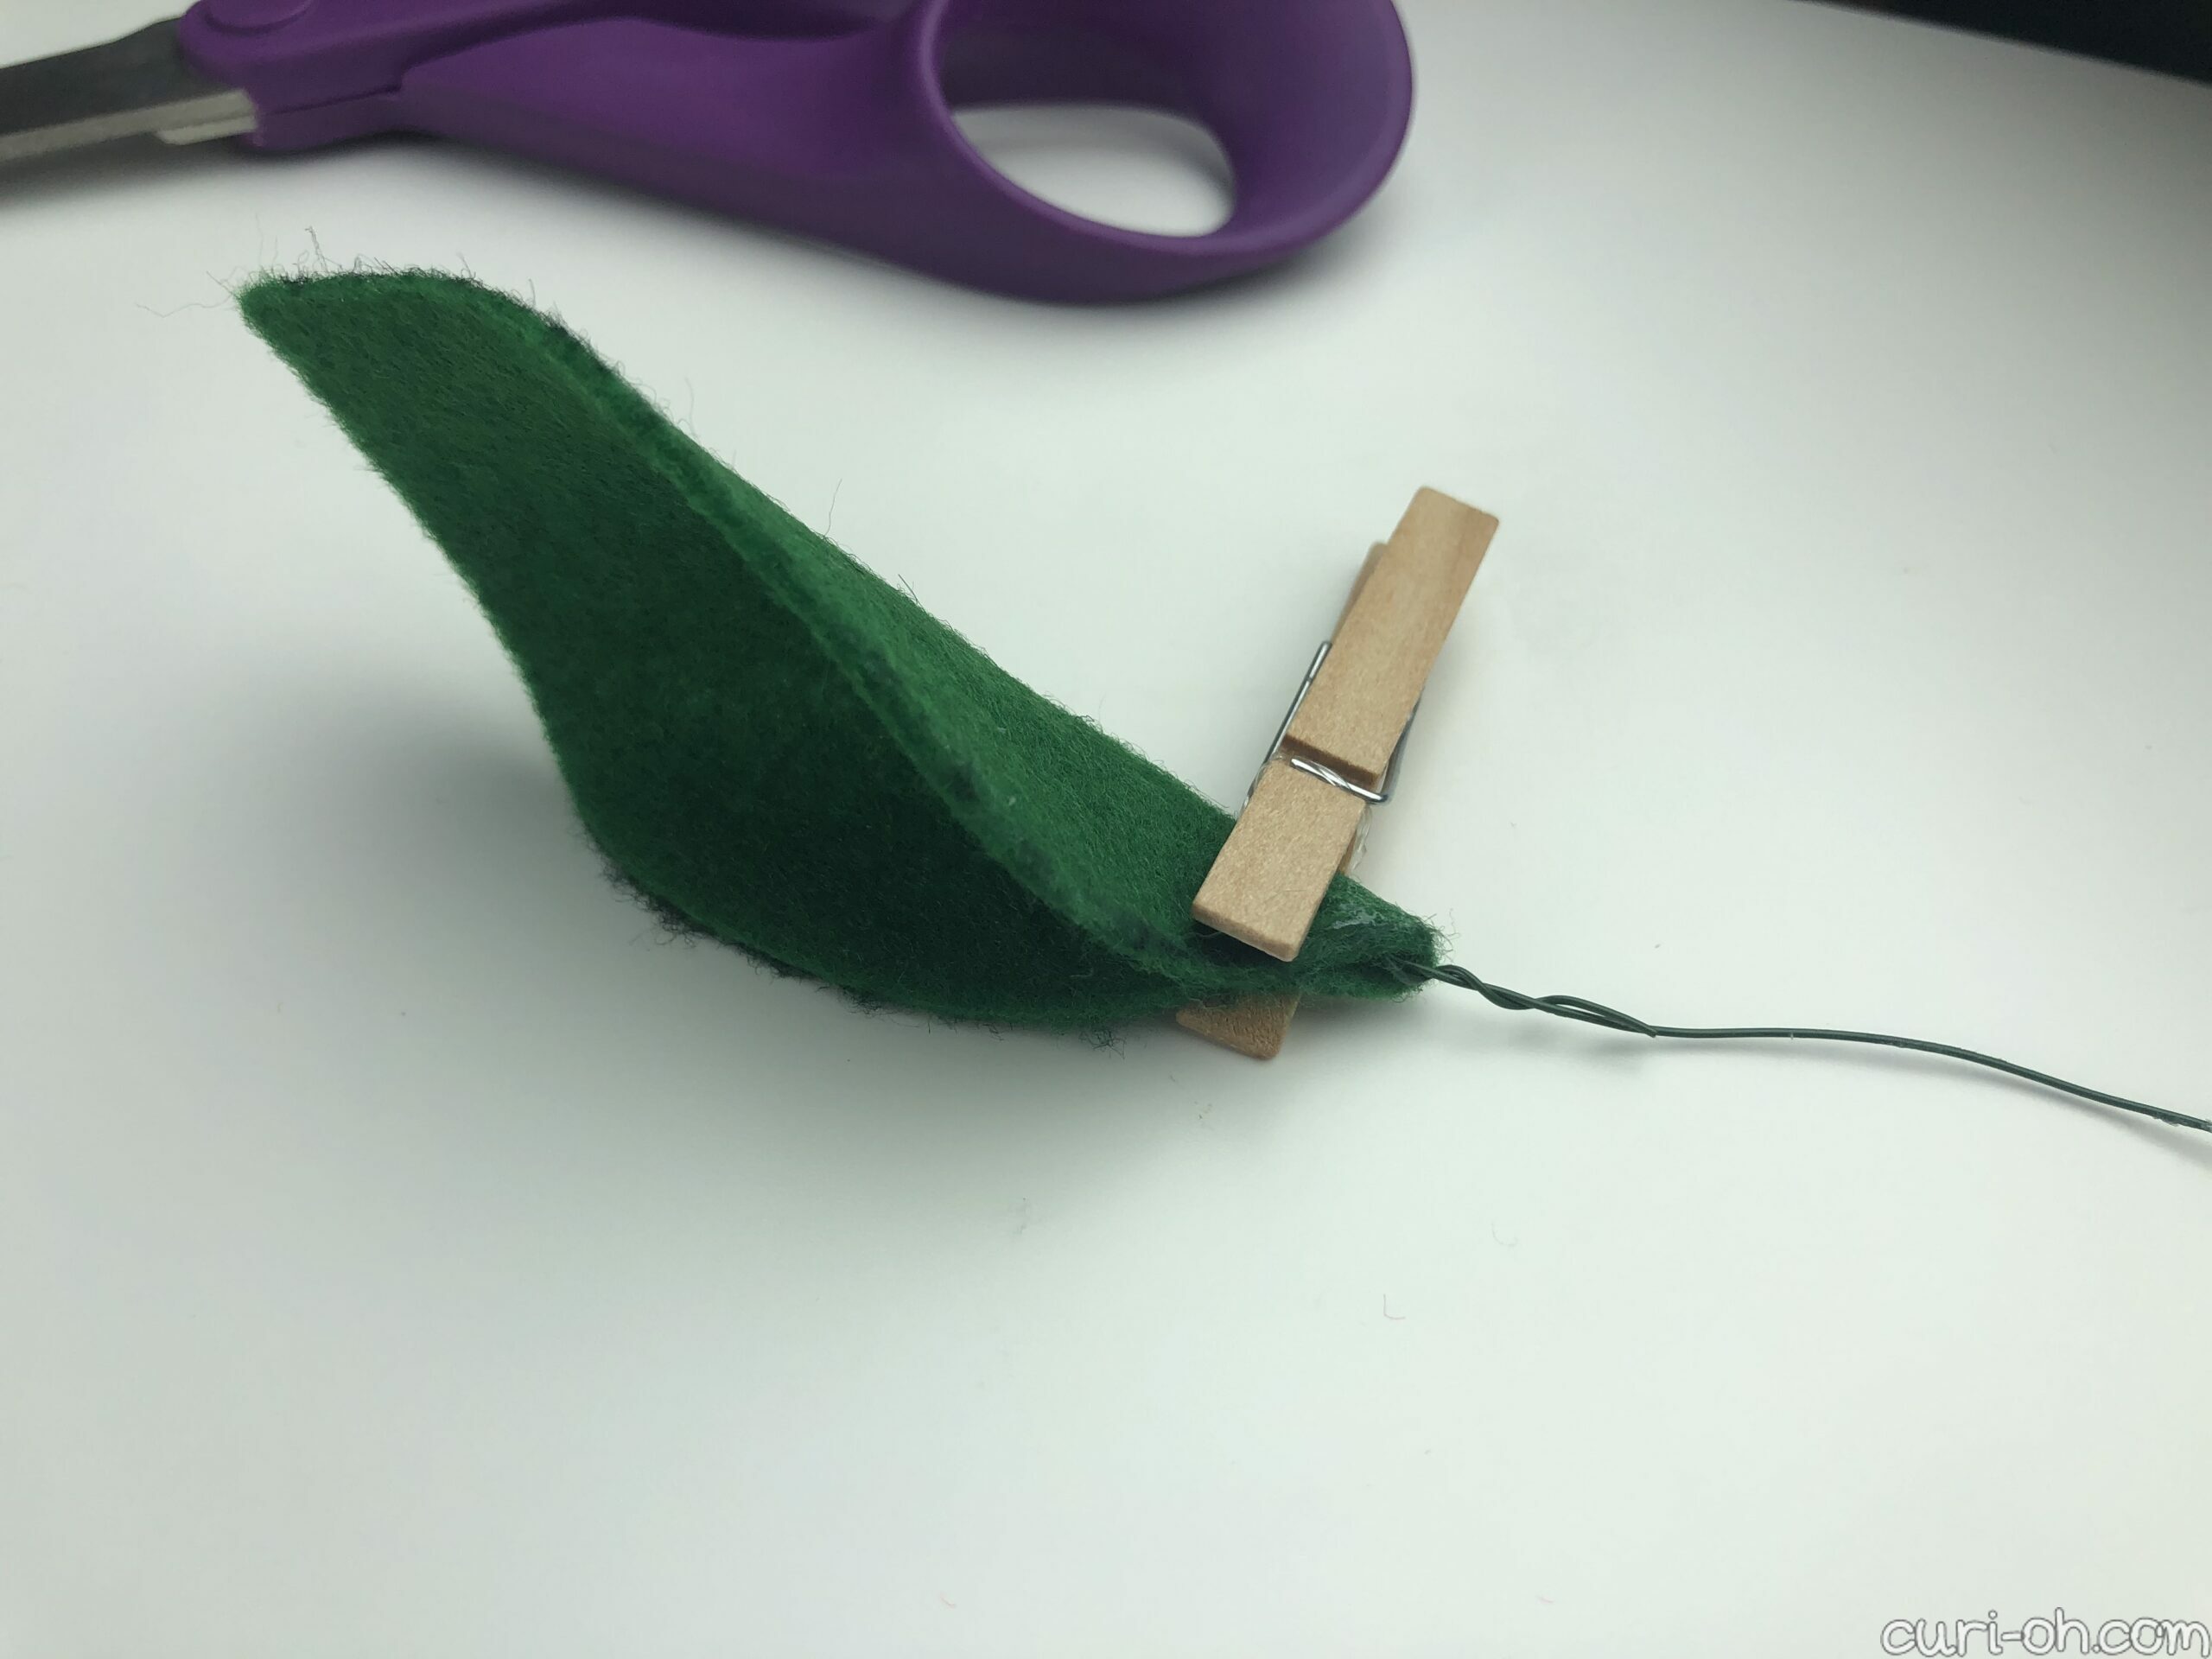
For method #2, just poke the wire through the front of the felt leaf. Pinch the leaf in your fingers, then wrap the wire from the back and around the pinched base a few times to secure. Voila! No glue, no dry time, no mess. This was much faster and seemed to work just as well.

For either the first or second method, you may need to crimp down the wires a bit here and there, so it’s good to have a pair of pliers on hand just in case.

Thanks to my husband, I finished out the leaves with what I think is a better method. Next, I simply wrapped the stem wires around the hoop, alternating leaf colors and mixing up their sizes and angles to create visual interest.
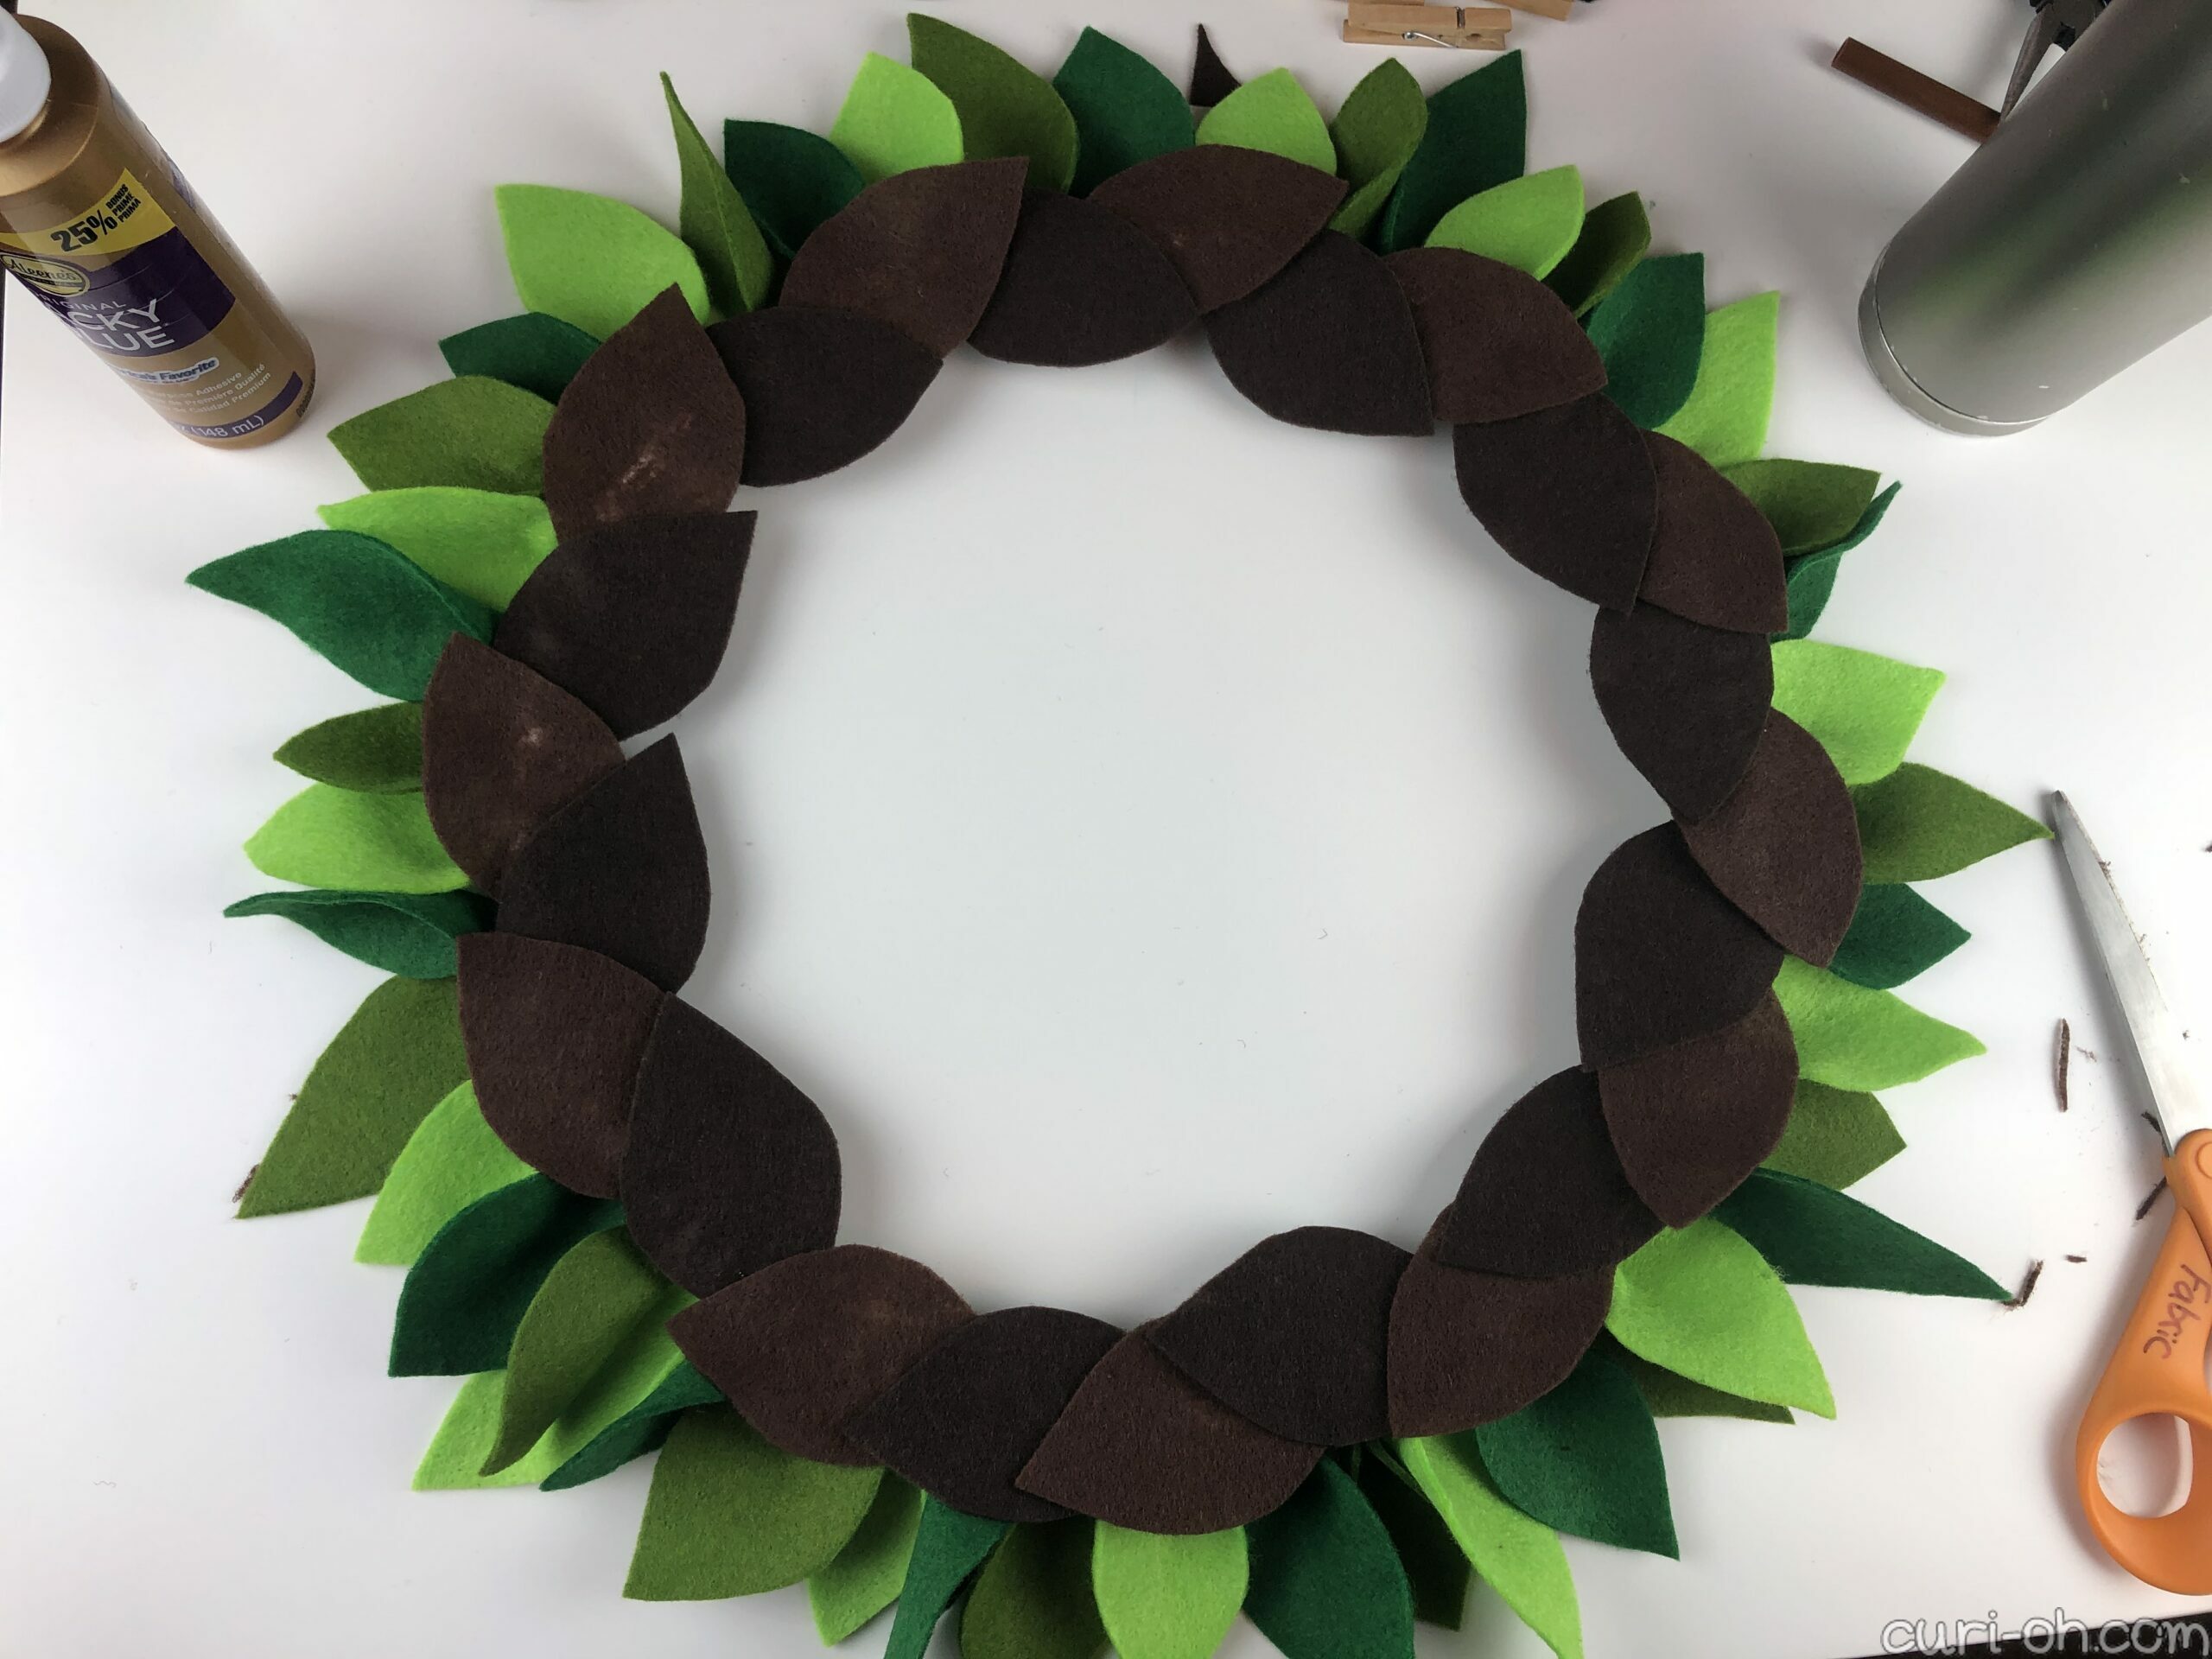
To finish out the hoop, I cut another set of leaves from two brown sheets of felt, using only two of the stencil shapes. I layered and overlapped the leaves, gluing them directly to the hoop.
With the wreath finished, I thought it needed something for the middle. I could have made more leaves and turned some inward, but with the size of my form, I liked the idea of adding a sign or something to the center.
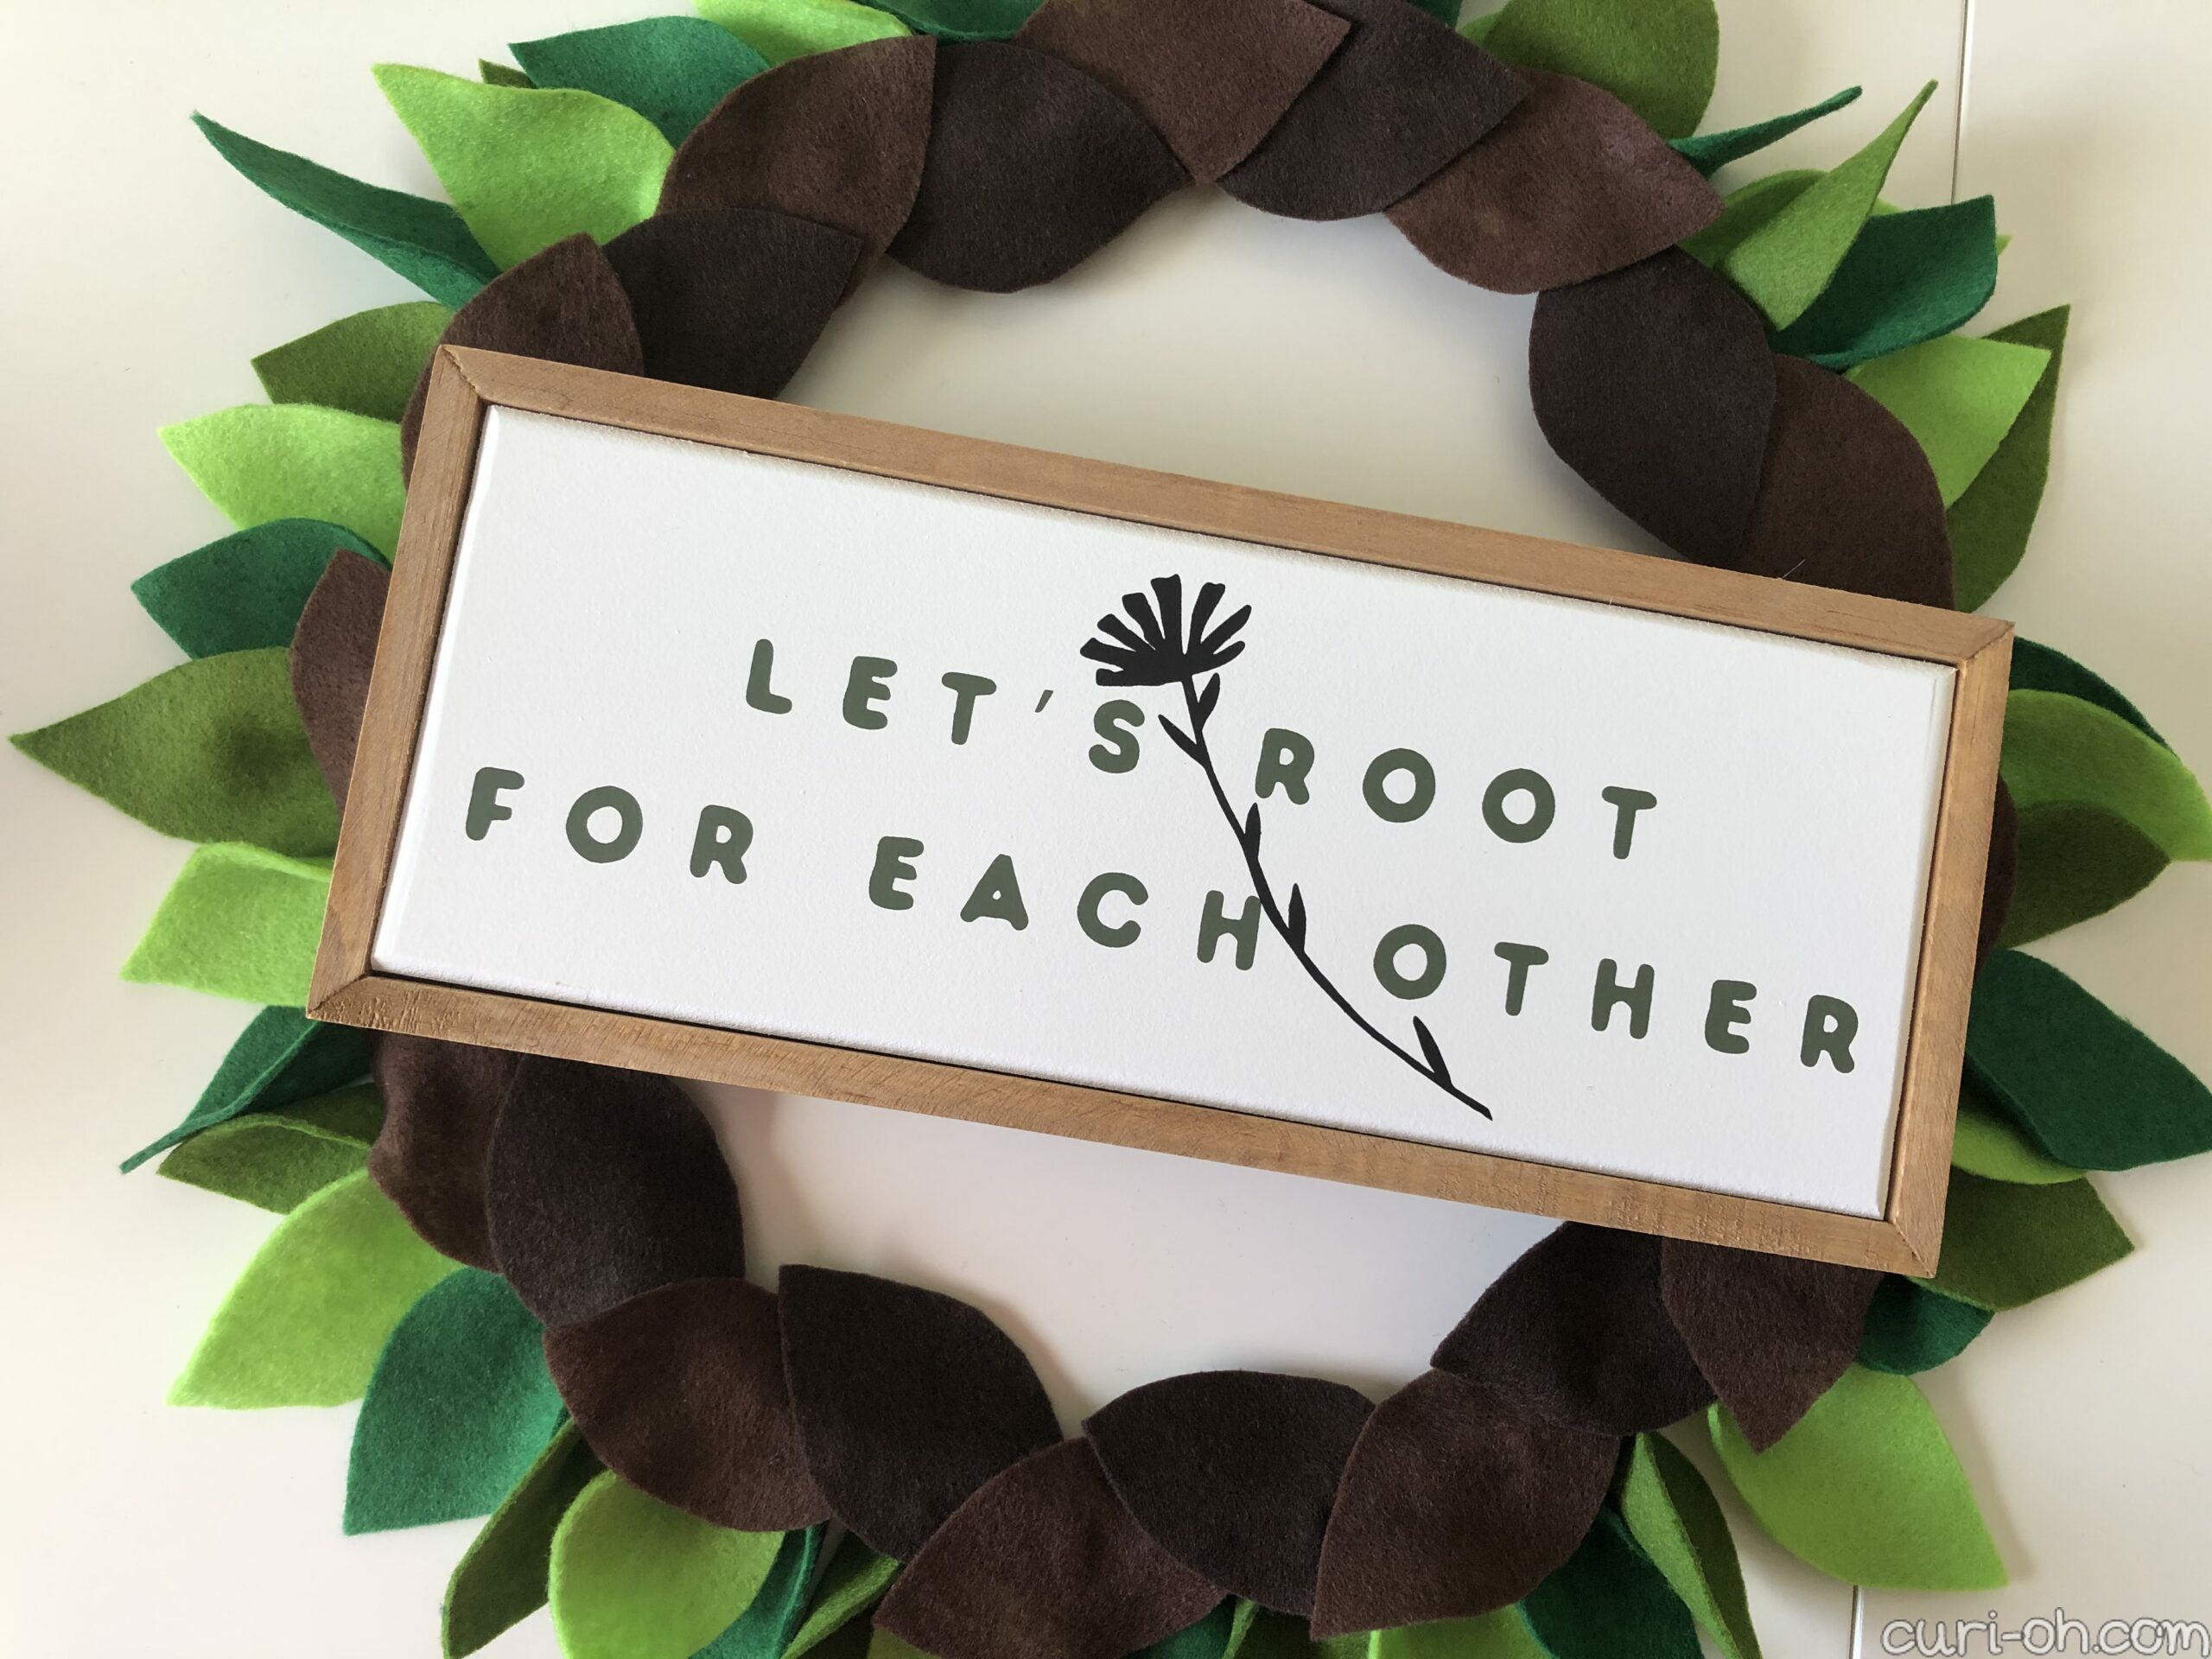
I planned to hang the wreath on my back door, so I thought this little garden themed punny sign was a fun addition.
Yay! Now I finally have a back door wreath. This was a fun, easy, and inexpensive project. I will probably do another one for indoor use in the future.