Mod Podge Fix For a Papered Vintage Toy
Hello! This post will be short and sweet because I only just realized that I have not shared this project from months ago. This was another one of the very last things I did before we moved out of our house, so apparently it fell through the cracks. However, it does contains a great nugget of info that I really want to pass on!
I love sharing my experiences cleaning up and “restoring” vintage items. Cleaning is a necessary part of thrifting and as much as I love a good upcycle or repurpose project, making something whole and fresh again is uniquely satisfying. So far, I’ve shared my experiences with afghans, baskets, and even View-Masters, however, this one is much simpler than any of those.

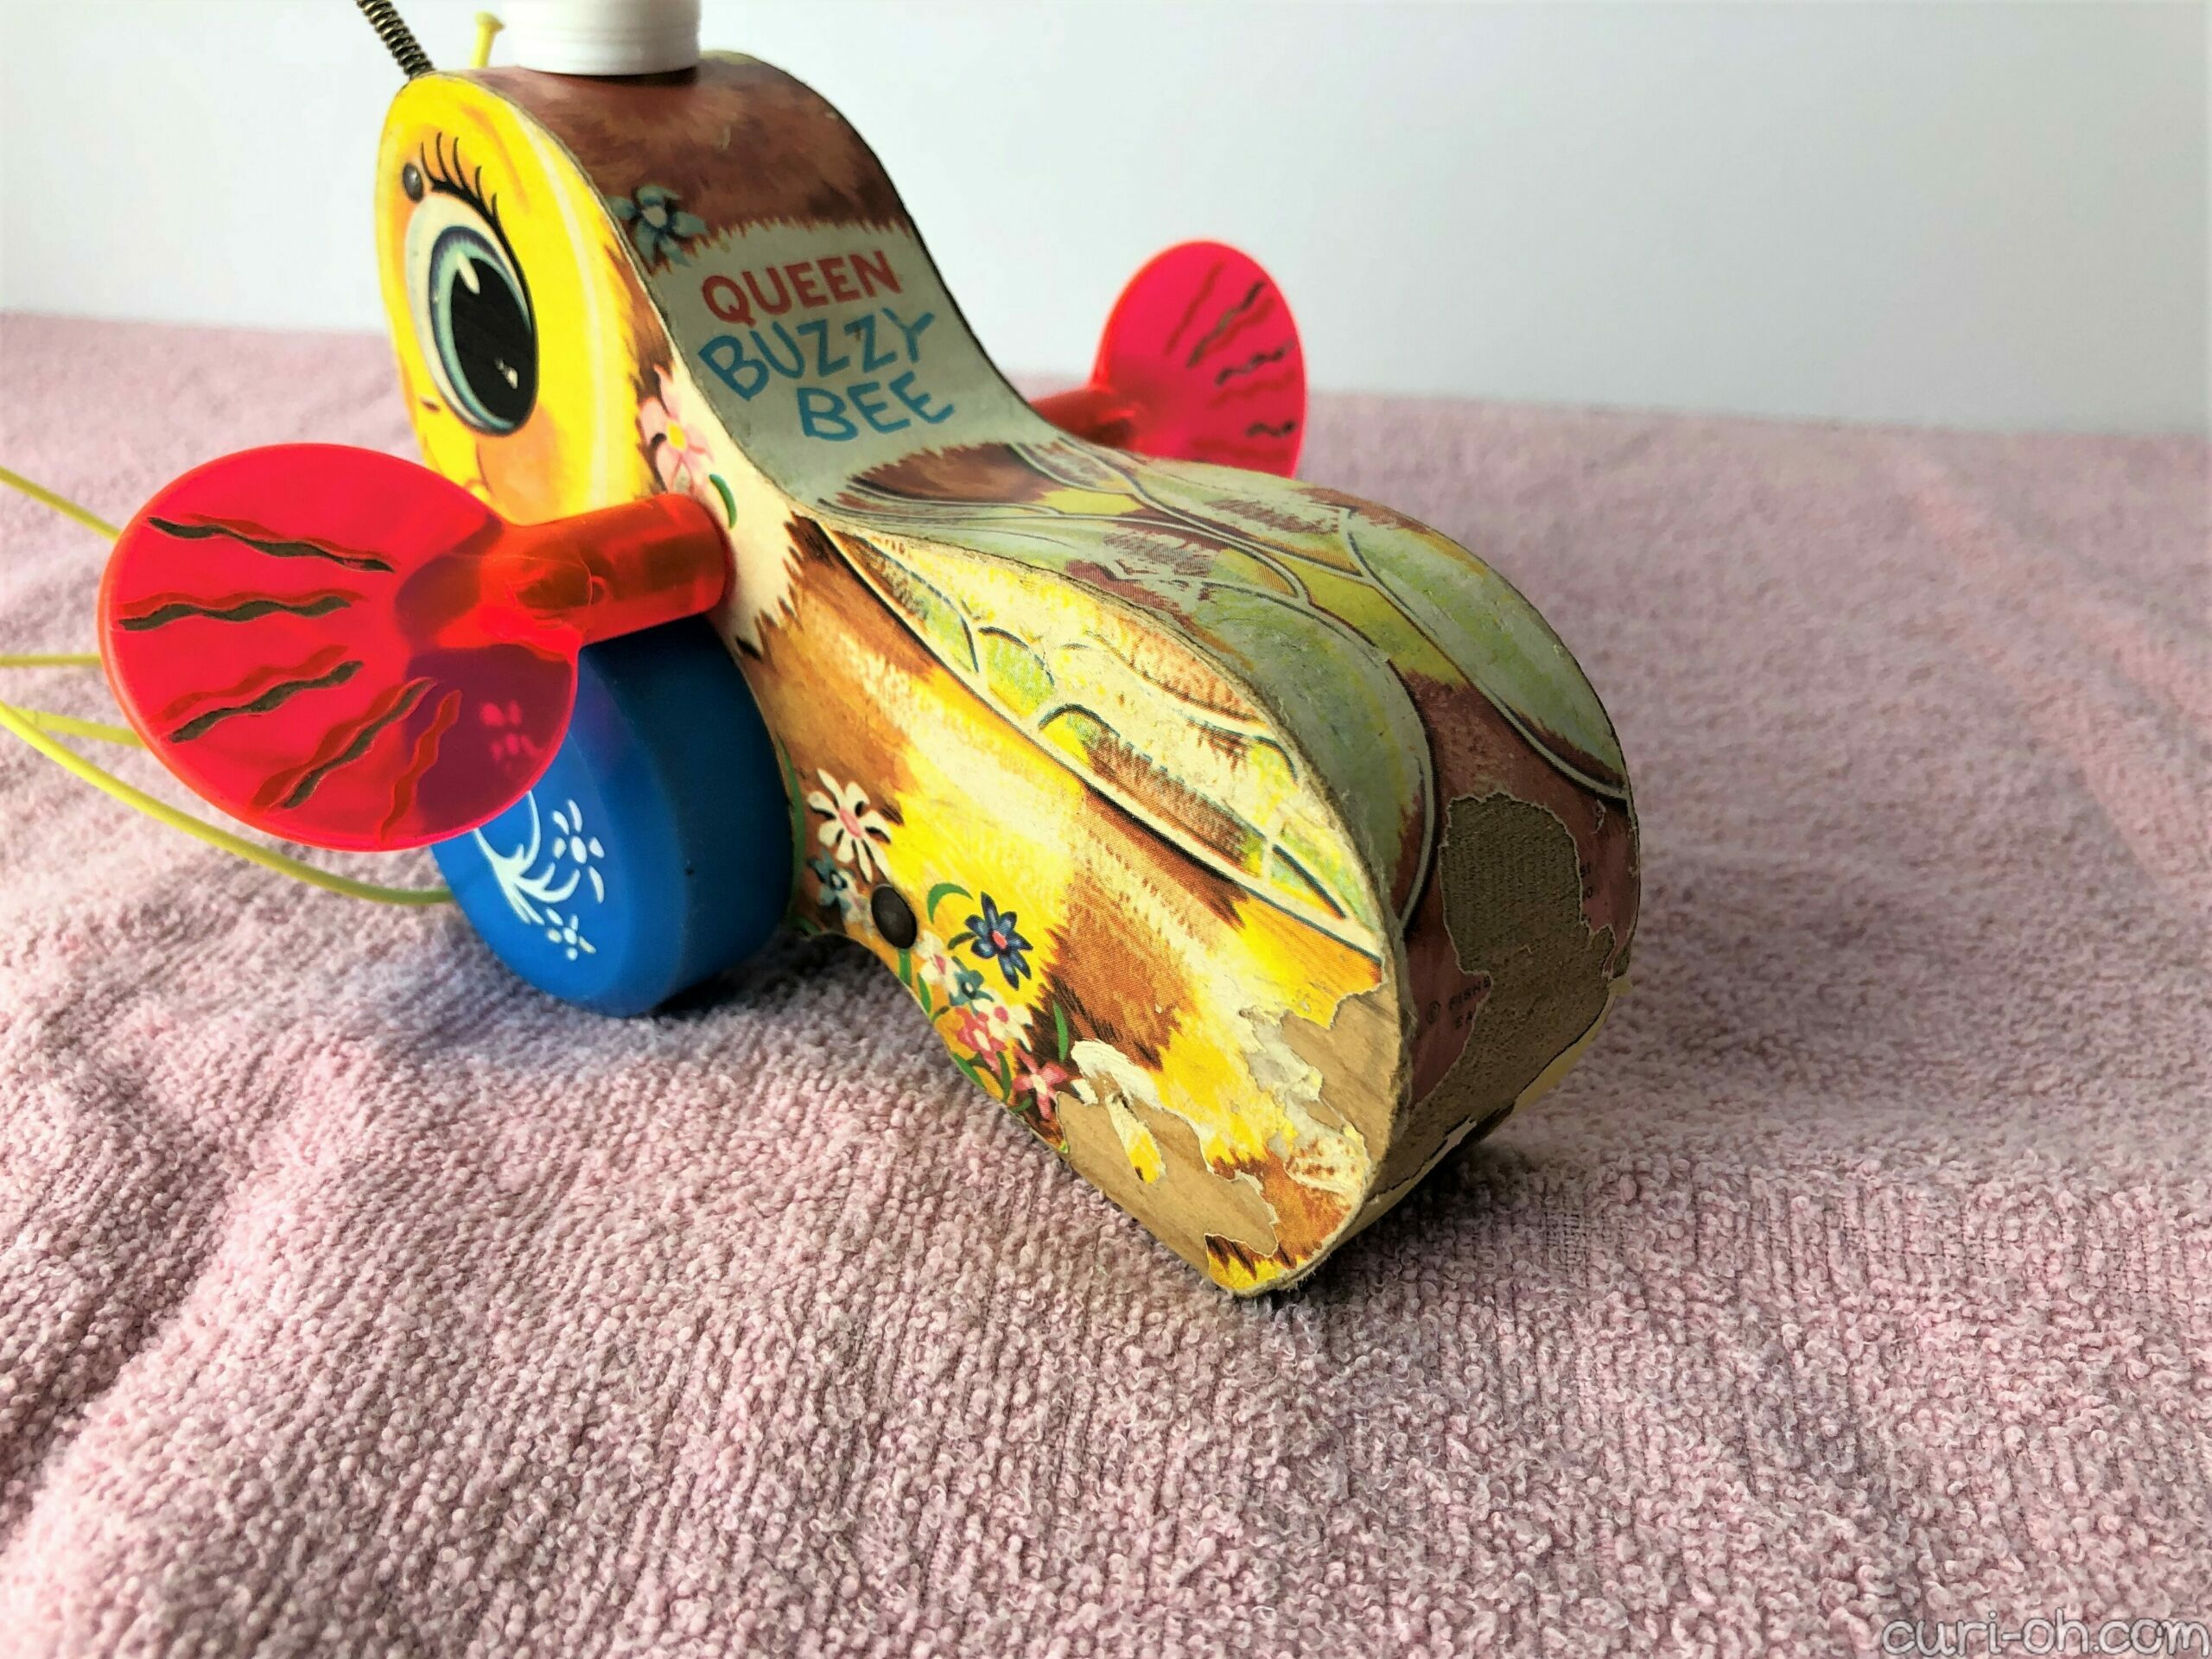
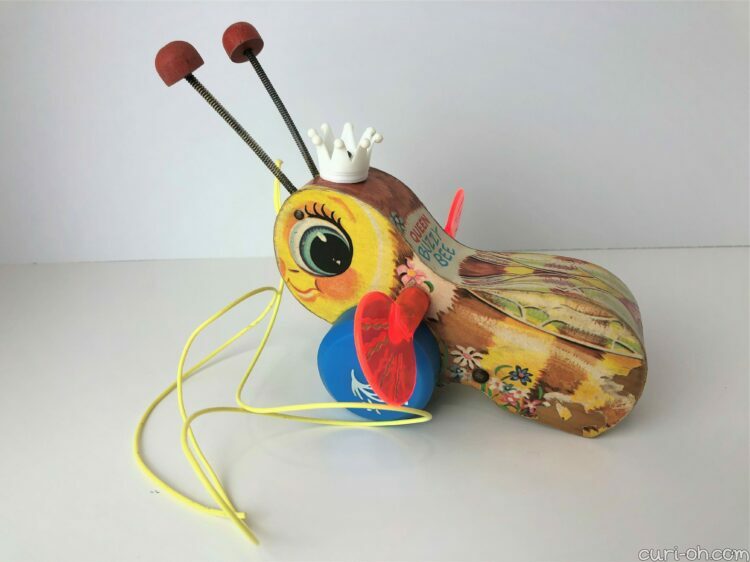
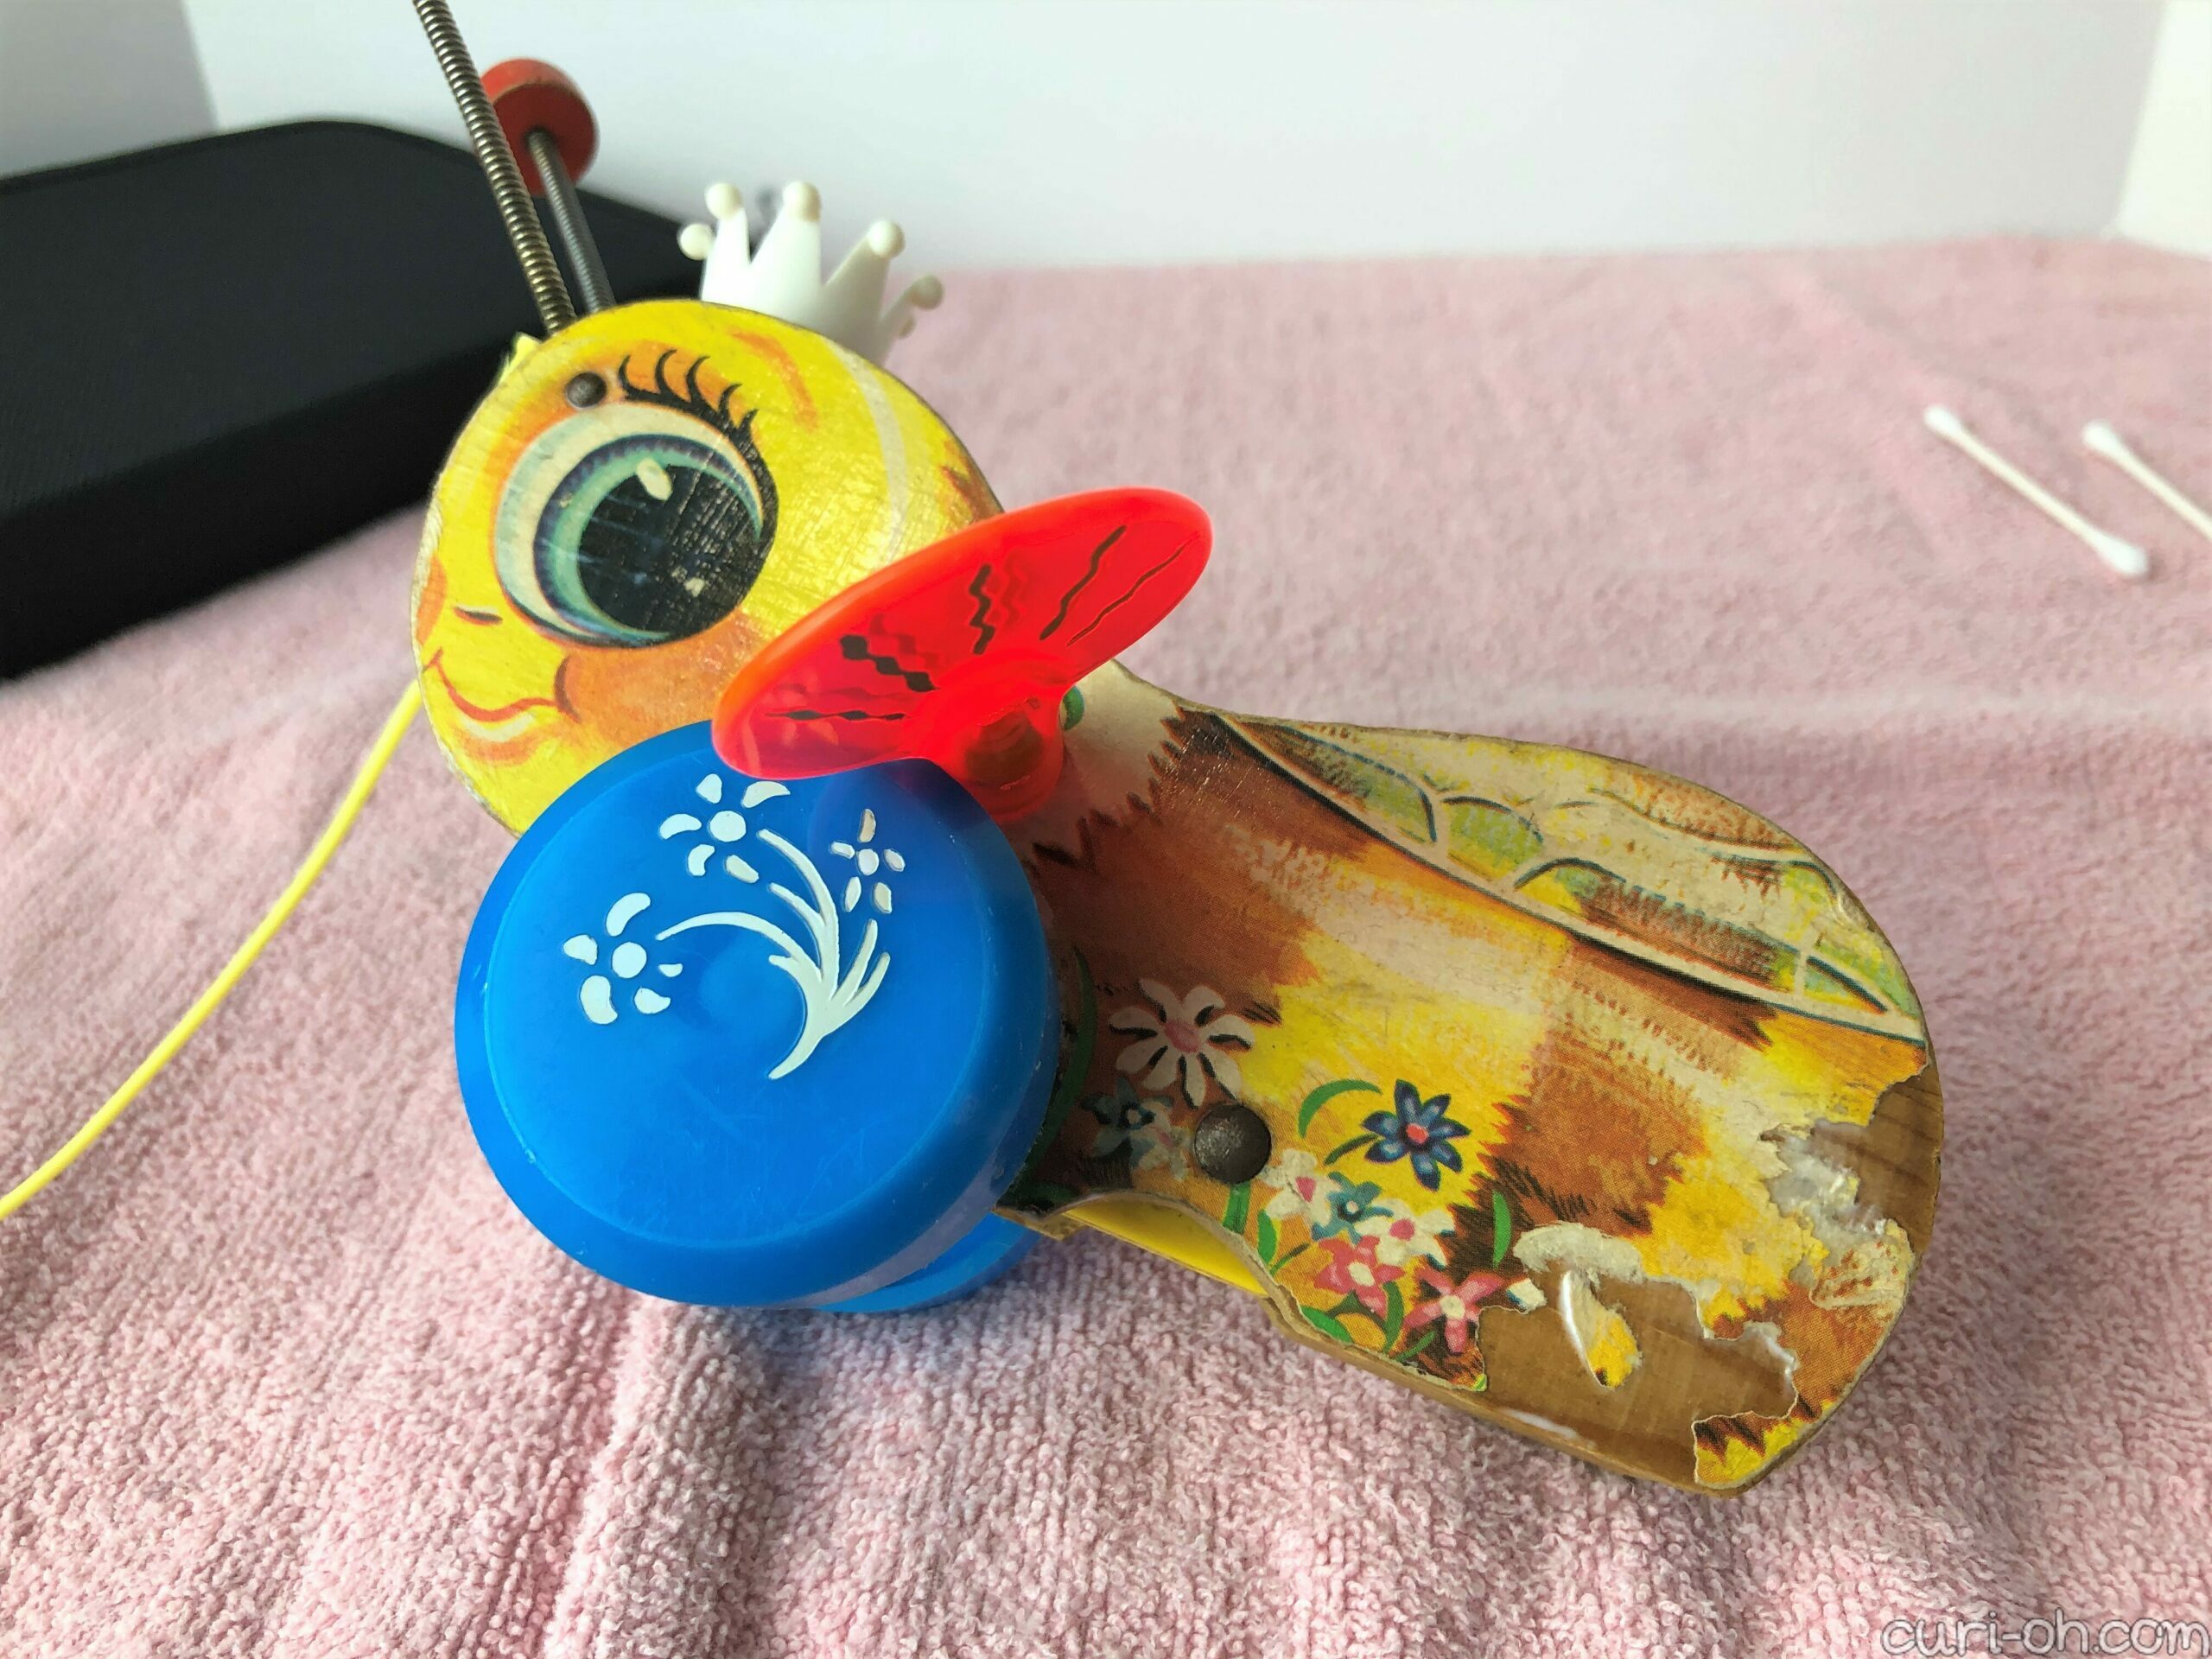
The vintage Fisher-Price pull-toy “Queen Buzzy Bee” was one of the finds in my last Thrift Tales post. I explained there that I left her at the flea market the first time around due to damage. As you can see, the paper has peeled away from her queenly behind. I was afraid this would keep peeling over time, so I passed. She kept buzzing around in my brain though, so I went back for her next time, having decided to deal with it. Dealing with it for me though meant fixing it somehow.

I actually went through quite a few cleaning steps with the queen here. I used Brasso on the few metal bits, Novus plastic polish on the wheels and wings, and I can’t for the life of me remember what I used on the papered body, but I think it was Pledge Multi Surface. This was all very forgettable because I honestly don’t feel that it made that much of a difference. Sure, it’s the little efforts that count, but I don’t have a big cleaning process to recommend to you here. The paper was permanently stained in places and I’m not sure that the Novus did any better than a basic clean would have. The Brasso got all stuck in the spring… It all turned out clean in the end at least.
After establishing a clean base to work with, my challenge was simply to prevent any more paper from peeling away from the wooden body. If only there was a way to transparently seal paper to wood…
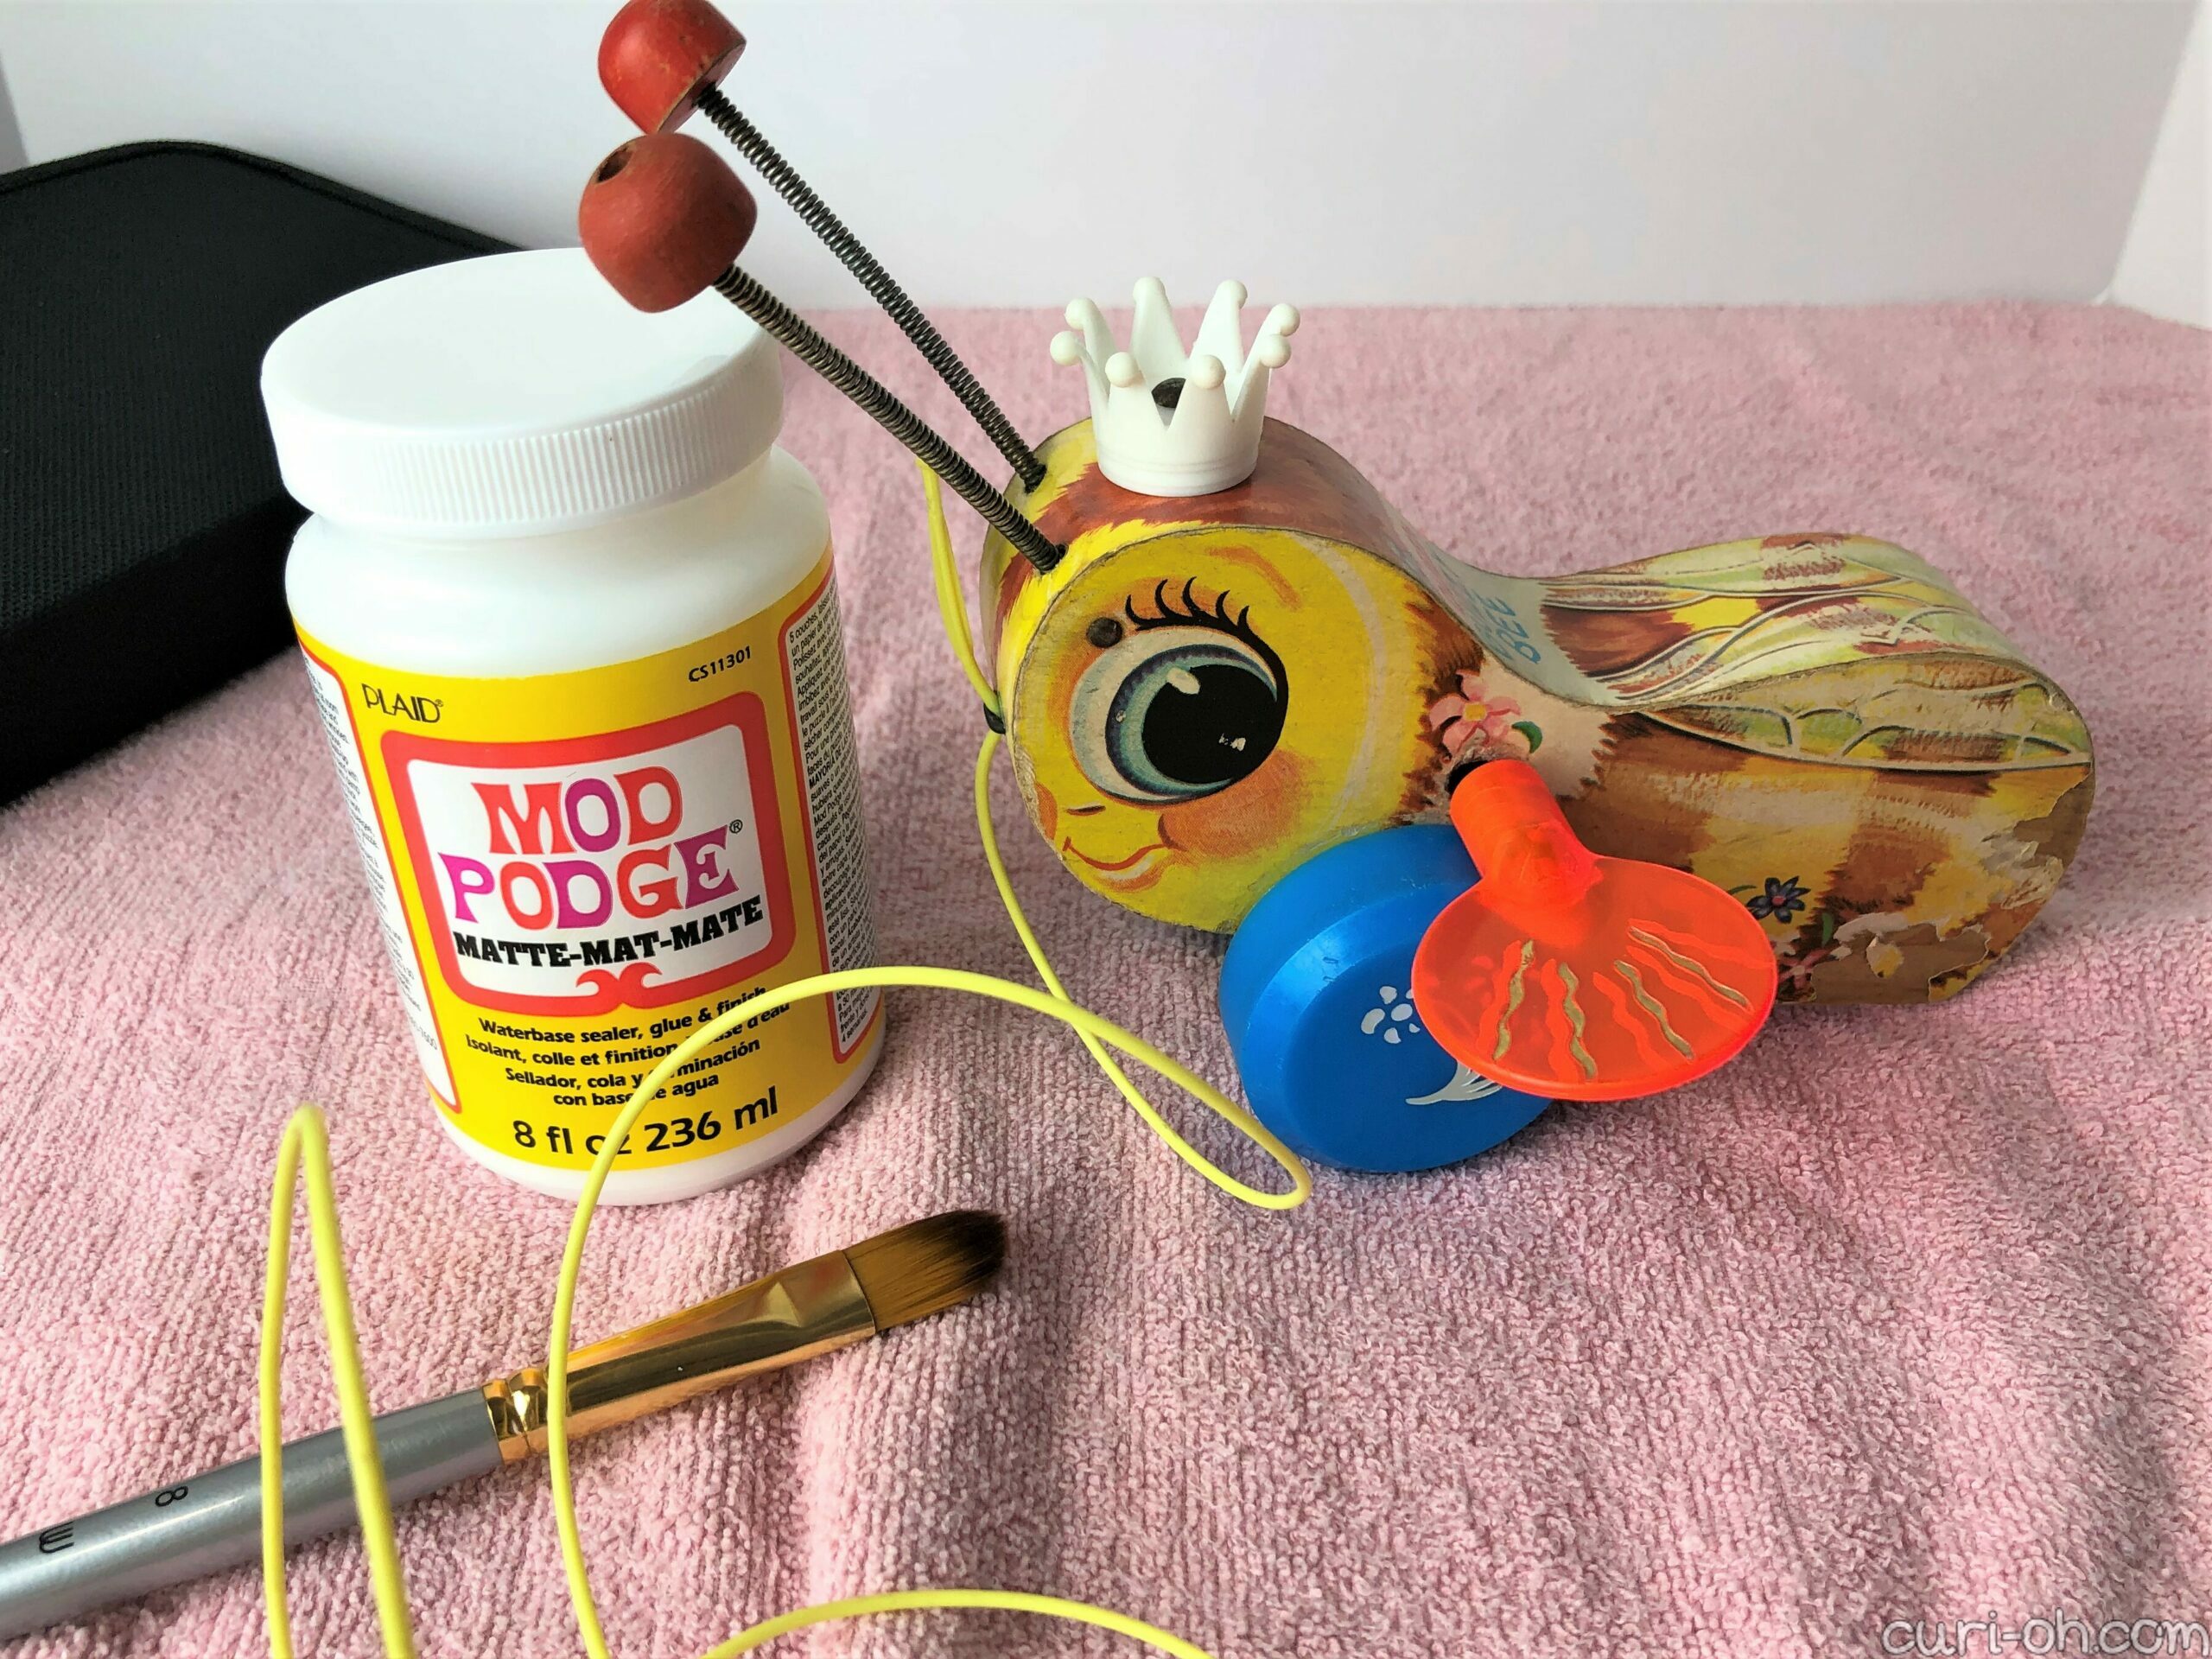
Duh, Mod Podge! I used the matte version because I wanted an invisible finish, which I applied all over the wooden paper-covered body with a paintbrush. It performed beautifully. You cannot tell the difference at all – it doesn’t look like I did anything, even though I applied many coats and you can tell by touch that there is a nice barrier now.
That’s really all there is to it. I know how scary it can be to experiment around with techniques on a vintage item, so I try to share my experiences for others where I can. In this situation of peeling vintage paper on wood, the Mod Podge made a fantastic seal. I’ll definitely try this technique in future similar situations, where a degraded paper needs some extra reinforcement.

Here we have a lovely vintage toy that, while I wanted my child to be able to play with it, I was afraid to cause it further damage. With this easy fix, I was able to stop the damage in its tracks and increase its resistance to future wear and tear, all while preserving its original appearance. That’s a big win in my book! I look forward to seeing my kid pull around this fun vintage toy.
Cheers!