Stately Rock Art
I currently have at least four projects simultaneously in the works right now. They all keep dragging out for one reason or another, so I have had to travel back in time for a project to cover here in the interim. I completed this one a couple of years ago, but I have had it in mind to share since it is very dear to my heart. And what better way to travel back in time than with FOSSILS!?

You can count on me personally to always have newly discovered rocks stuck in random places. If your drink won’t fit correctly into the cupholder in my car: there’s probably a rock down there. Something is banging around in the washing machine… forgot about that rock in my pocket. What’s this in the bottom of my bag? Yep, definitely rocks.
Rocks are a big deal in my family. When I was a kid we lived off of a dirt road, as did many of our family members, so we had plenty of access to gravel; and as far back as I can remember, we would go “crinoid hunting.” But, hey what is a crinoid?!
Crinoids are Echinoderms, marine animals related to starfish, sand dollars, and similar. They are sometimes called sea lilies or feather stars, depending on the variety. They are a creature still around today, but the Crinoidea class was very prolific in the past, so there are tons of their fossilized remnants in gravel – the type of gravel where I grew up anyway. I can’t speak for what YOUR gravel is like, ha! But in Mississippi, it’s this stuff mostly, which is “chert gravel.”
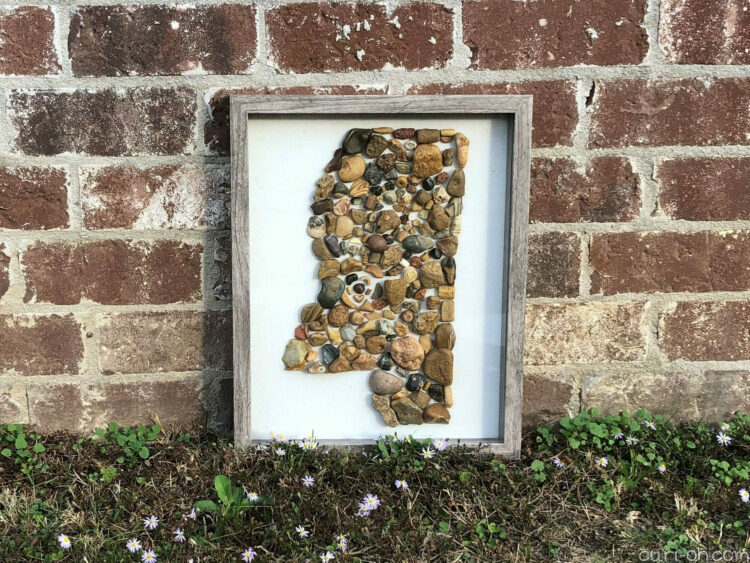
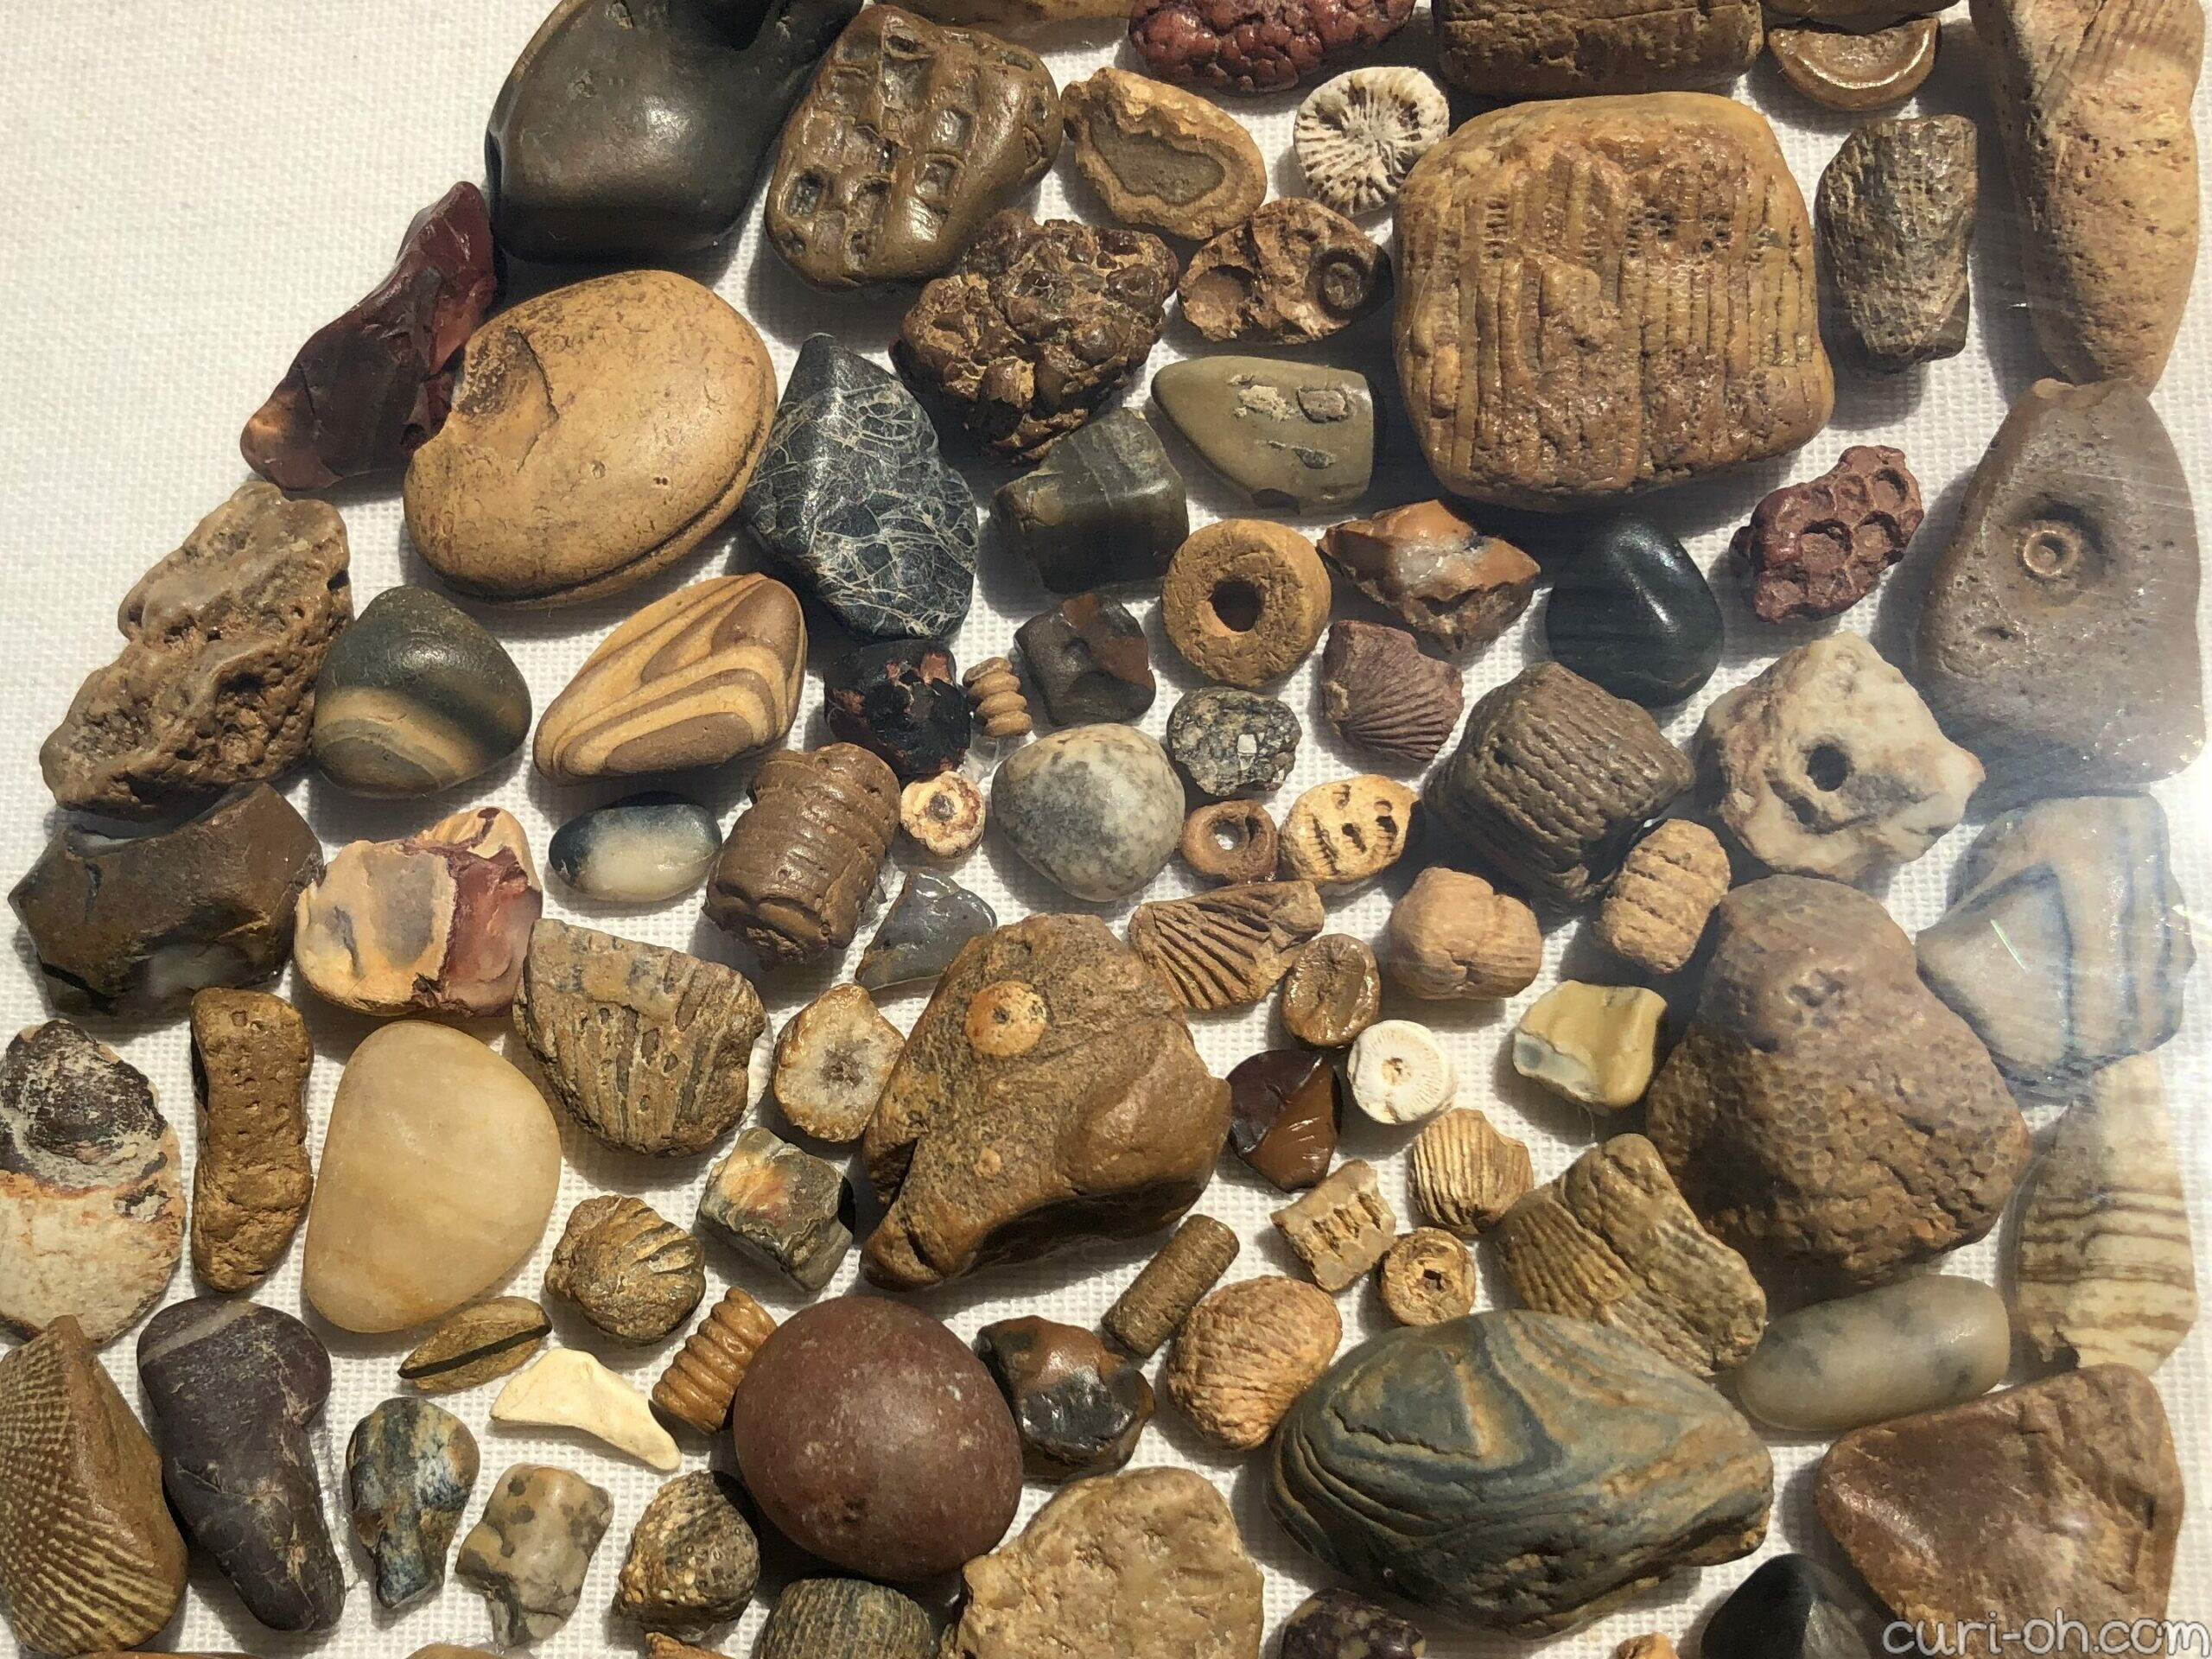
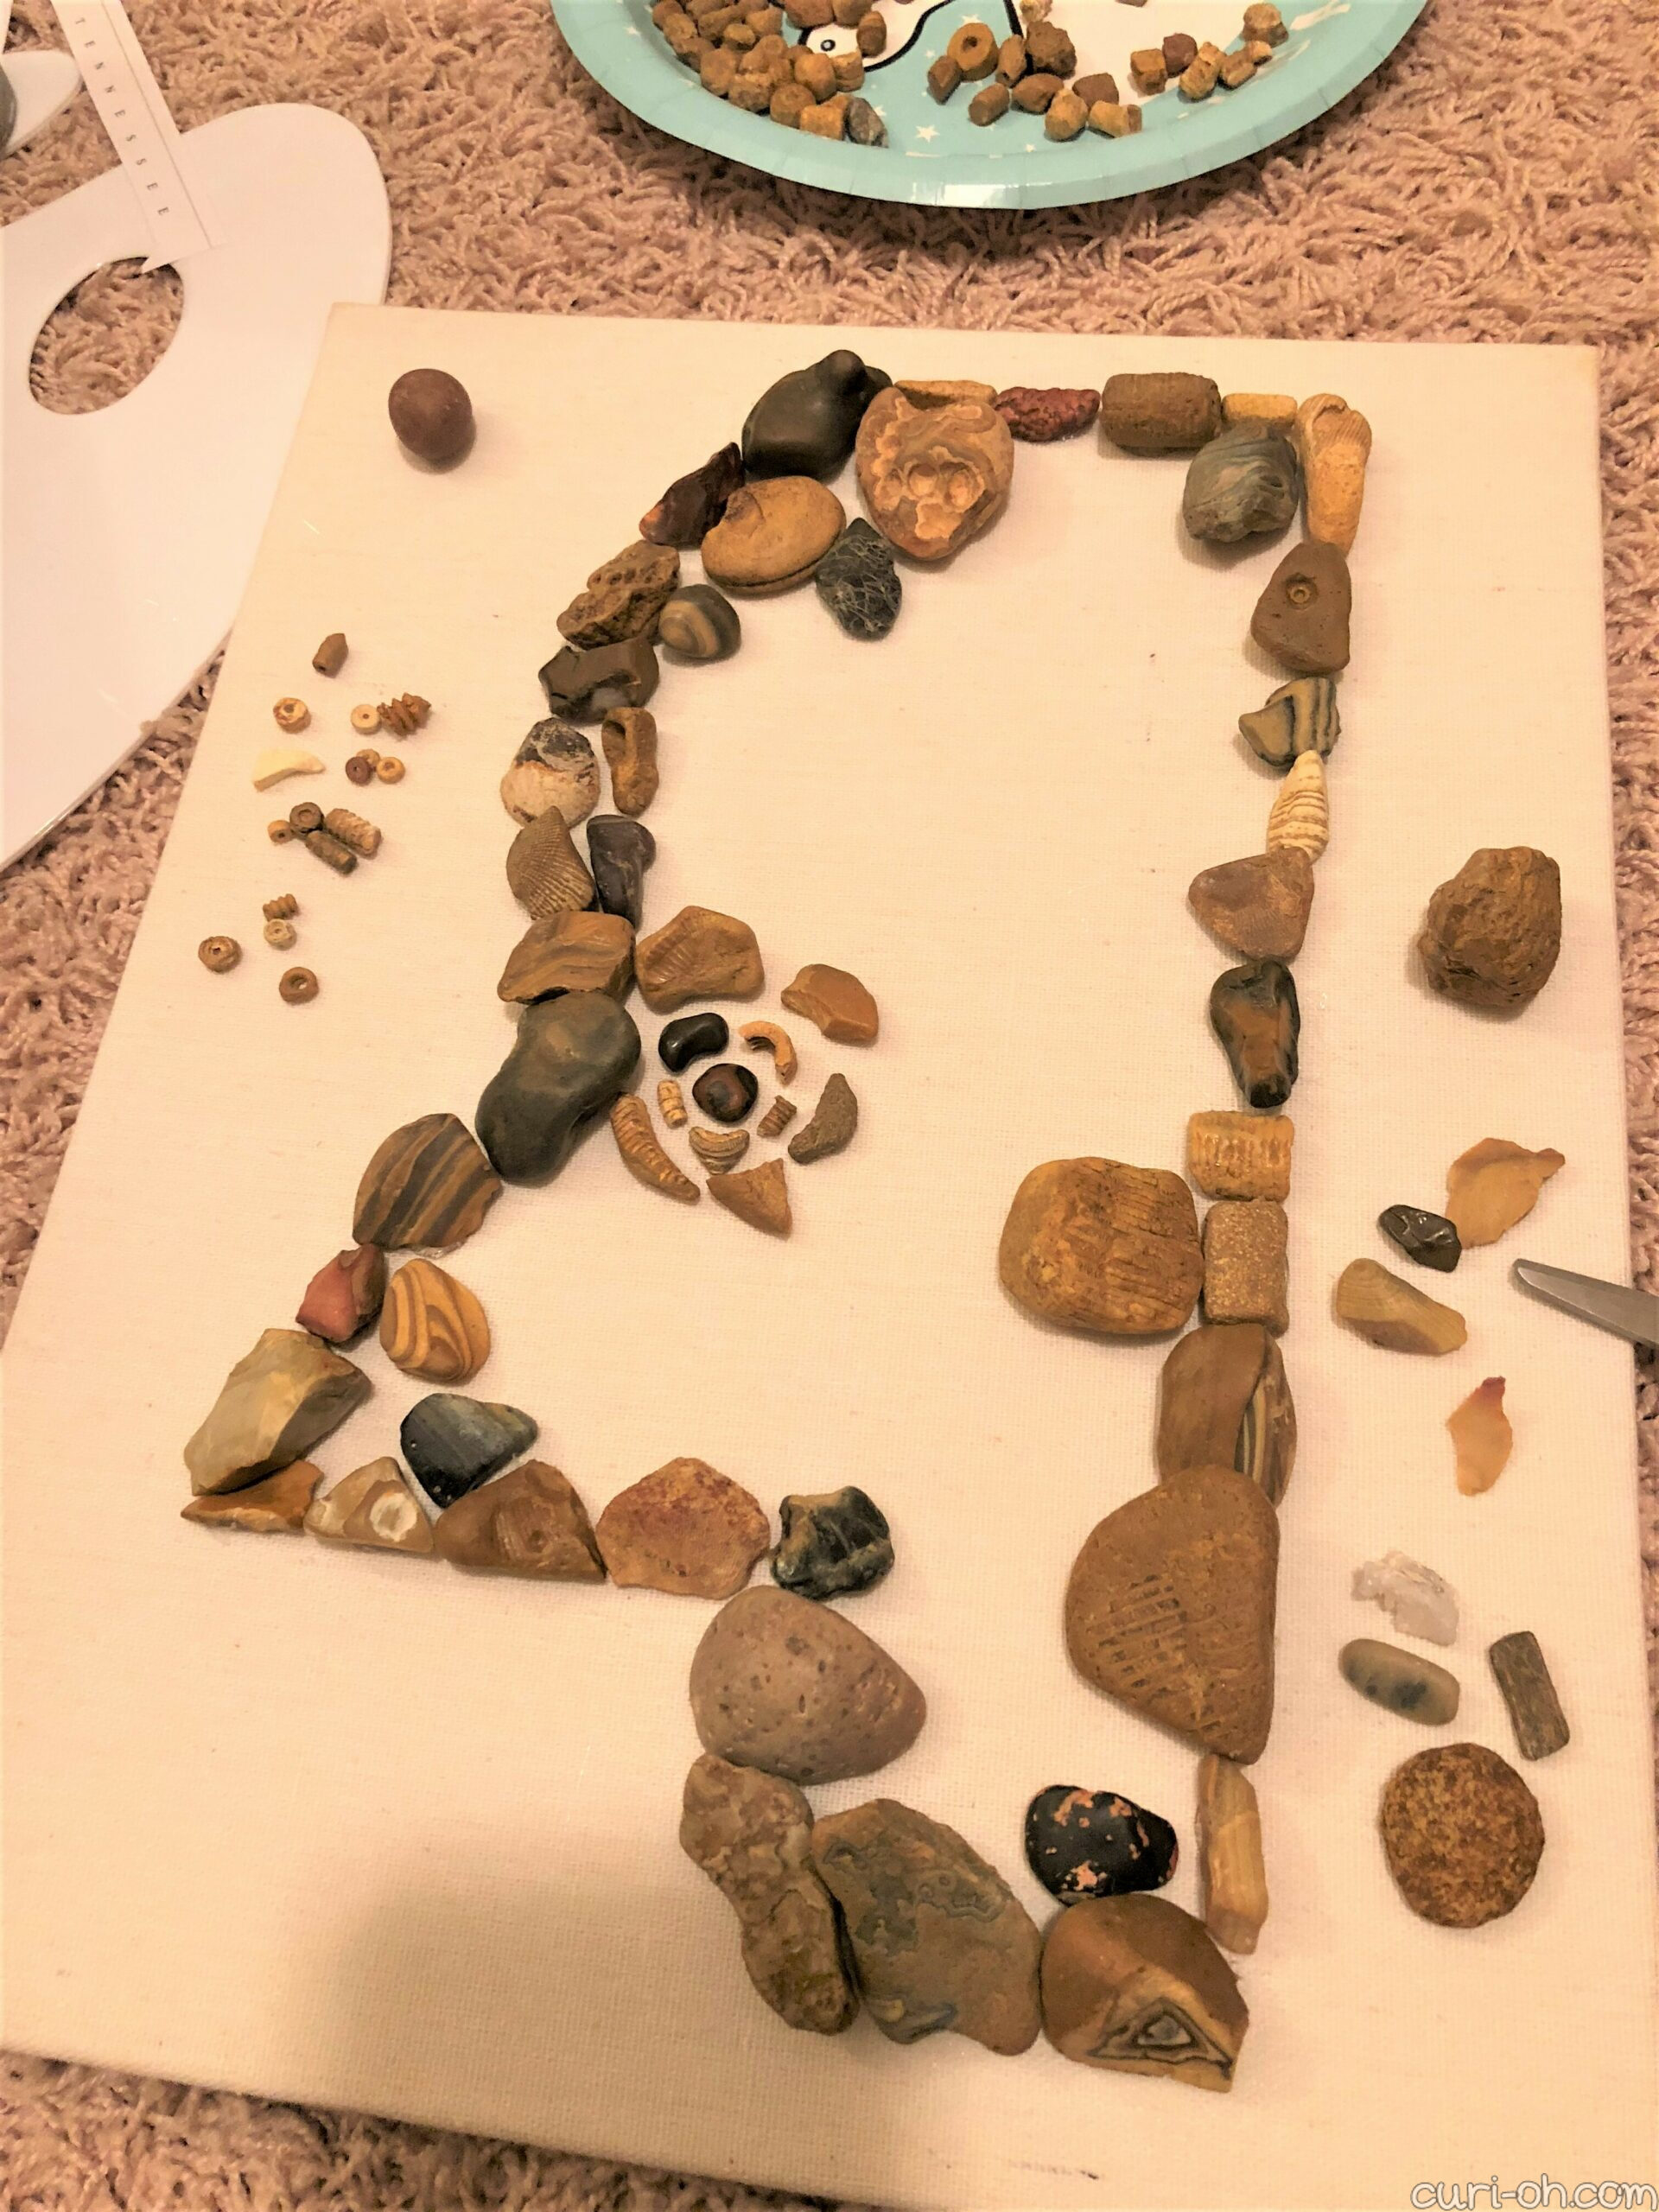
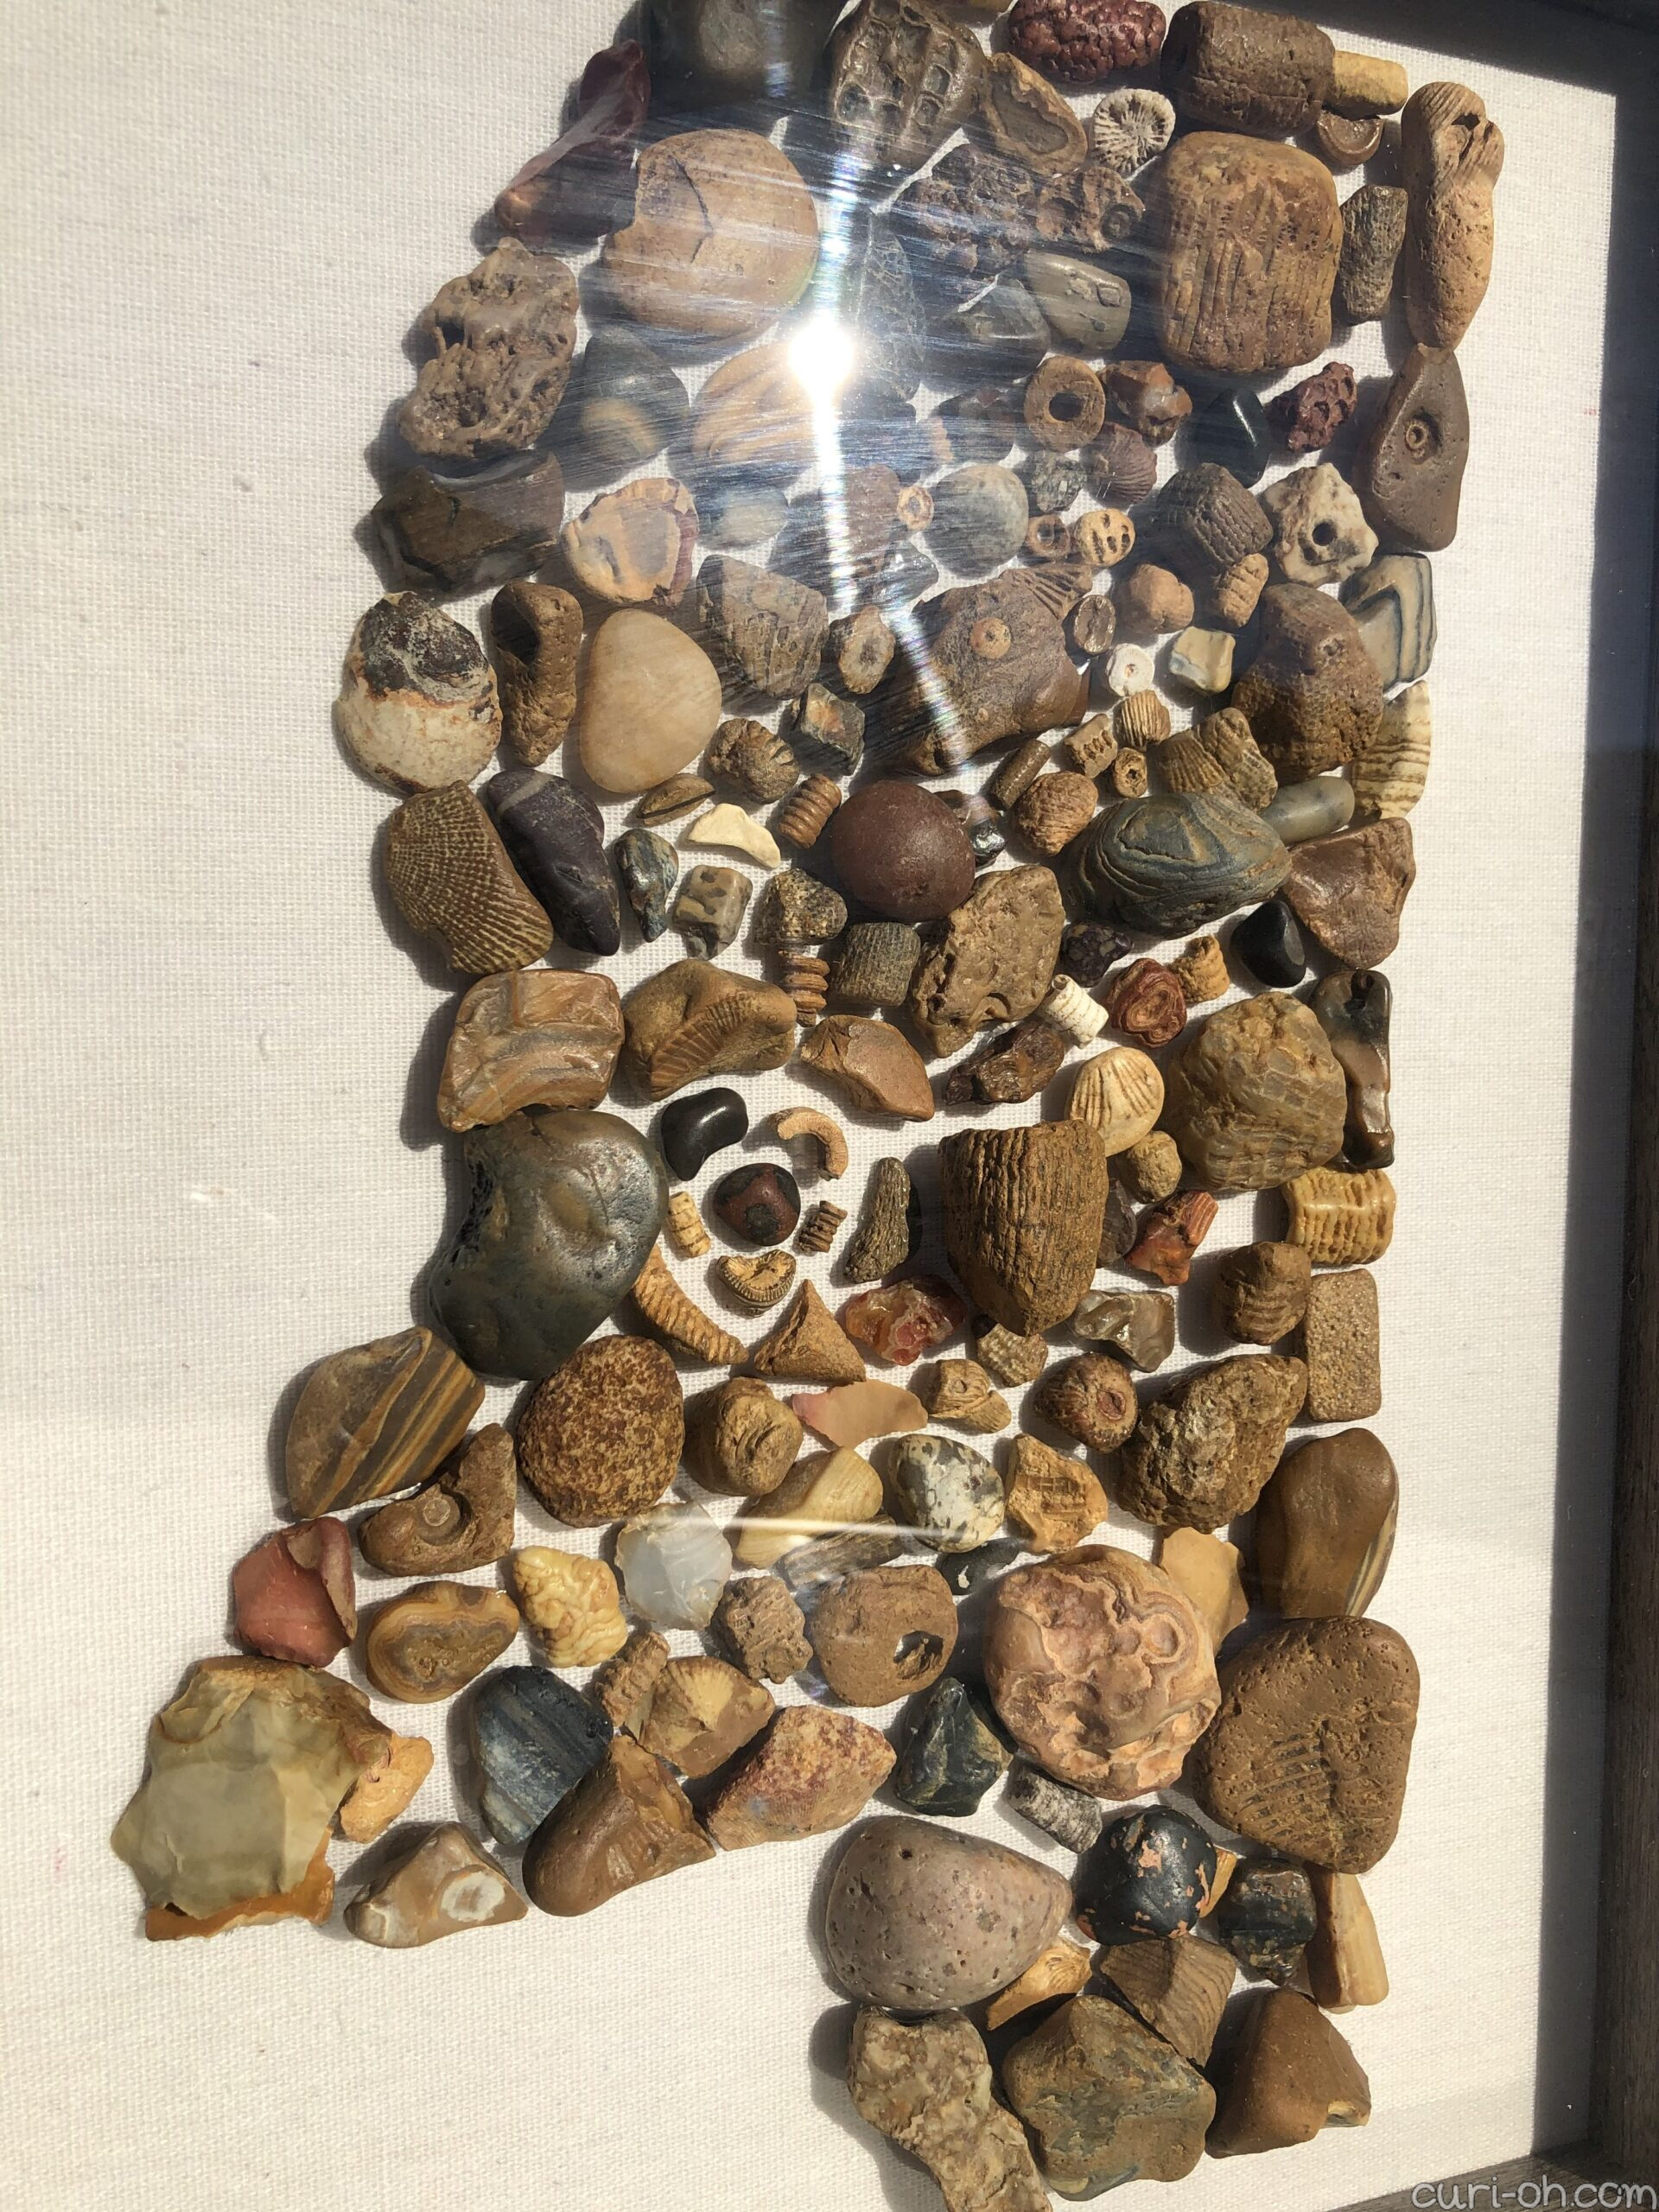
All of these rocks were taken from my childhood collection and found in Mississippi, where I grew up. Not all of them are fossils of course. Some are just interesting or pretty in one way or another. Those that look like little donuts or columns come from crinoids though.
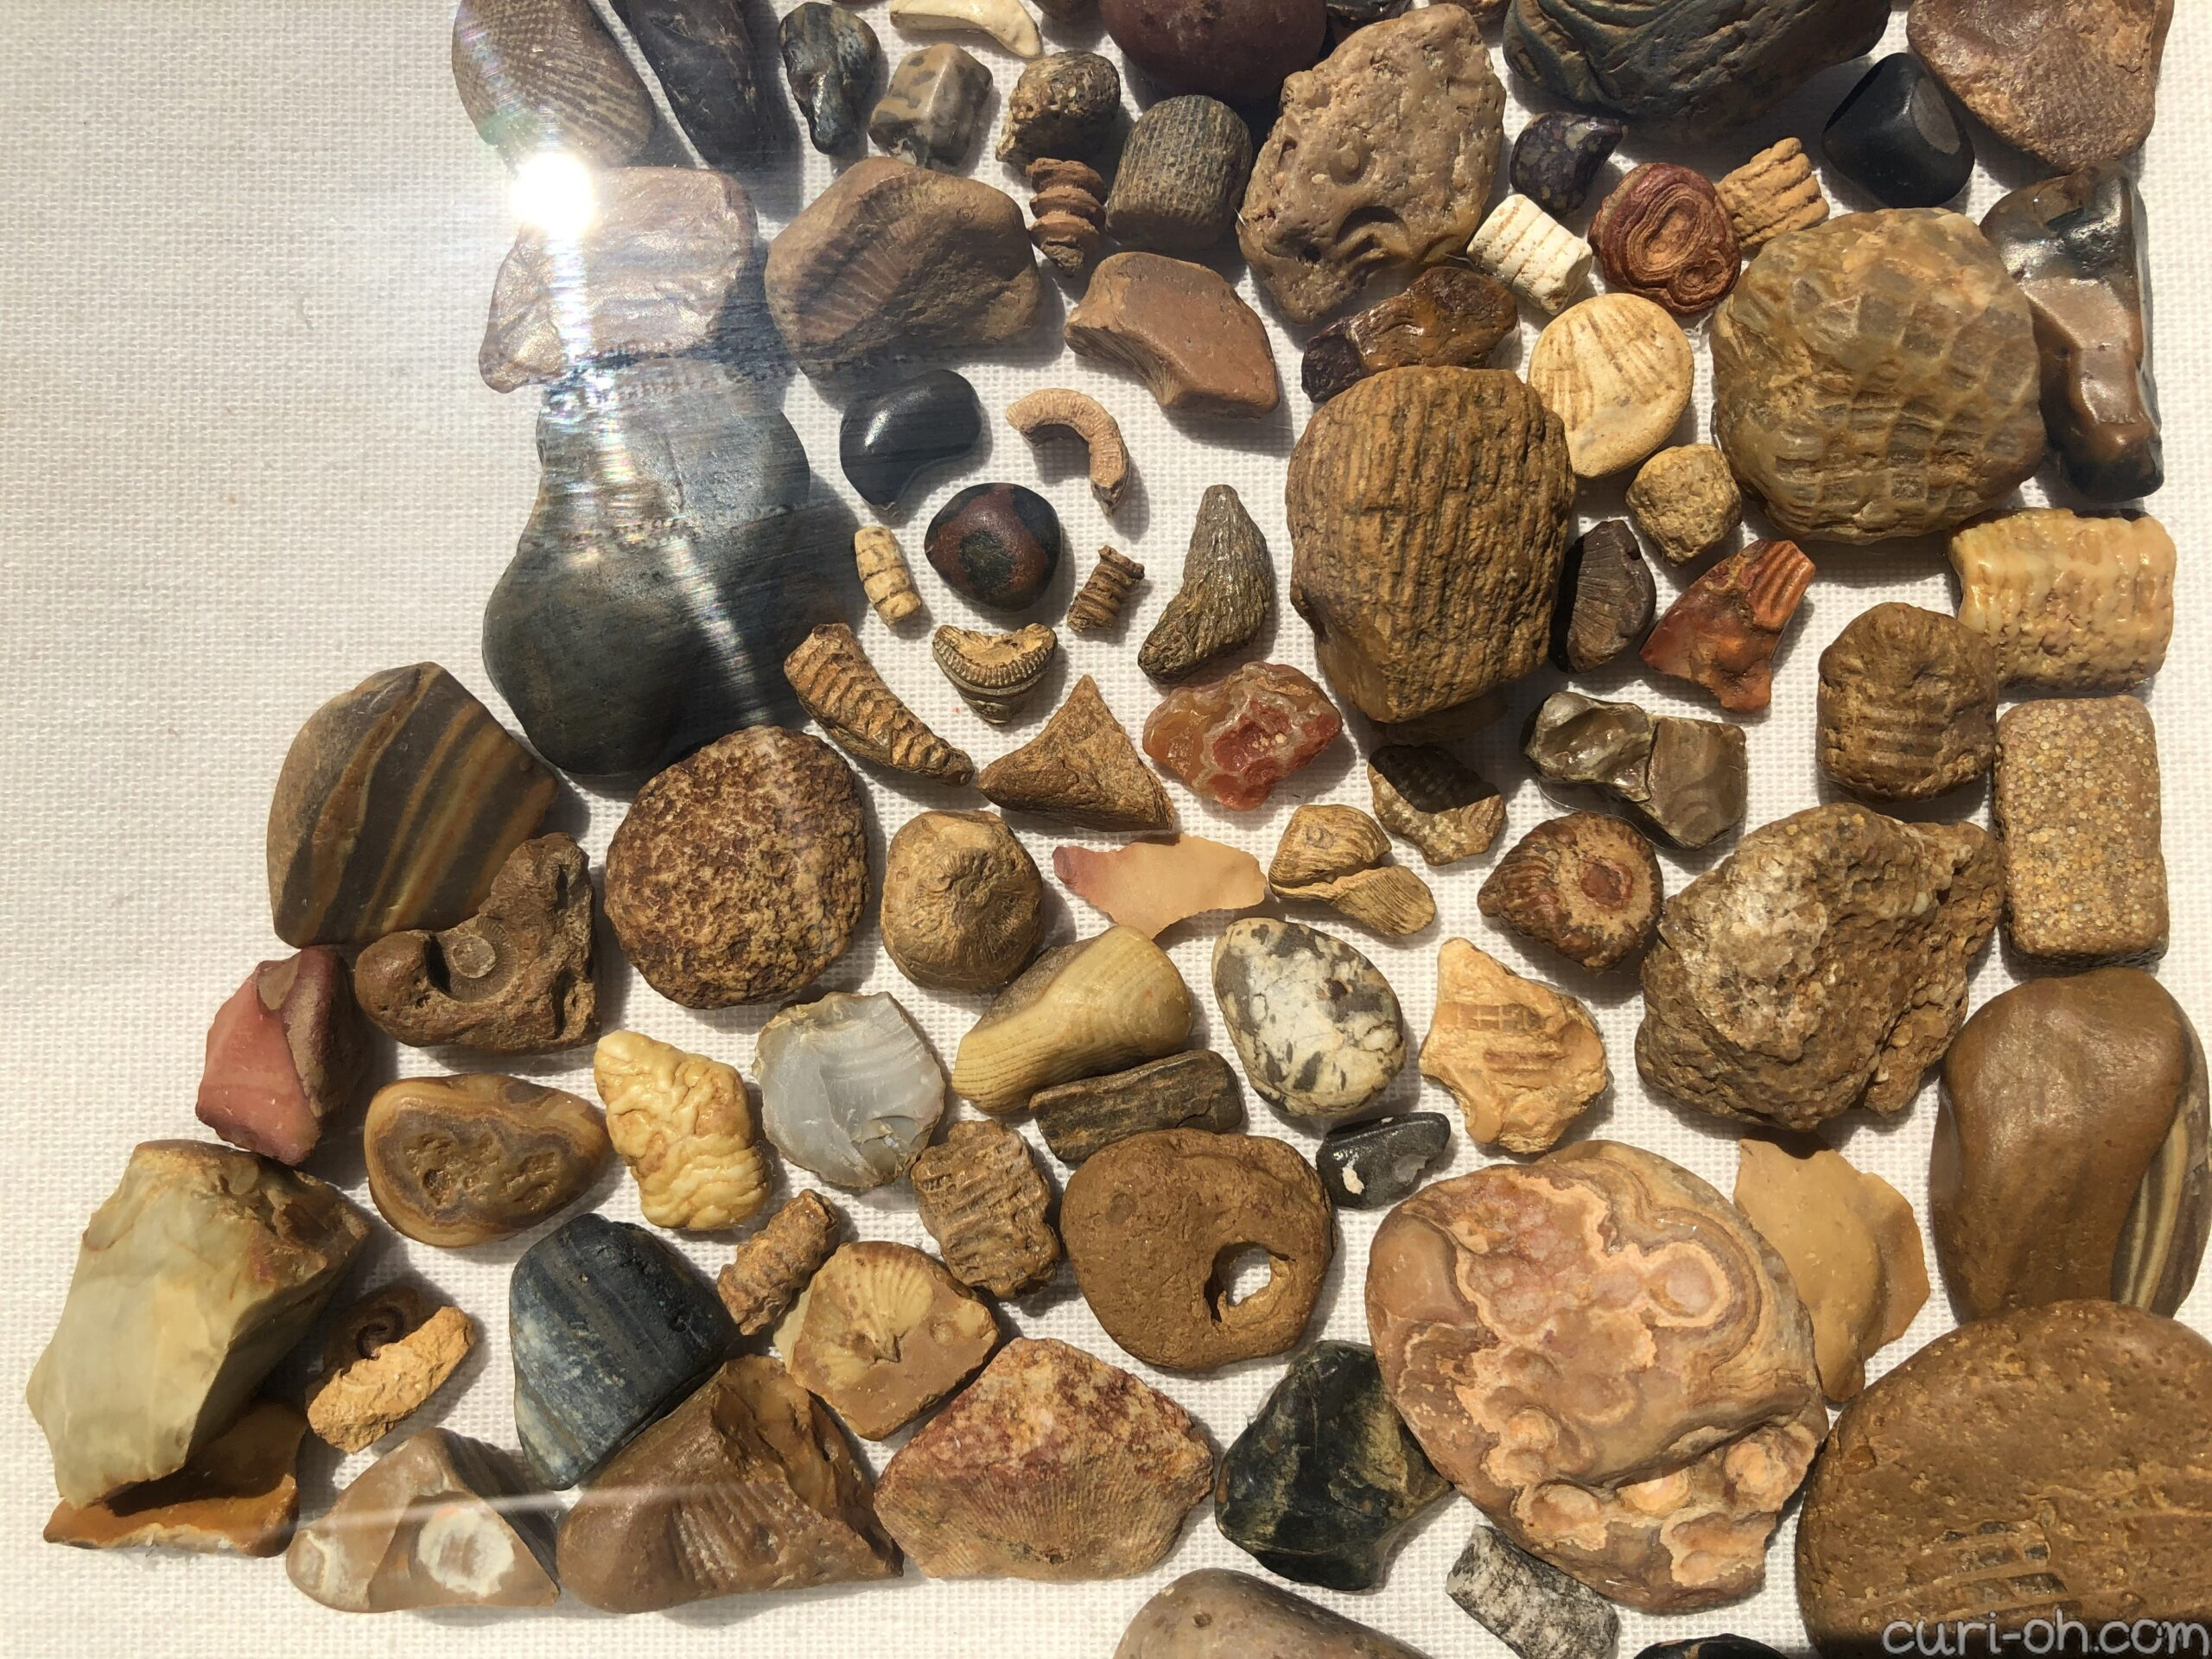
This is just a small sample of my collection. Many of my most interesting rocks are very tiny and would have been too small to show up in this piece. My family referred to our pastime as “crinoid hunting,” but really we were just always on the lookout for interesting fossils of any type. My mom once found a perfect star-shaped fossil! I don’t believe I ever found anything too exotic, but I could always find the tiniest crinoid fragments.
It was a great way to spend time together as a family. We would stretch out on an abandoned gravel-lined path near our home and while away the afternoon, running back and forth to share our finds with one another. And if you couldn’t find a fossil, there were plenty of other neat types of rocks to amuse yourself with, as you can see in the pictures.
I miss those simple family times. To this day, if I’m standing on a gravel path, my eyes will be glued to the ground. I credit the hobby as one of the things in my life that has instilled the love of a treasure hunt in me, the same fire that fuels my thrifting hobby.
This probably won’t apply to many people, but if you have a similar rock collection from around the Mississippi River, you may find this pamphlet, “Rocks and Fossils Found in Mississippi’s Gravel Deposits,” to be useful in identifying your rocks! I certainly have.
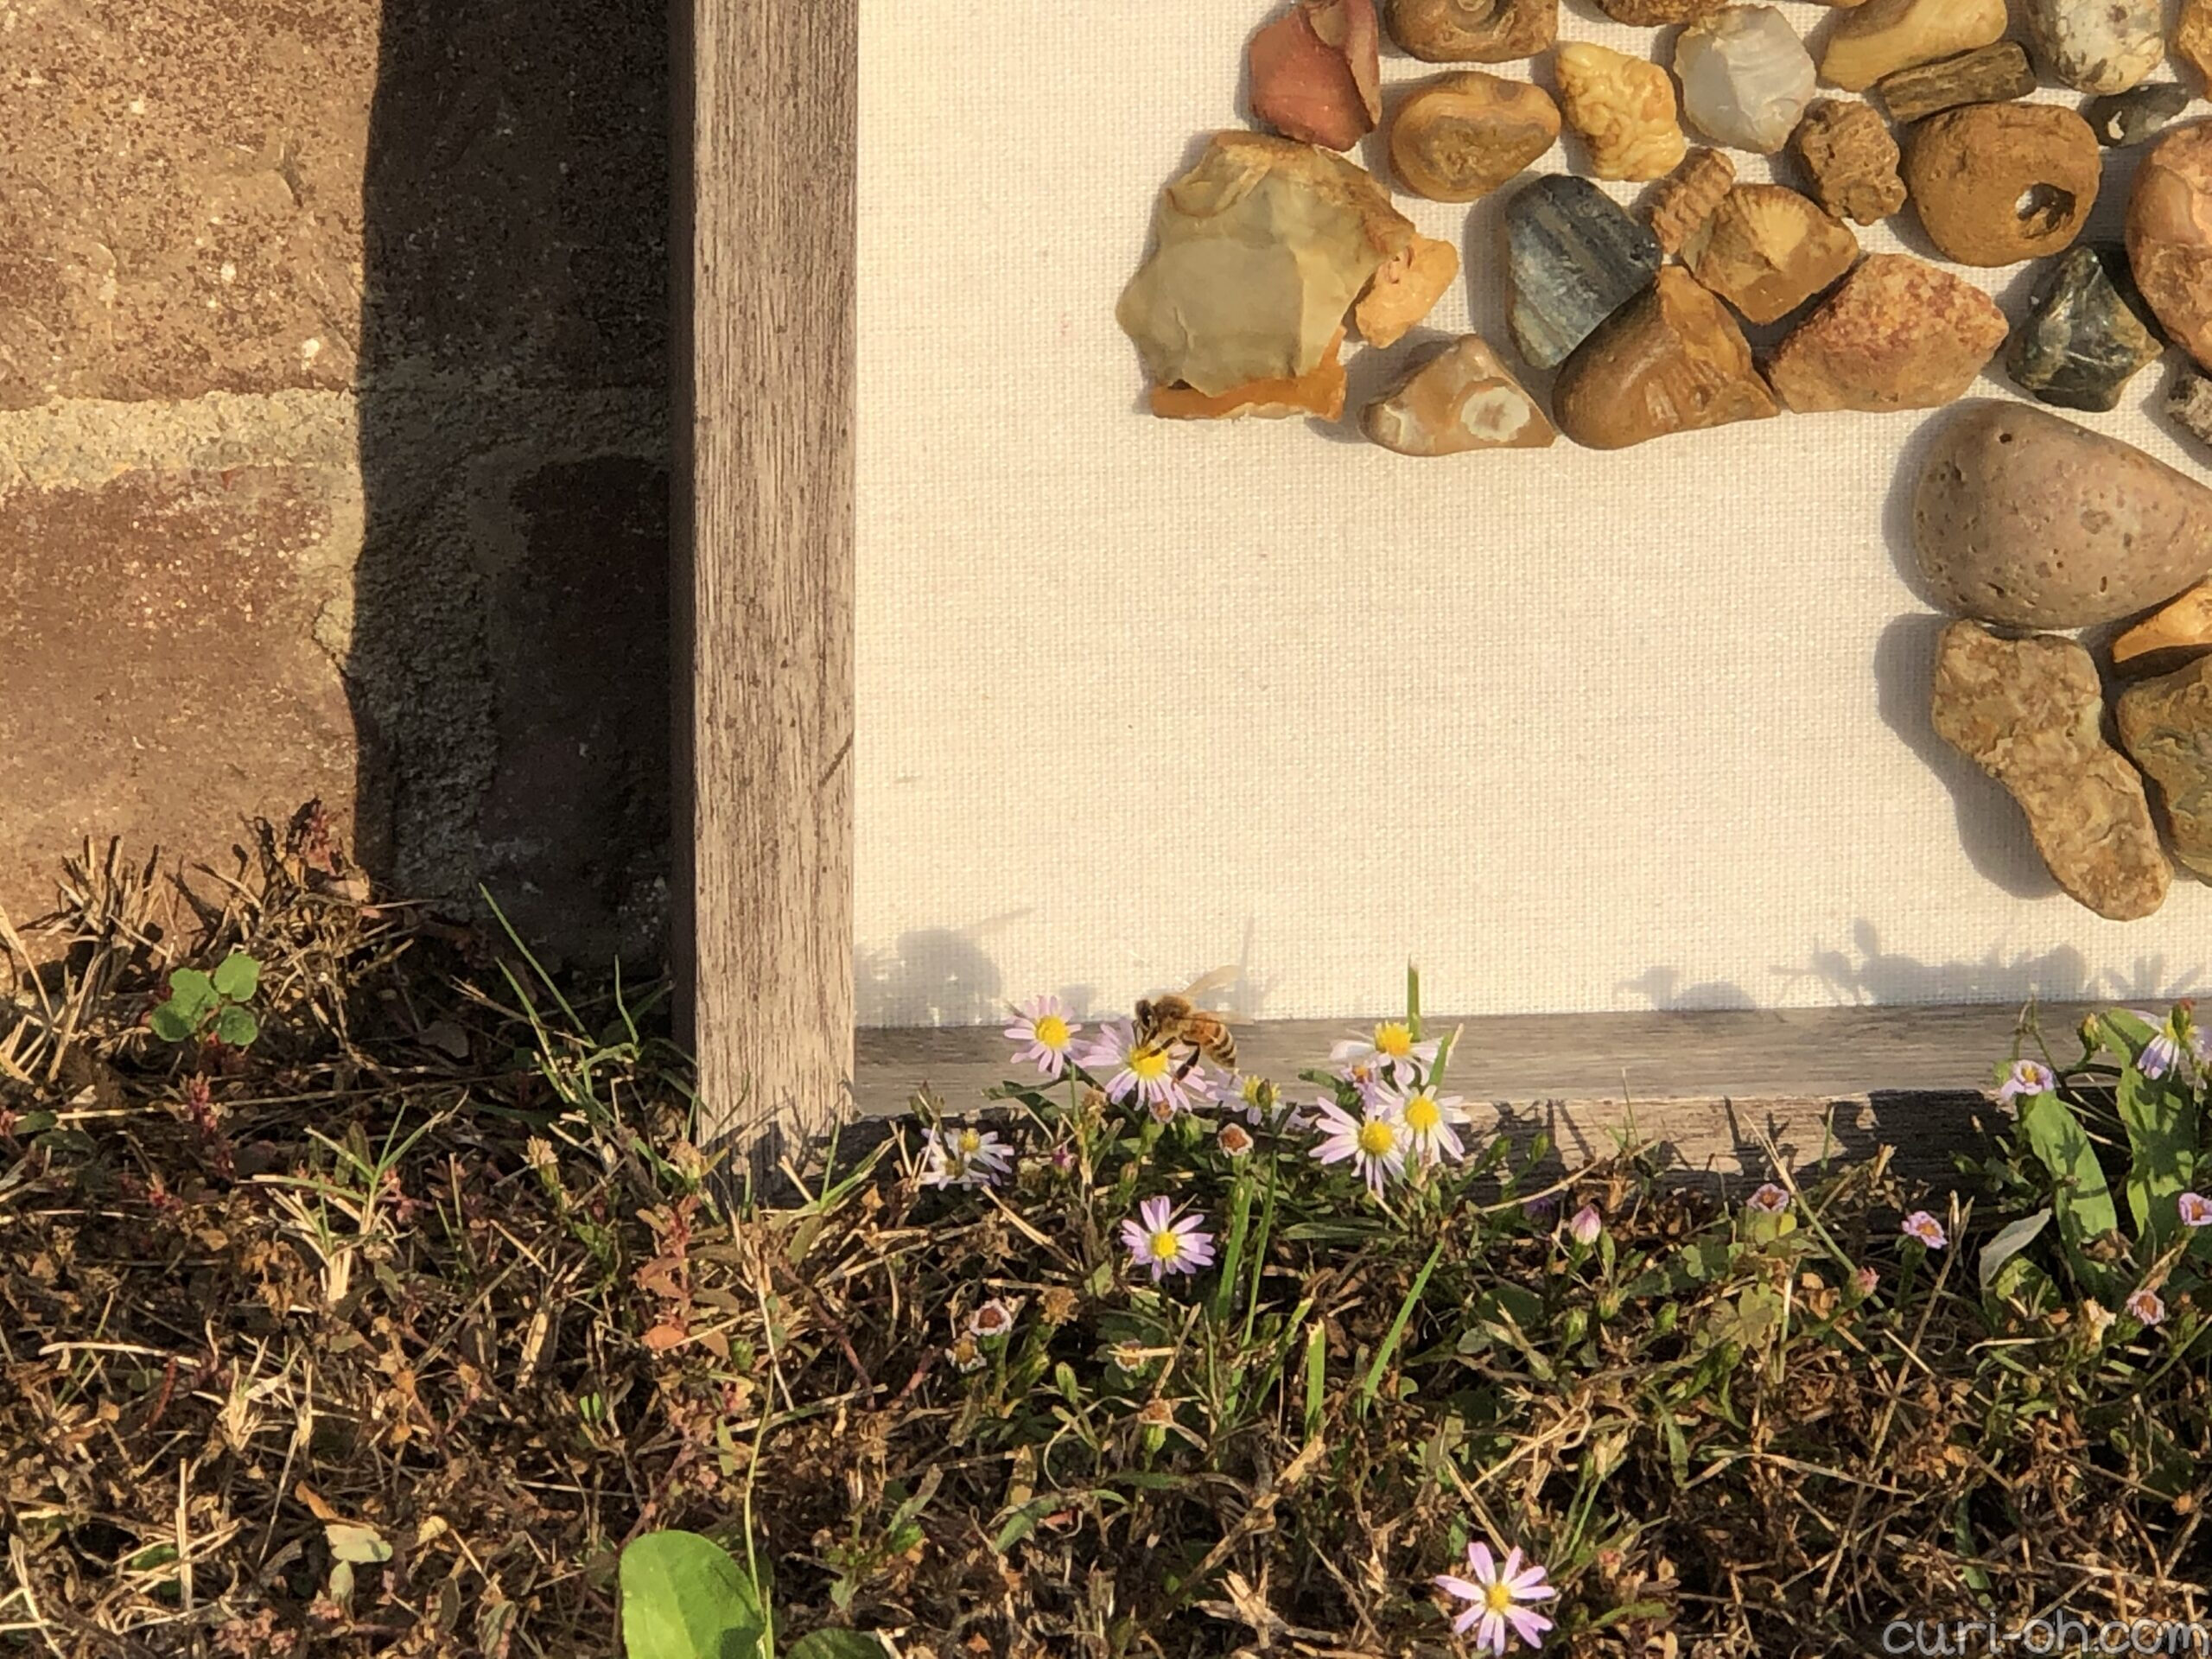
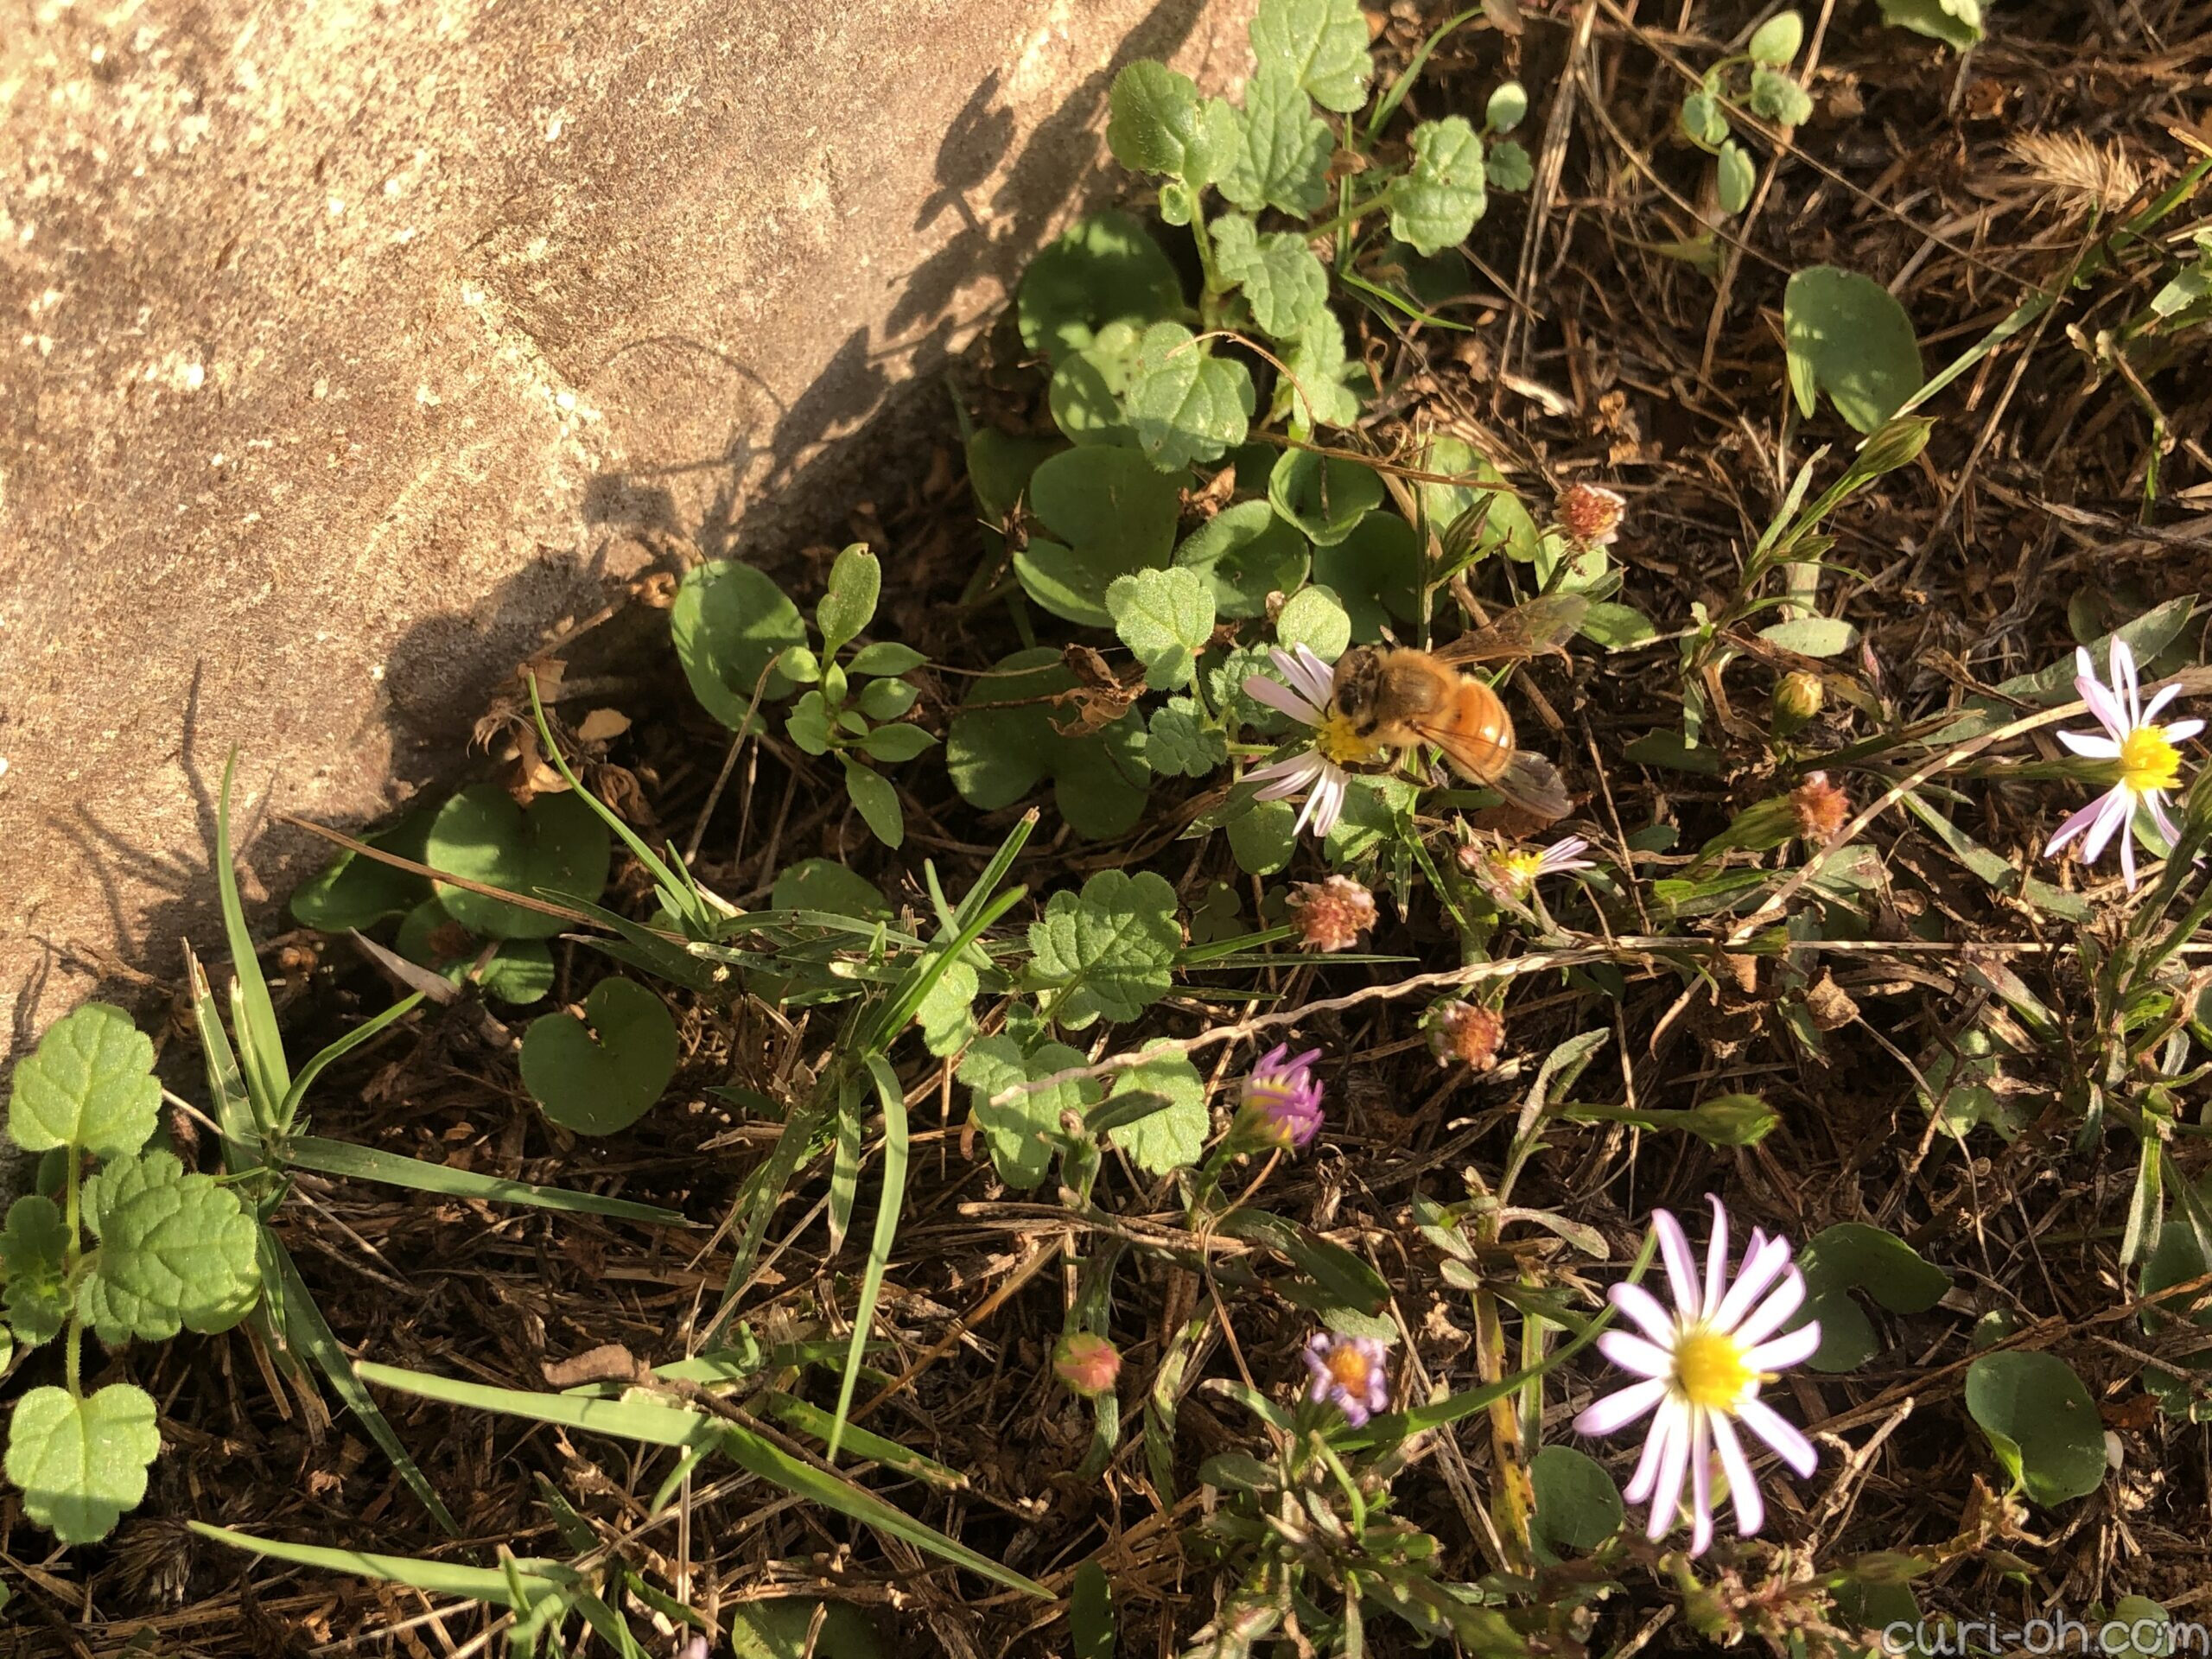
Anyway, I decided to mount some of my collection into the shape of their state of origin. But first, obligatory shout-out to this bee, who really wanted to be in my pictures:
Moving on to the how-to, please forgive the low quality photos! They were taken before I had a blog and I was just sending late night work-in-progress pictures to my parents.
WHAT I USED:
- Rocks!
- You need to clean your rocks well first, so use a basic soap like blue Dawn and a toothbrush to get in all the nooks and crannies. Use a colander to keep from losing them down the drain!
- Shadowbox.
- Glue gun and sticks.
- A printout of your state, correctly sized to your shadowbox, and cut out.
- A pencil for tracing.
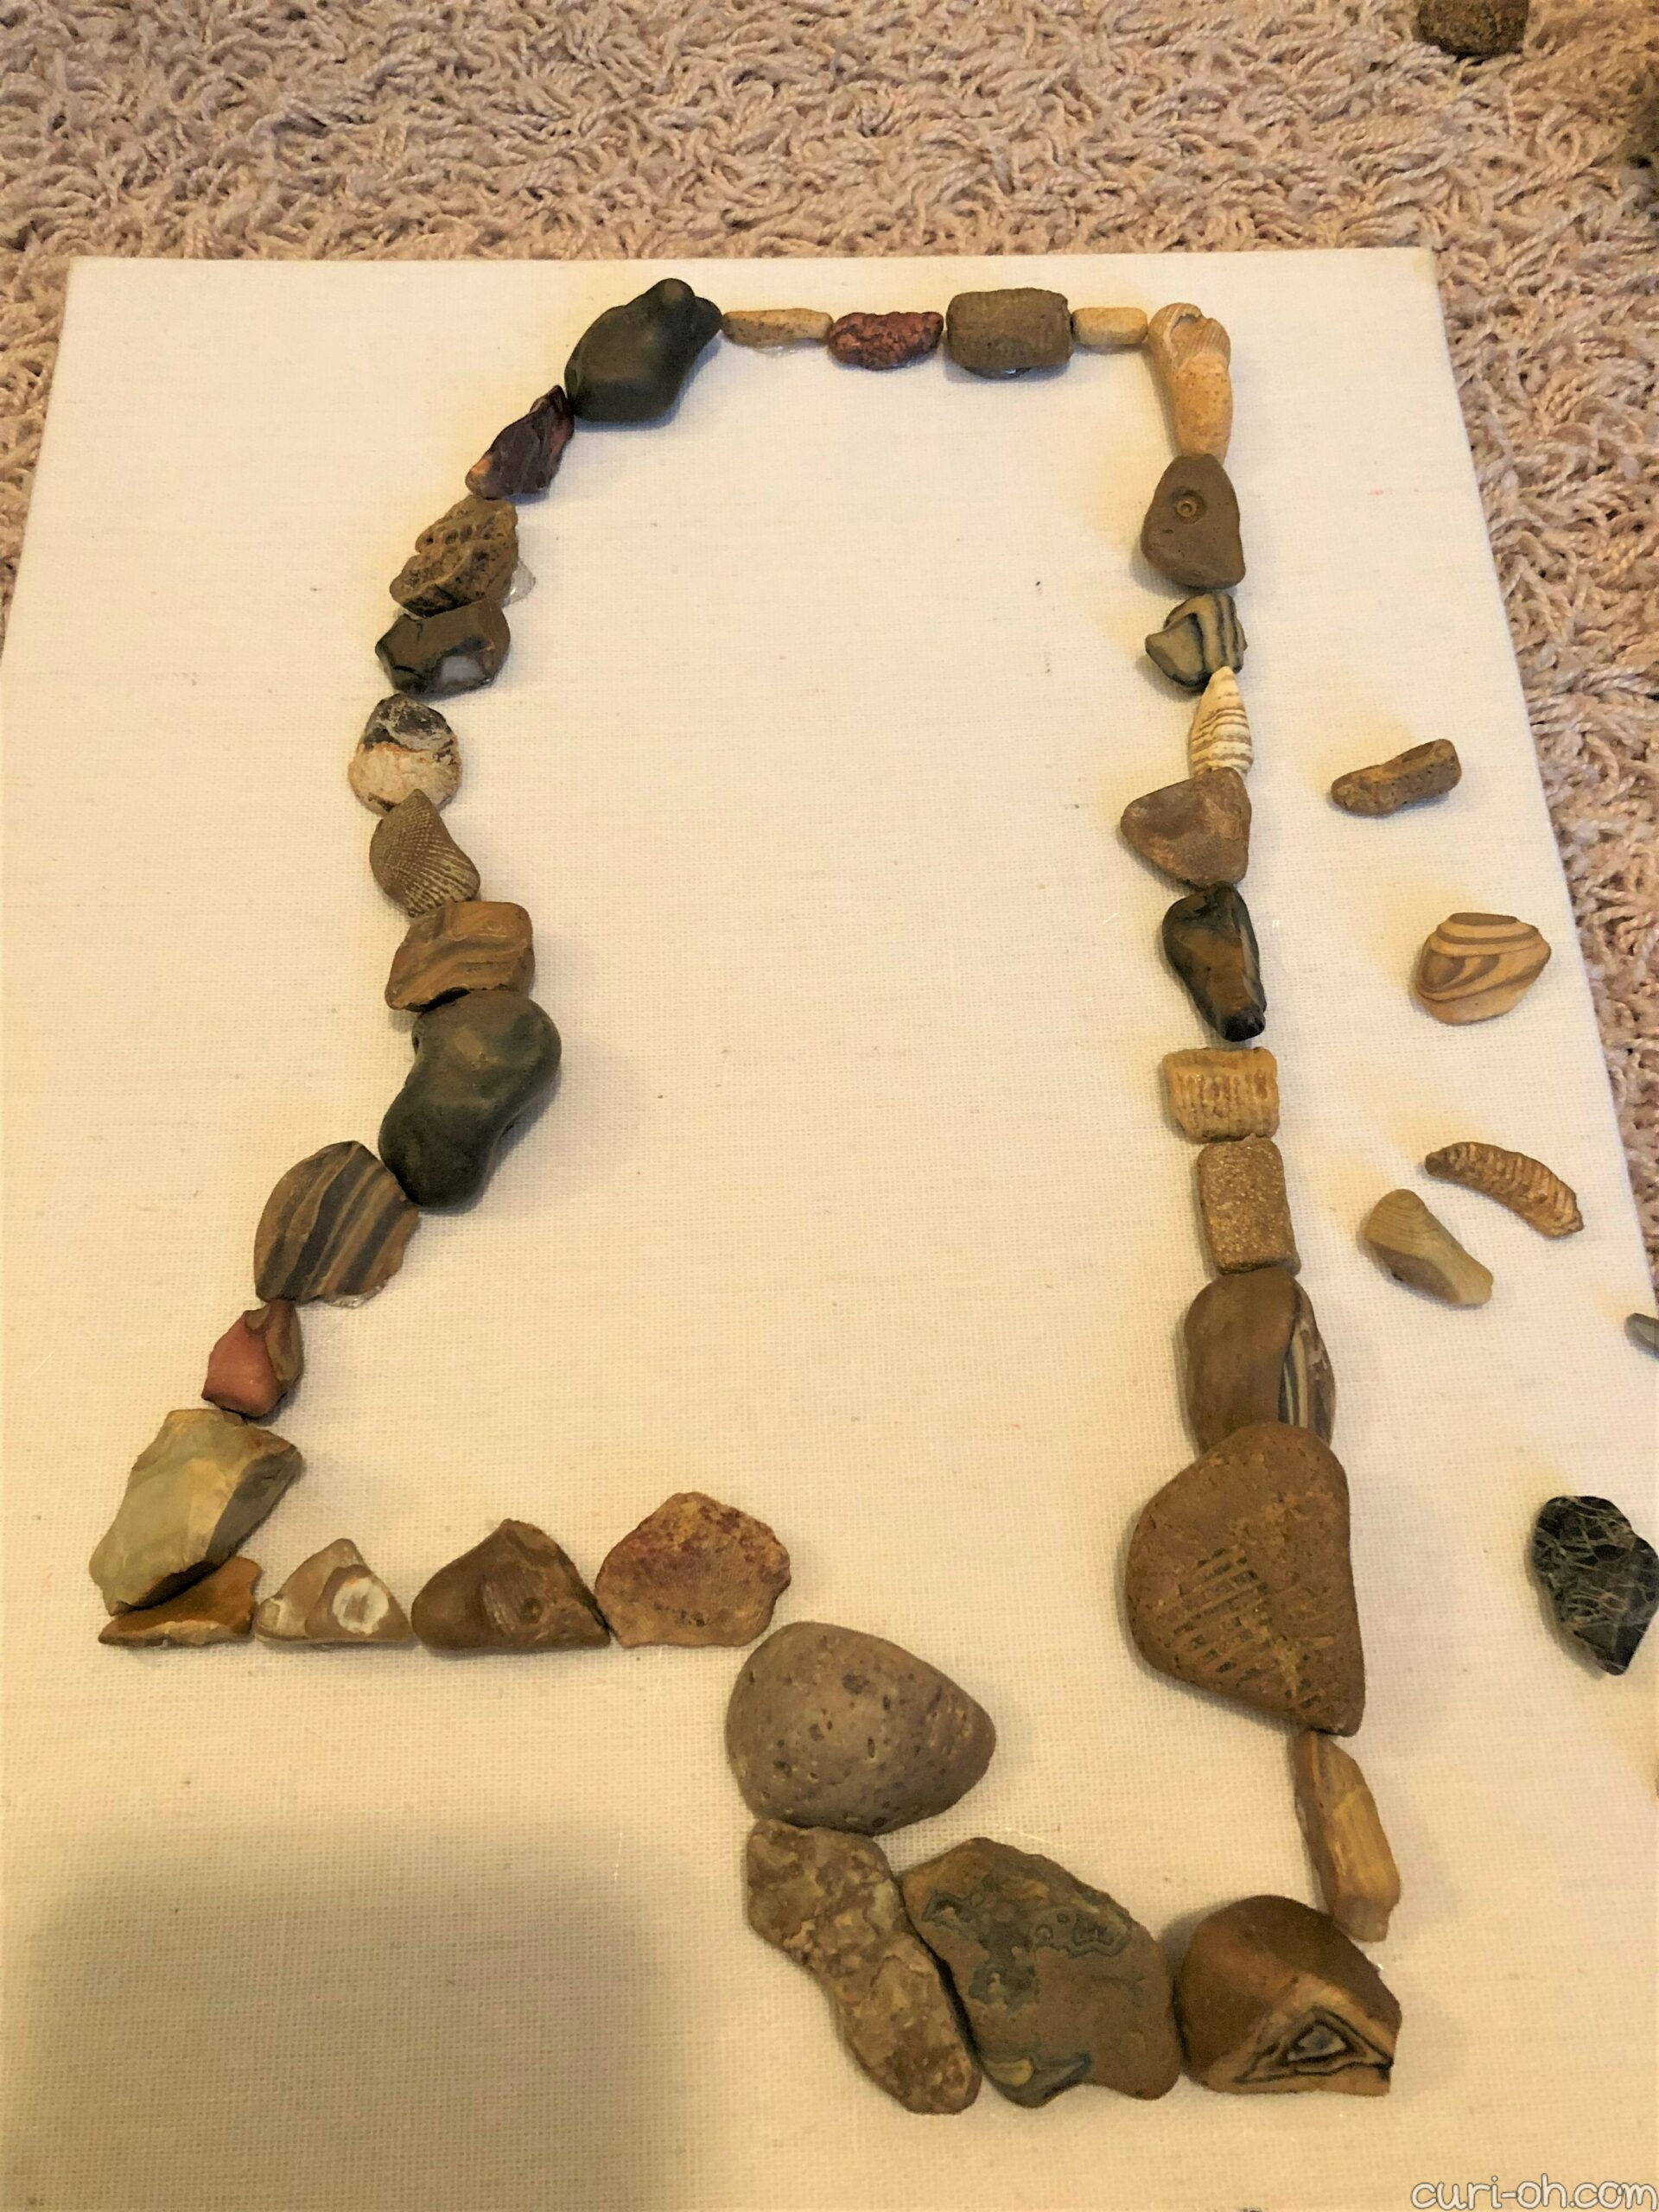
What I did was fairly straightforward. I applied the design directly to the backboard of the shadowbox. I left my state printout on the board and glued my outline of rocks around it, but if I’m remembering correctly, I did that because I thought it would help me best visualize where to put the heart design I did for the area where I grew up. I would suggest just tracing the state cutout with a pencil instead unless you have a specific reason otherwise.
I chose to replicate a heart design in that area as best I could from the rocks I had, but if you have a heart shaped rock for your home town that would be awesome!
I chose hot glue because it can be fairly easily peeled off without leaving a residue. However, it is very easy to burn your fingers with the smaller rocks. I worried that this would not be a strong enough hold and that one day they would crash down and break through the glass and chaos would ensue… but here we are over two years later and that hasn’t happened, so I feel pretty confident it will work for any rocks in this general size range.
Give the glue plenty of time to set laying flat before you stand it up.
A one-of-a-kind, sentimental piece, for me anyway.