Perler Bead Bob Ross
Mine is by no means the first Bob Ross bead sprite on the internet, but it is my own and I love it!
“Don’t forget to make all these little things individuals — all of them special in their own way.”
-Bob Ross
Bob Ross remains an inspiration to so many, myself included. He taught with kindness and encouragement that anyone could be an artist if they tried and that “the joy of painting” was to be found in the art itself – in the spirit of creation. As a perfectionist, I can certainly beat myself up about my creations plenty. Even sharing them here on my own blog can make me nervous, but I always remember that they bring me joy and that my hope in sharing them here is that they will inspire you to create something that gives you that same feeling.

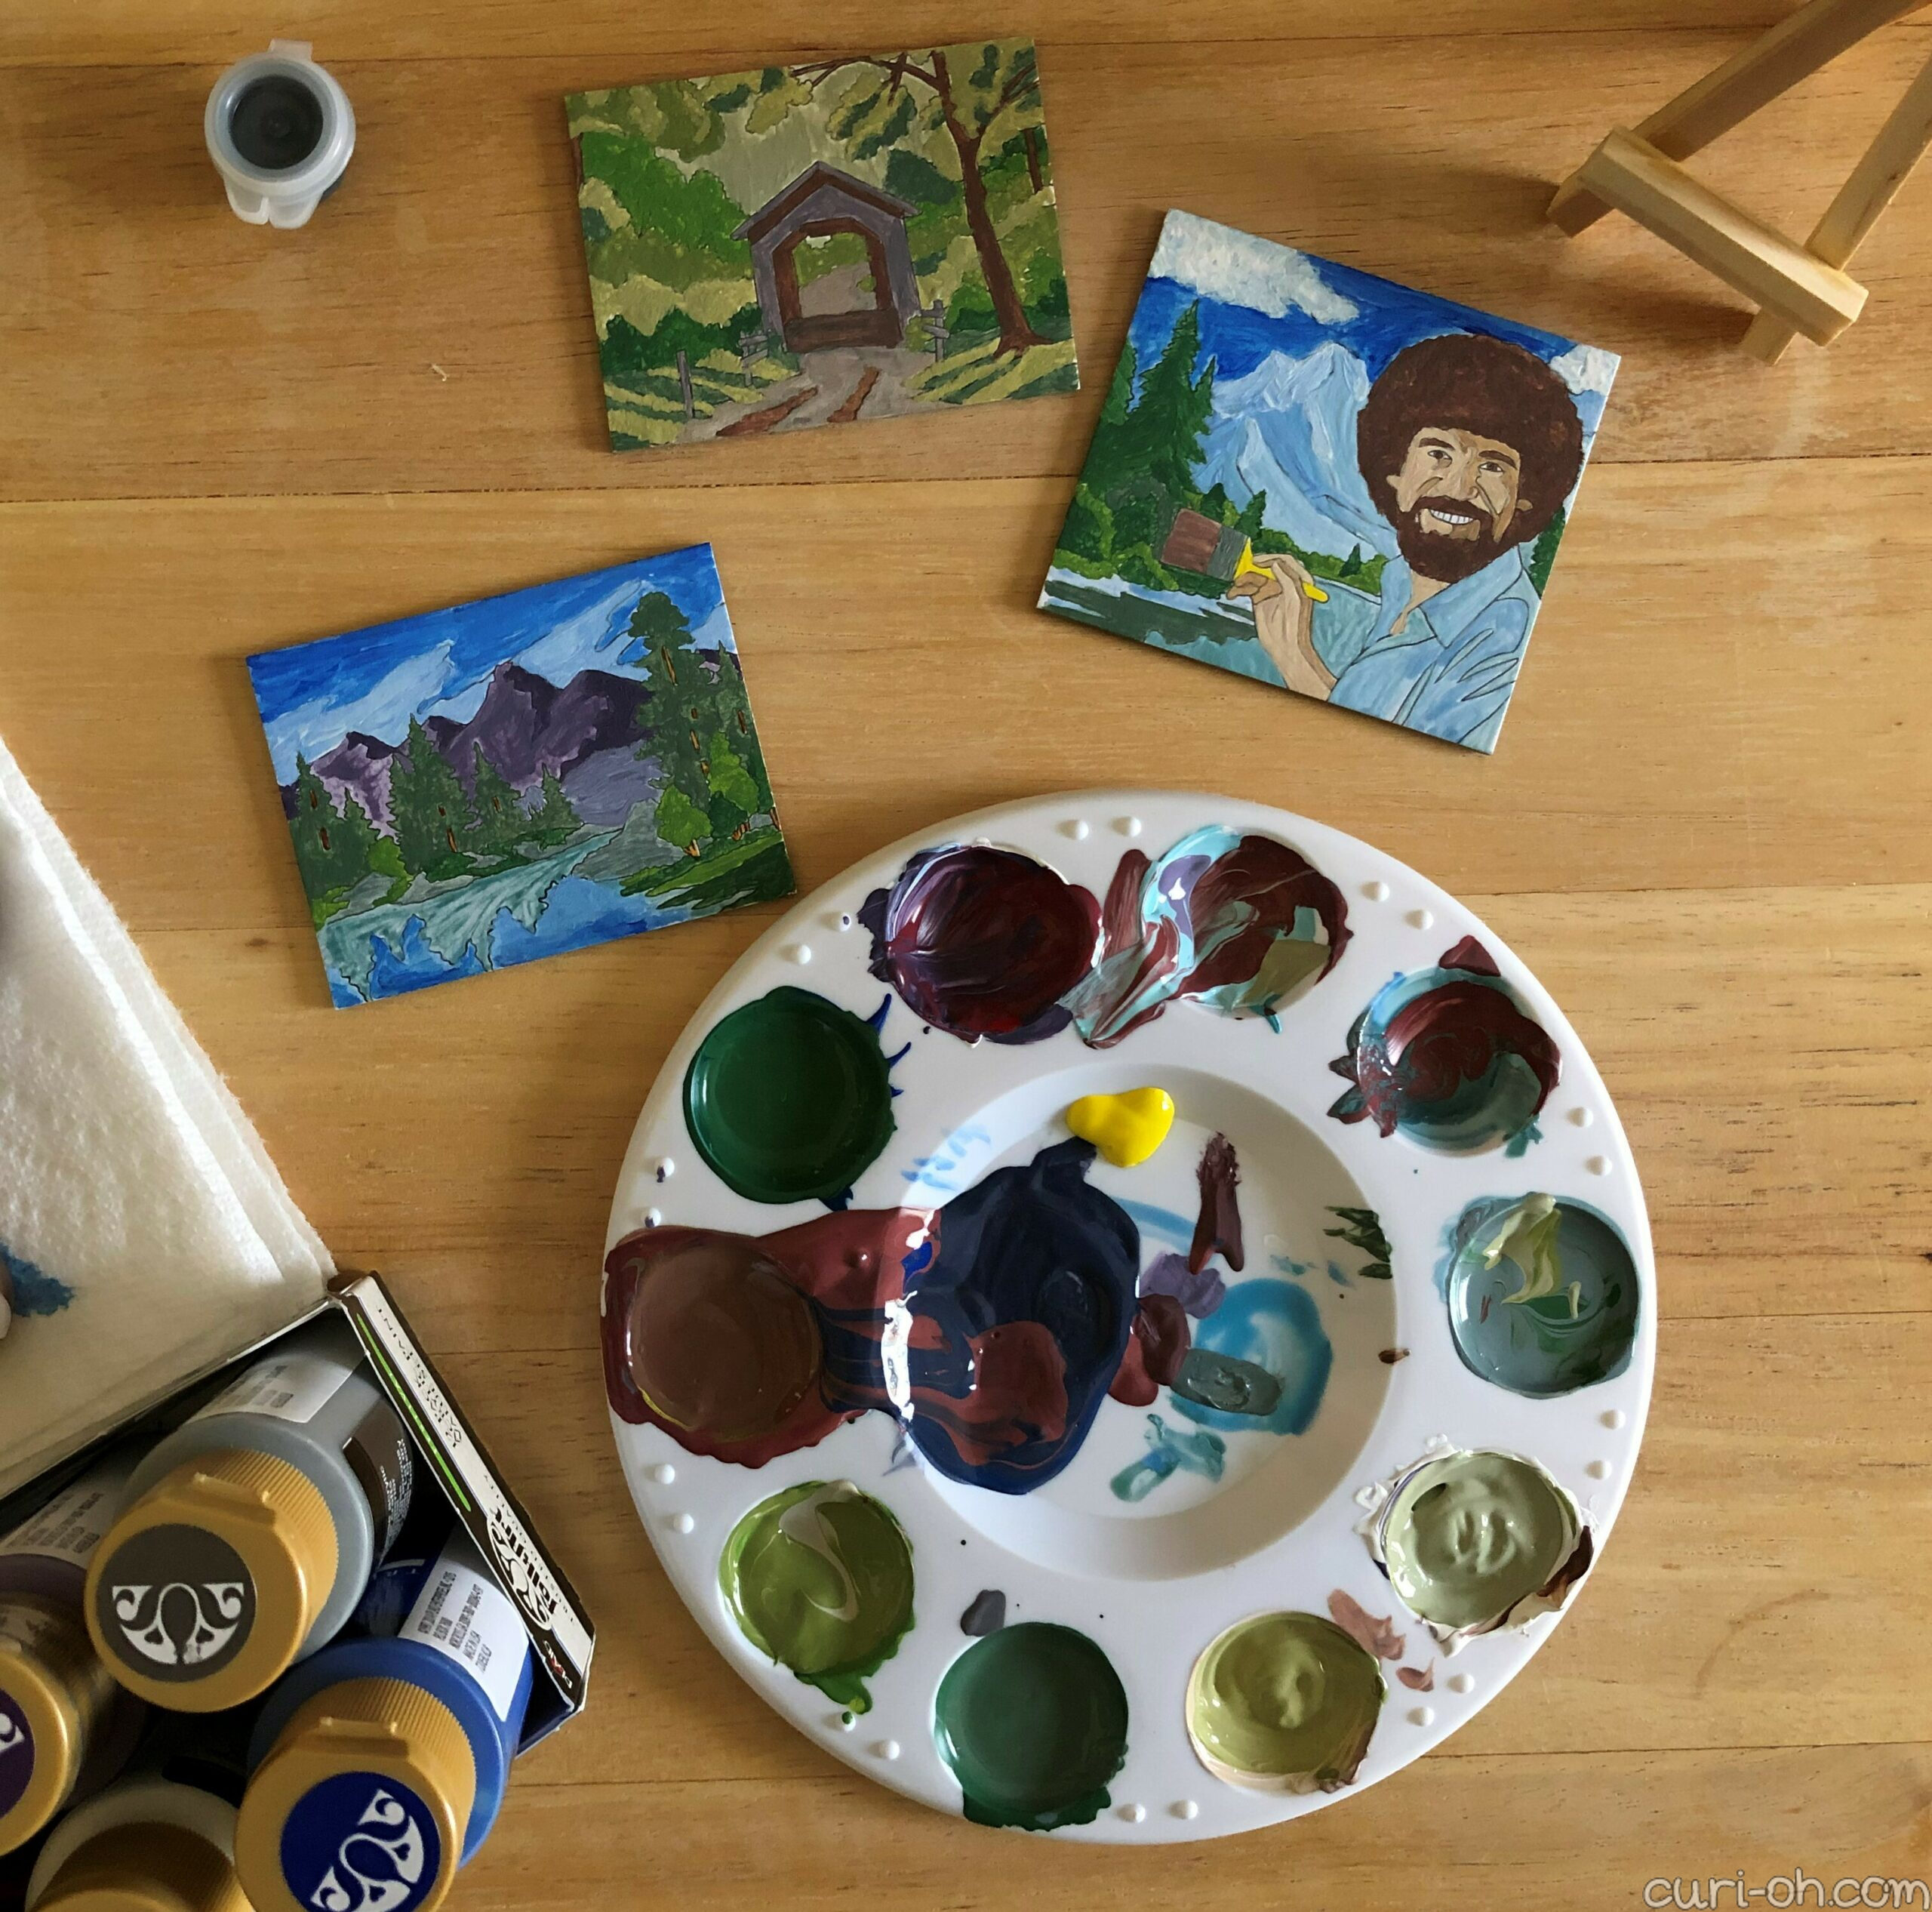
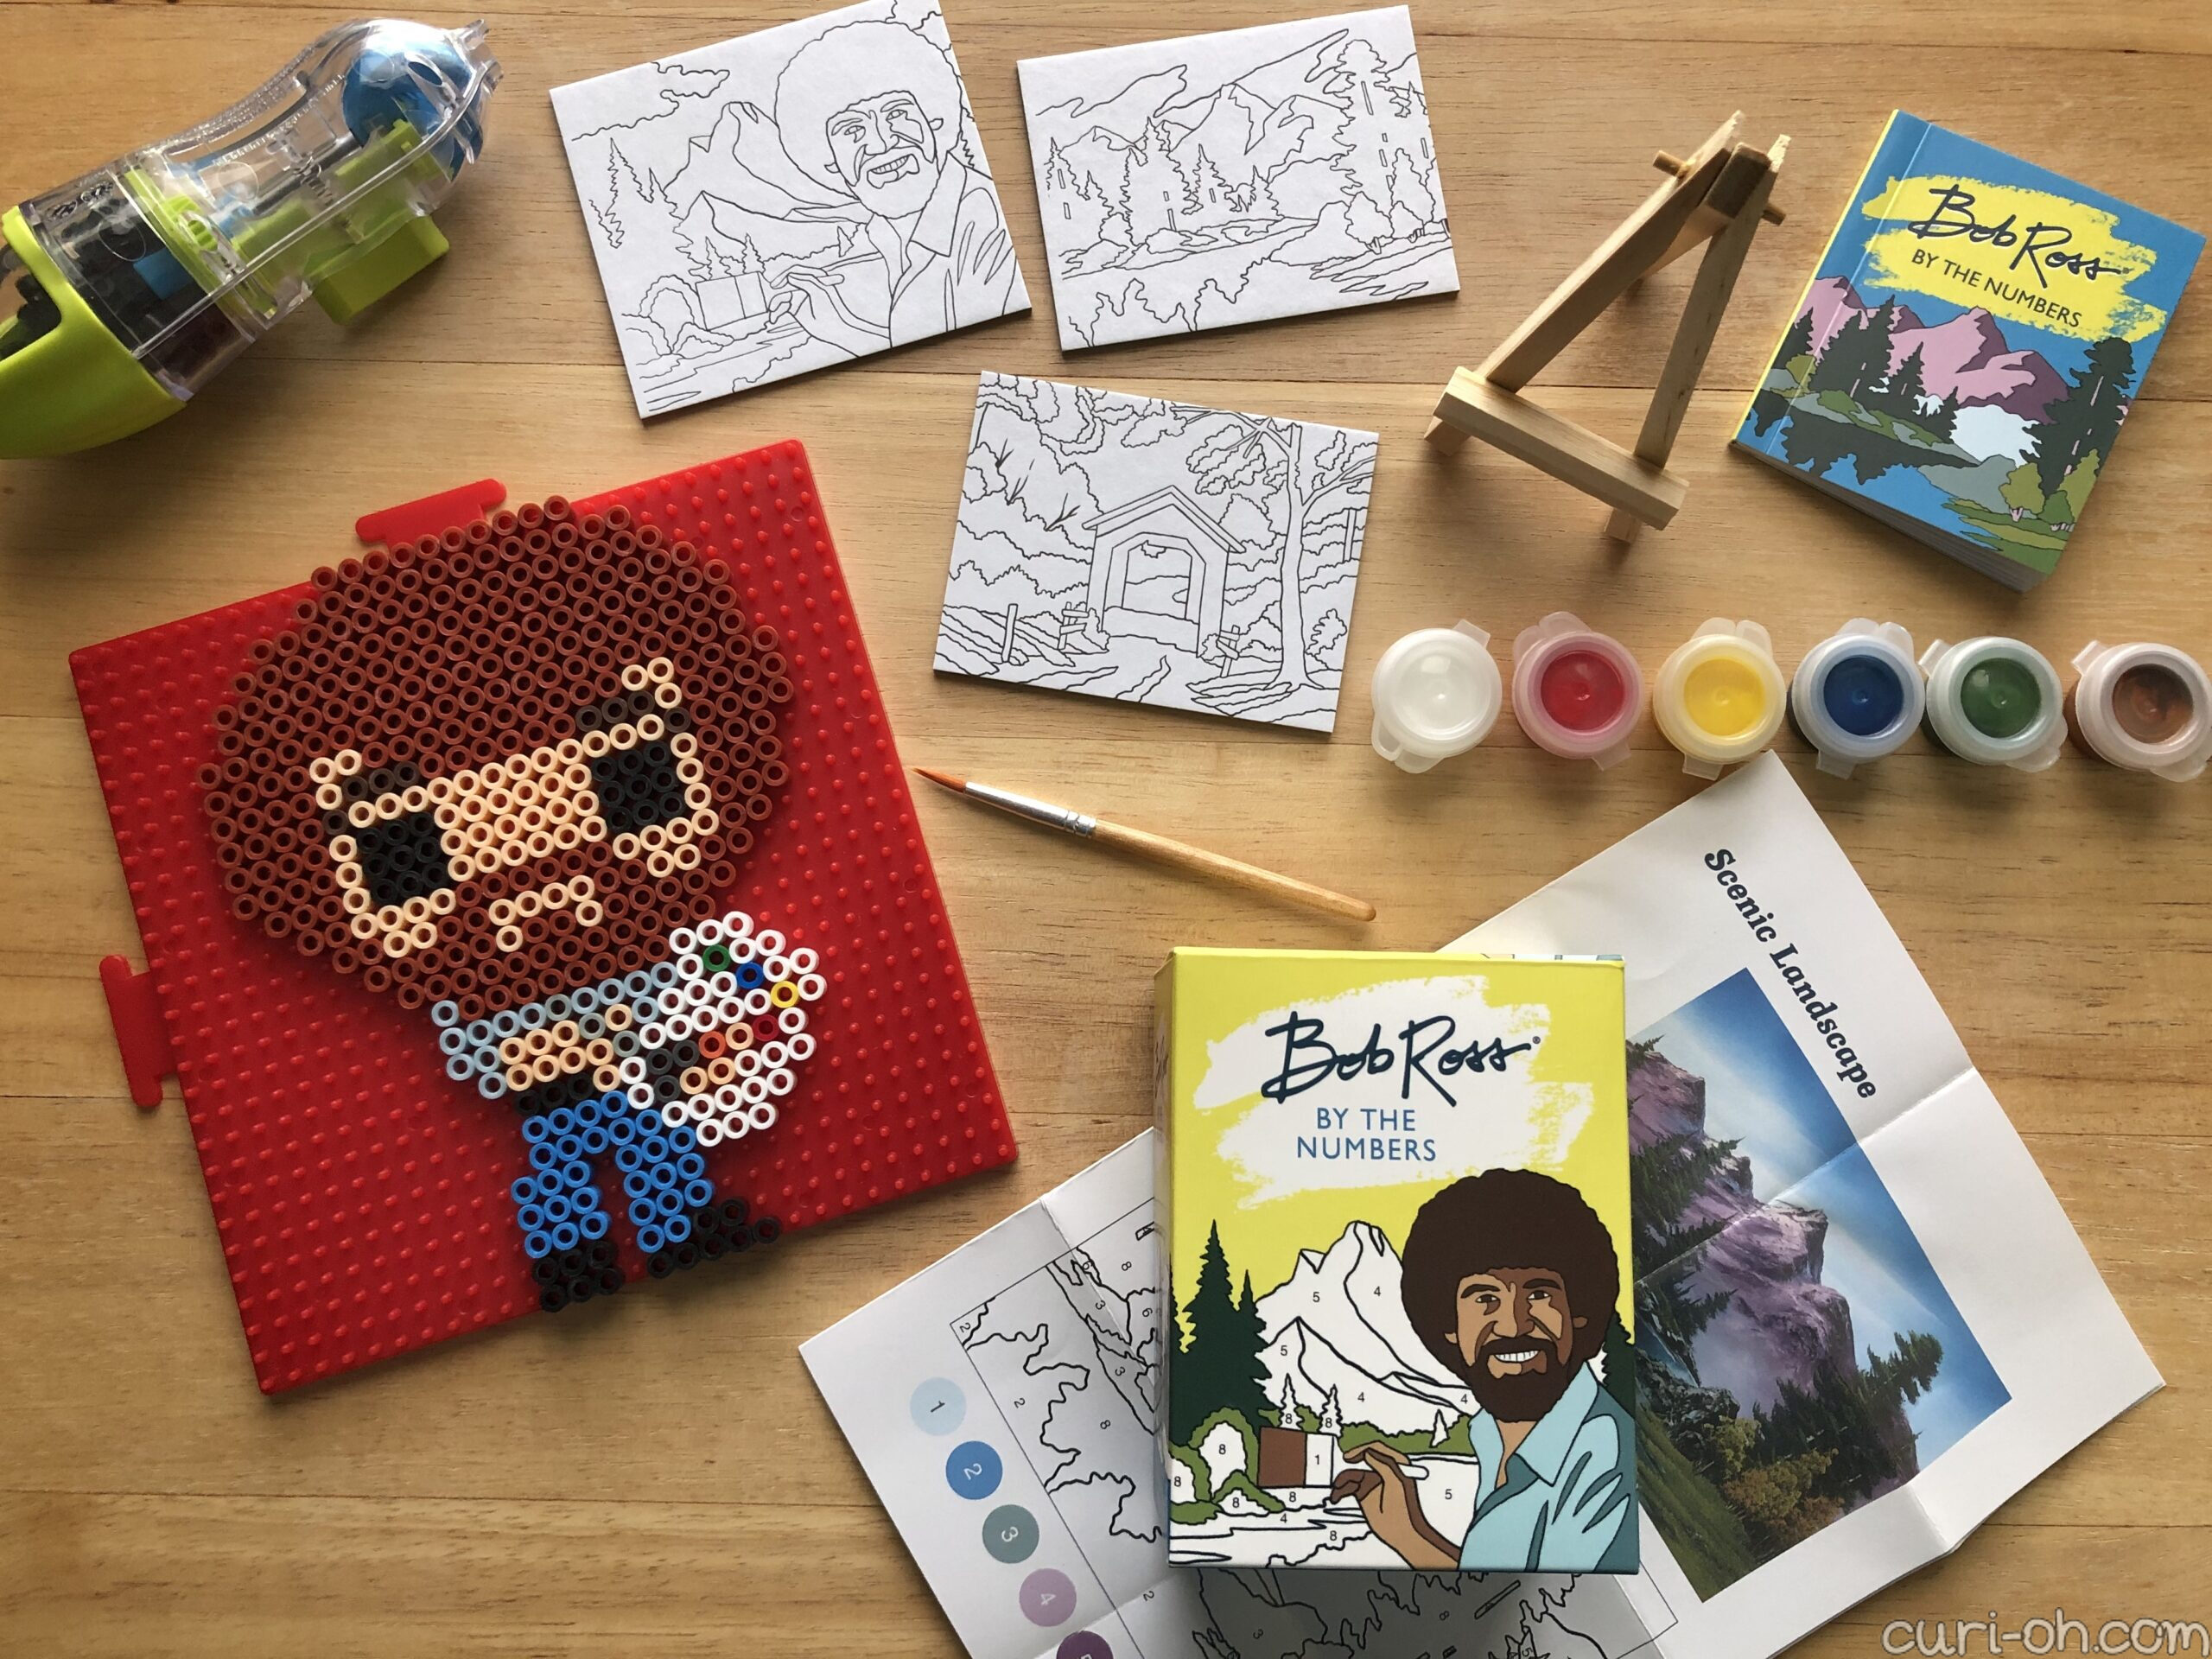
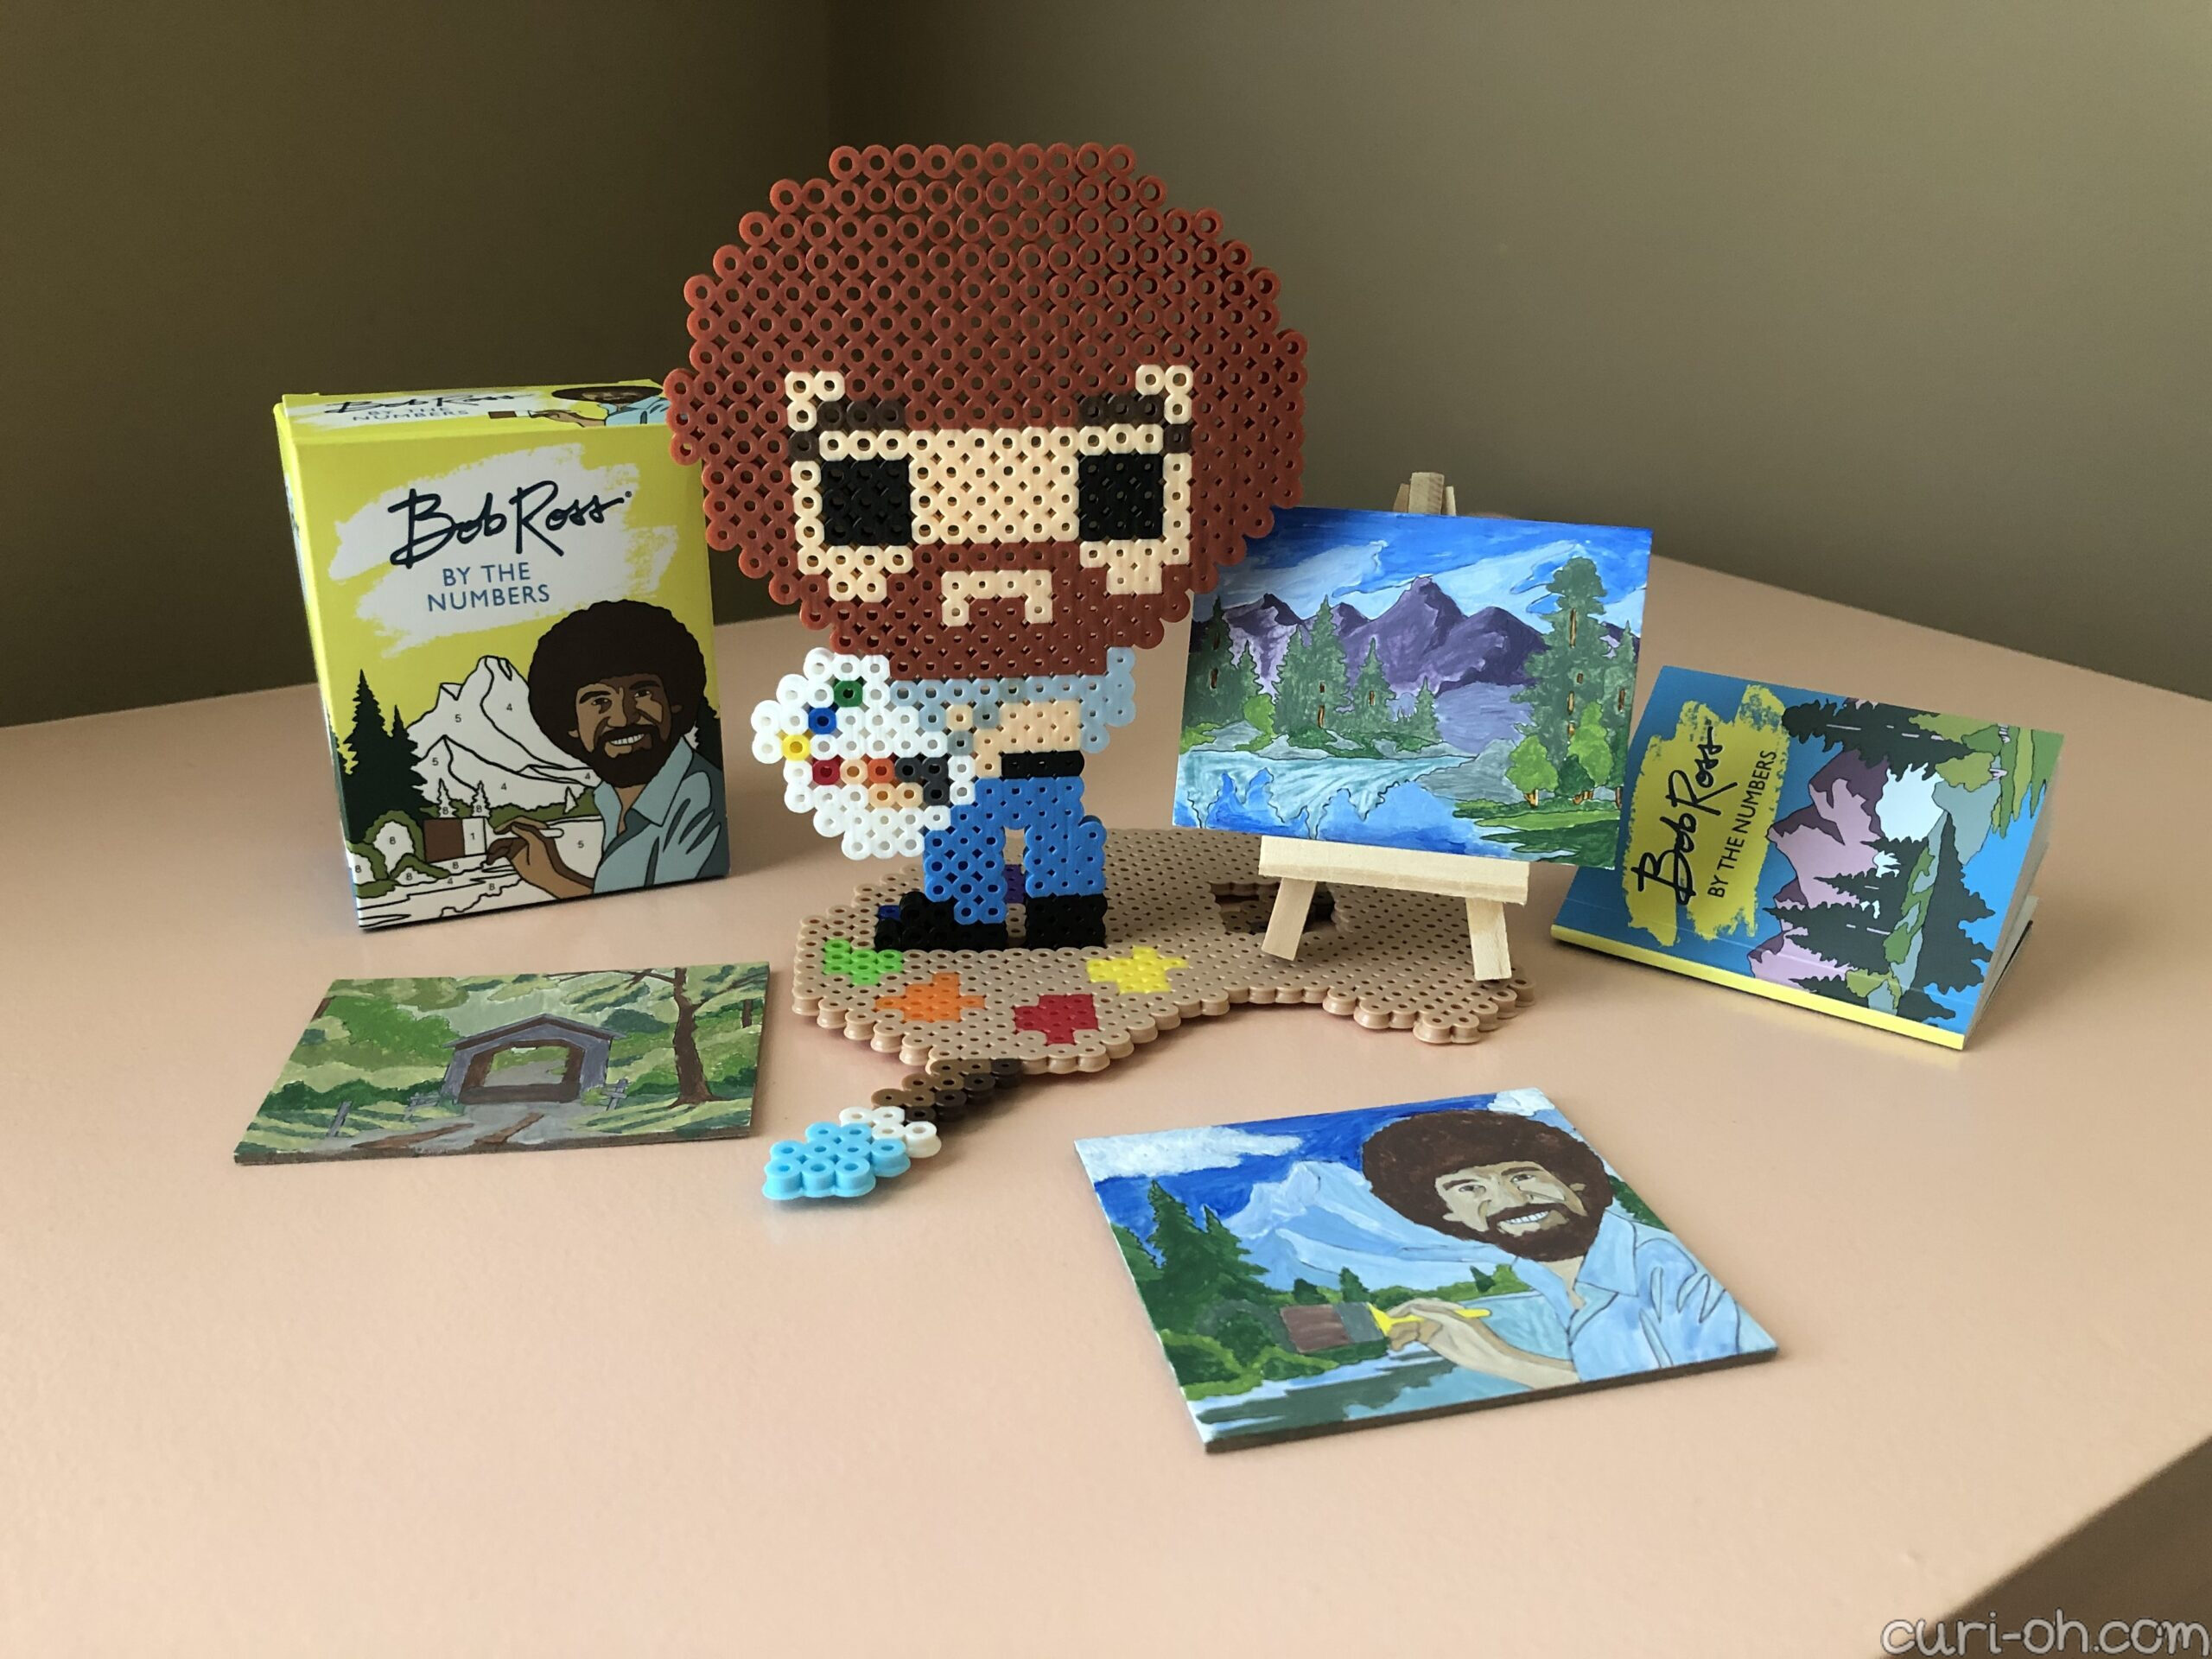
My project began with a stocking stuffer from my sister for Christmas last year – this “Bob Ross by the Numbers” mini paint-by-numbers kit. How adorable is this?! I did enjoy it and would recommend it, but I did supplement with my own paints, and since I was doing that I used my own brush and palette too. I do not know how anyone gets by with just the paints that came with it since you need to mix the colors! Maybe that’s just me though.
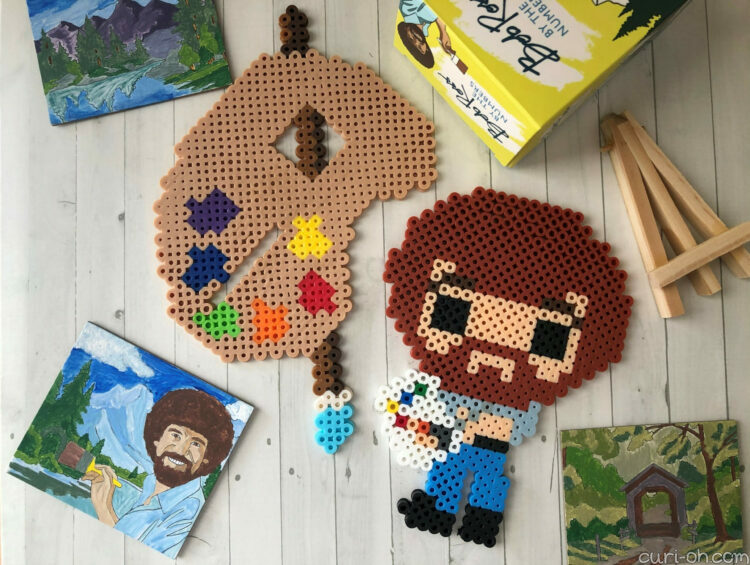
I knew I had to have a Bob figure to go along with the finished product. I remembered the Funko Pop! Bob Ross, which I absolutely adore. The original is my favorite, though there are many versions out there now: one in overalls with a giant painbrush, several different ones with animals, and even one you can paint yourself! However, I have wanted to try making a bead sprite standee for a while, so with Bob as my encouraging muse, this seemed like a good time to try. But first of all, what the heck am I talking about?
What are Perler beads?
If you are not already familiar with these beads, Perler is just one of the more popular brands of fuse beads and is the one which I use. There are many out there including Artkal and Hama, with these three being the most popular among beaders in my experience. Perler is my brand of choice because it is most readily available in my area and it is a reliable, consistent brand that I have had good results with.
Okay, so what are “fuse beads” then?
Fuse beads are small plastic beads you place on a pegboard into the design pattern of your choice. Then, you place a piece of ironing or parchment paper on top of the design and melt the beads with your standard household iron to fuse them together. It really is that simple, but there is, of course, more to it and you can finesse your technique a bit more than that. It is a great medium for creating “pixelated” designs though so it is popular for geeky/nerdy fan art in its many flavors.
Gotcha, but what is a “bead sprite”?
Just a community term for the little figures you make with fuse beads!
If you are interested in learning more, I recommend checking out the resources below:
- Perler.com to get you started with basic information and how-tos, as well as some beginner projects.
- The reddit “beadsprites” community.
- The “Pixel Art Shop” YouTube channel has a lot of great instructional videos for beginners.
- QDCrafts, another YouTube channel, for some wonderfully unique project ideas.
Obviously the design of Bob here is inspired by the Funko version, but I made mine based on this pattern at Brik.co. Their inspiration gallery is a wonderful resource for fuse bead patterns! They sell clip-on cases for laptops which can be customized with 1×1 bricks. Such a fun idea and again, a great medium for pixelated designs, so the patterns there will work for fuse bead designs. I have also used cross-stitch patterns for fuse beads before too!
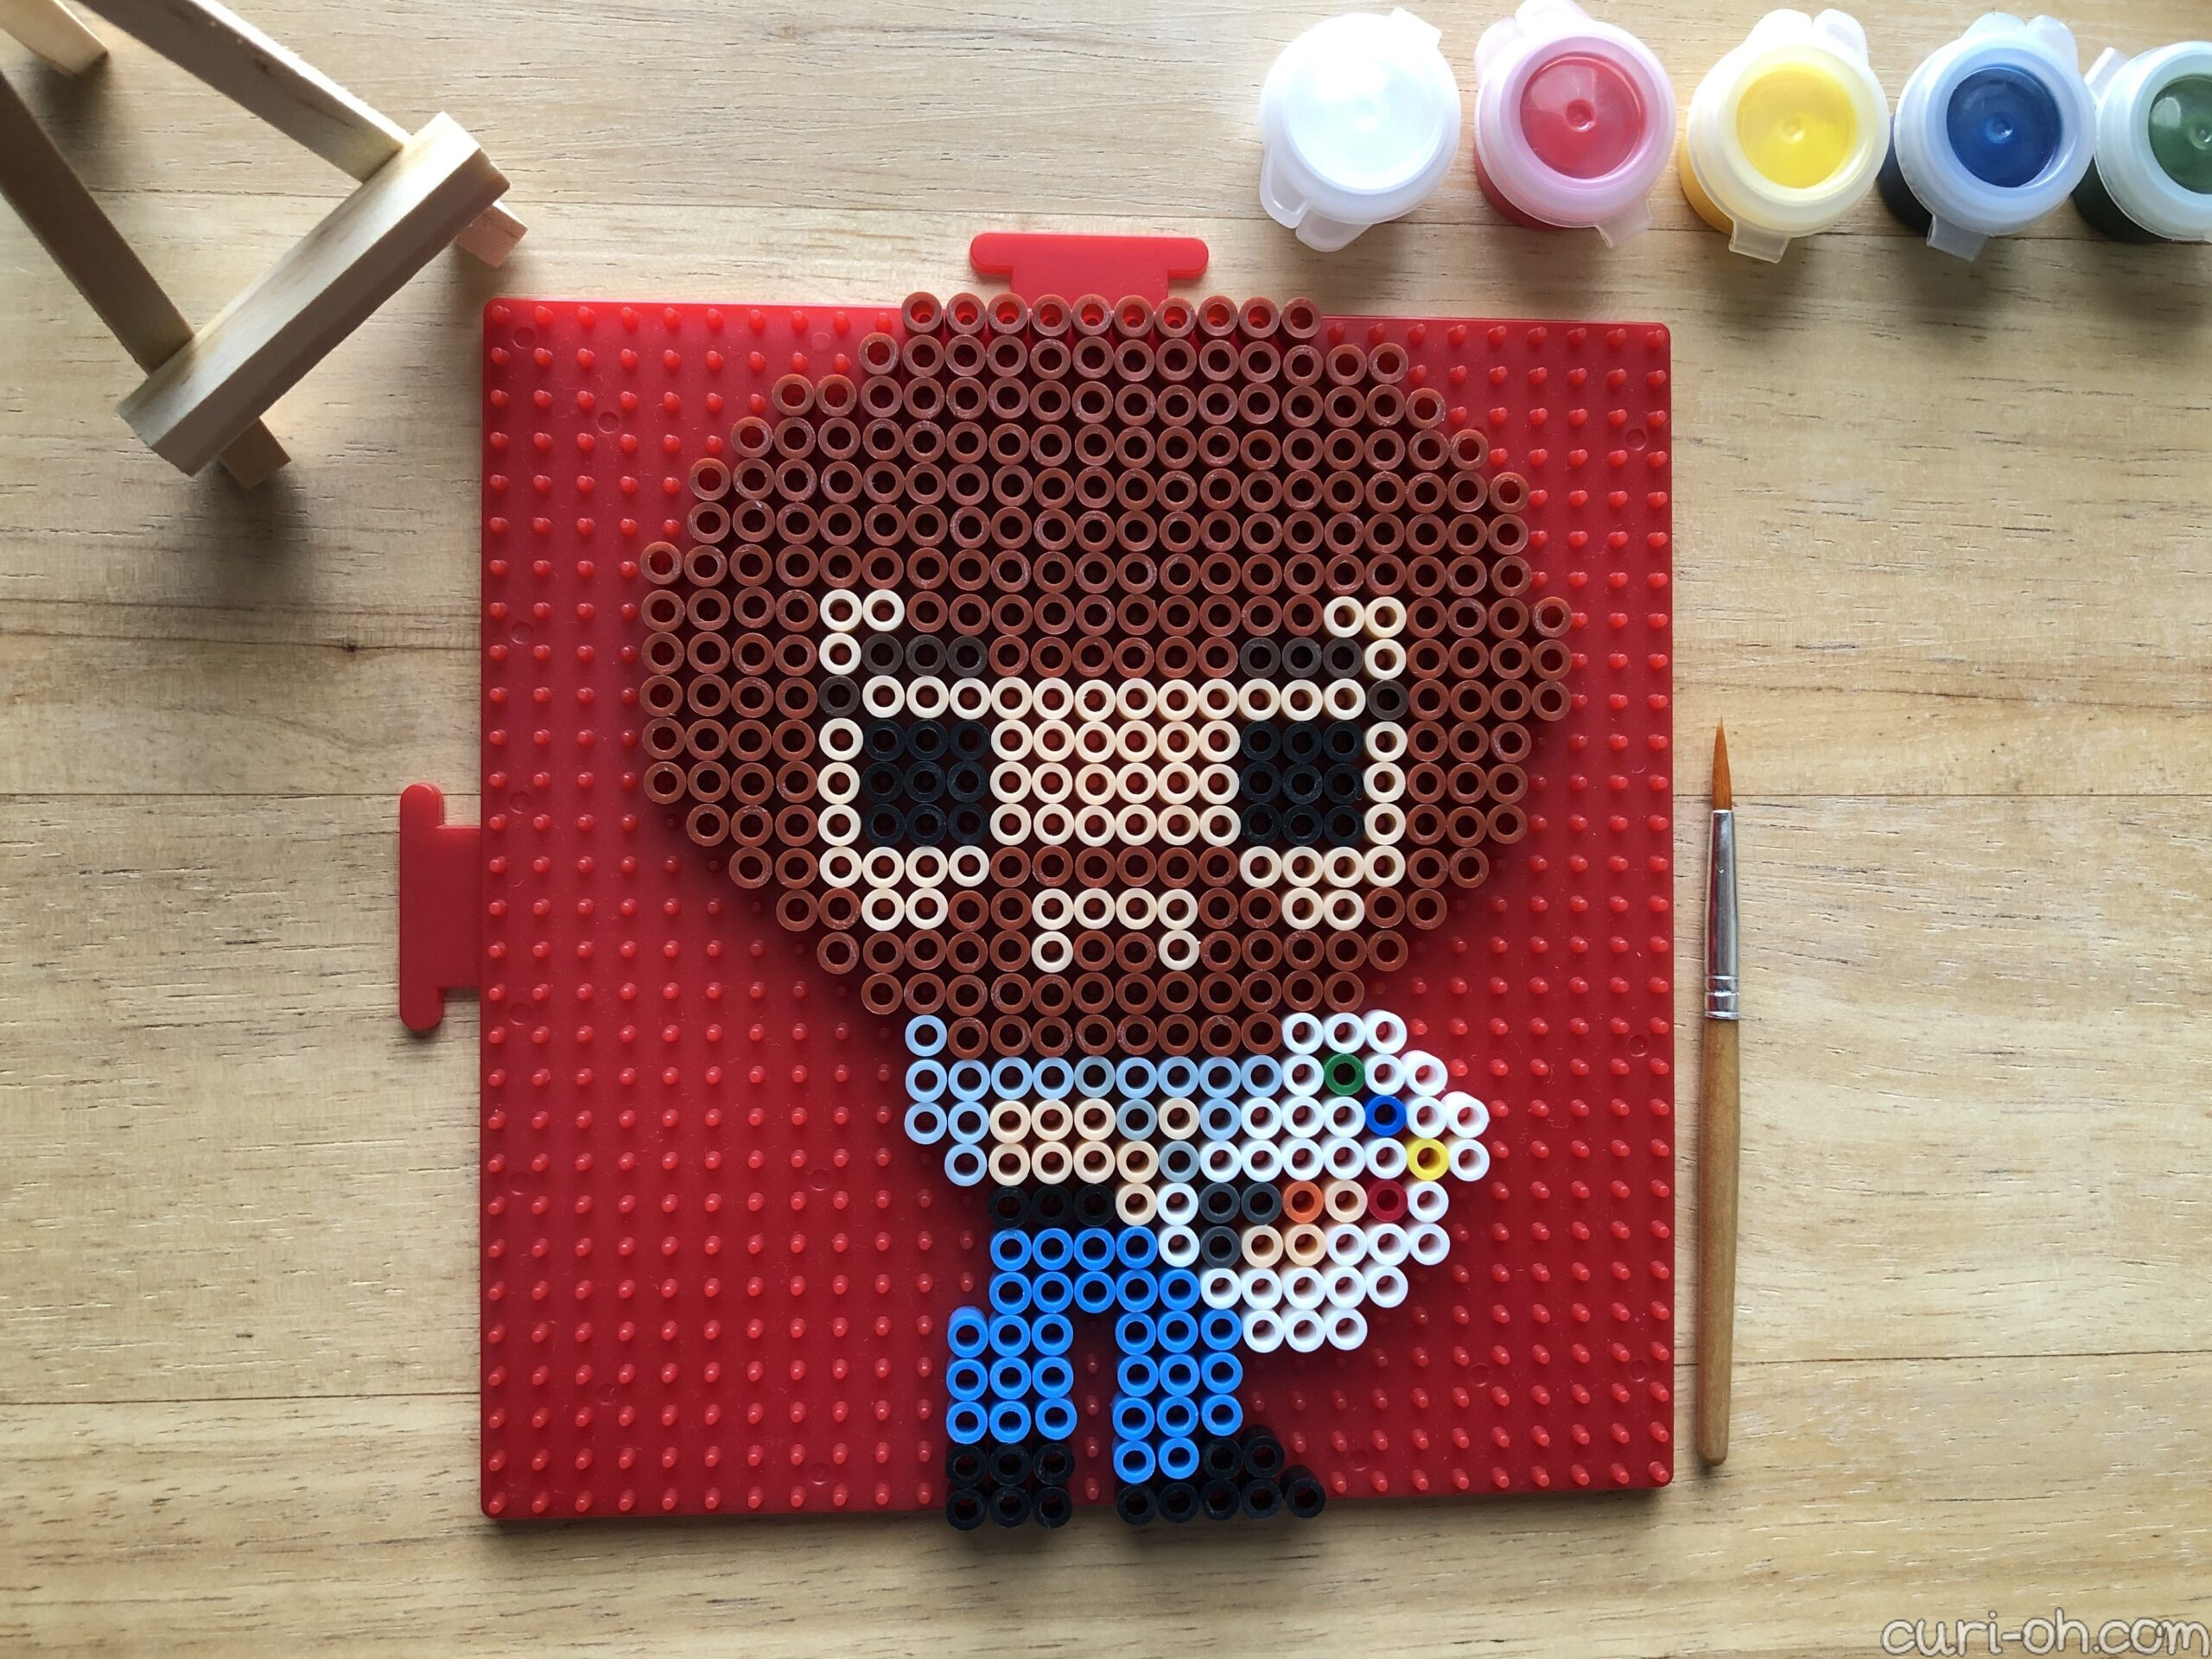
I customized the colors to my liking and added the extra layer at the bottom needed for a standee. In order to make a bead sprite stand into a base, you have to add that extra layer of beads at the bottom to insert into the base so you won’t lose any of your design. The design as is fits on one Perler pegboard, but that is without the added standee layer! I had to iron that on separately, so you would need to do that as well or use two boards.
With some trial and error, I found that an extra four along the out-turned (longer) foot (so, one less) and an extra three along the front-facing (shorter) foot (so, the same amount) to work best, as you can see in the header picture. In the picture below you can see an earlier version where I had the whole row across the bottom, but it did not work as well for me.
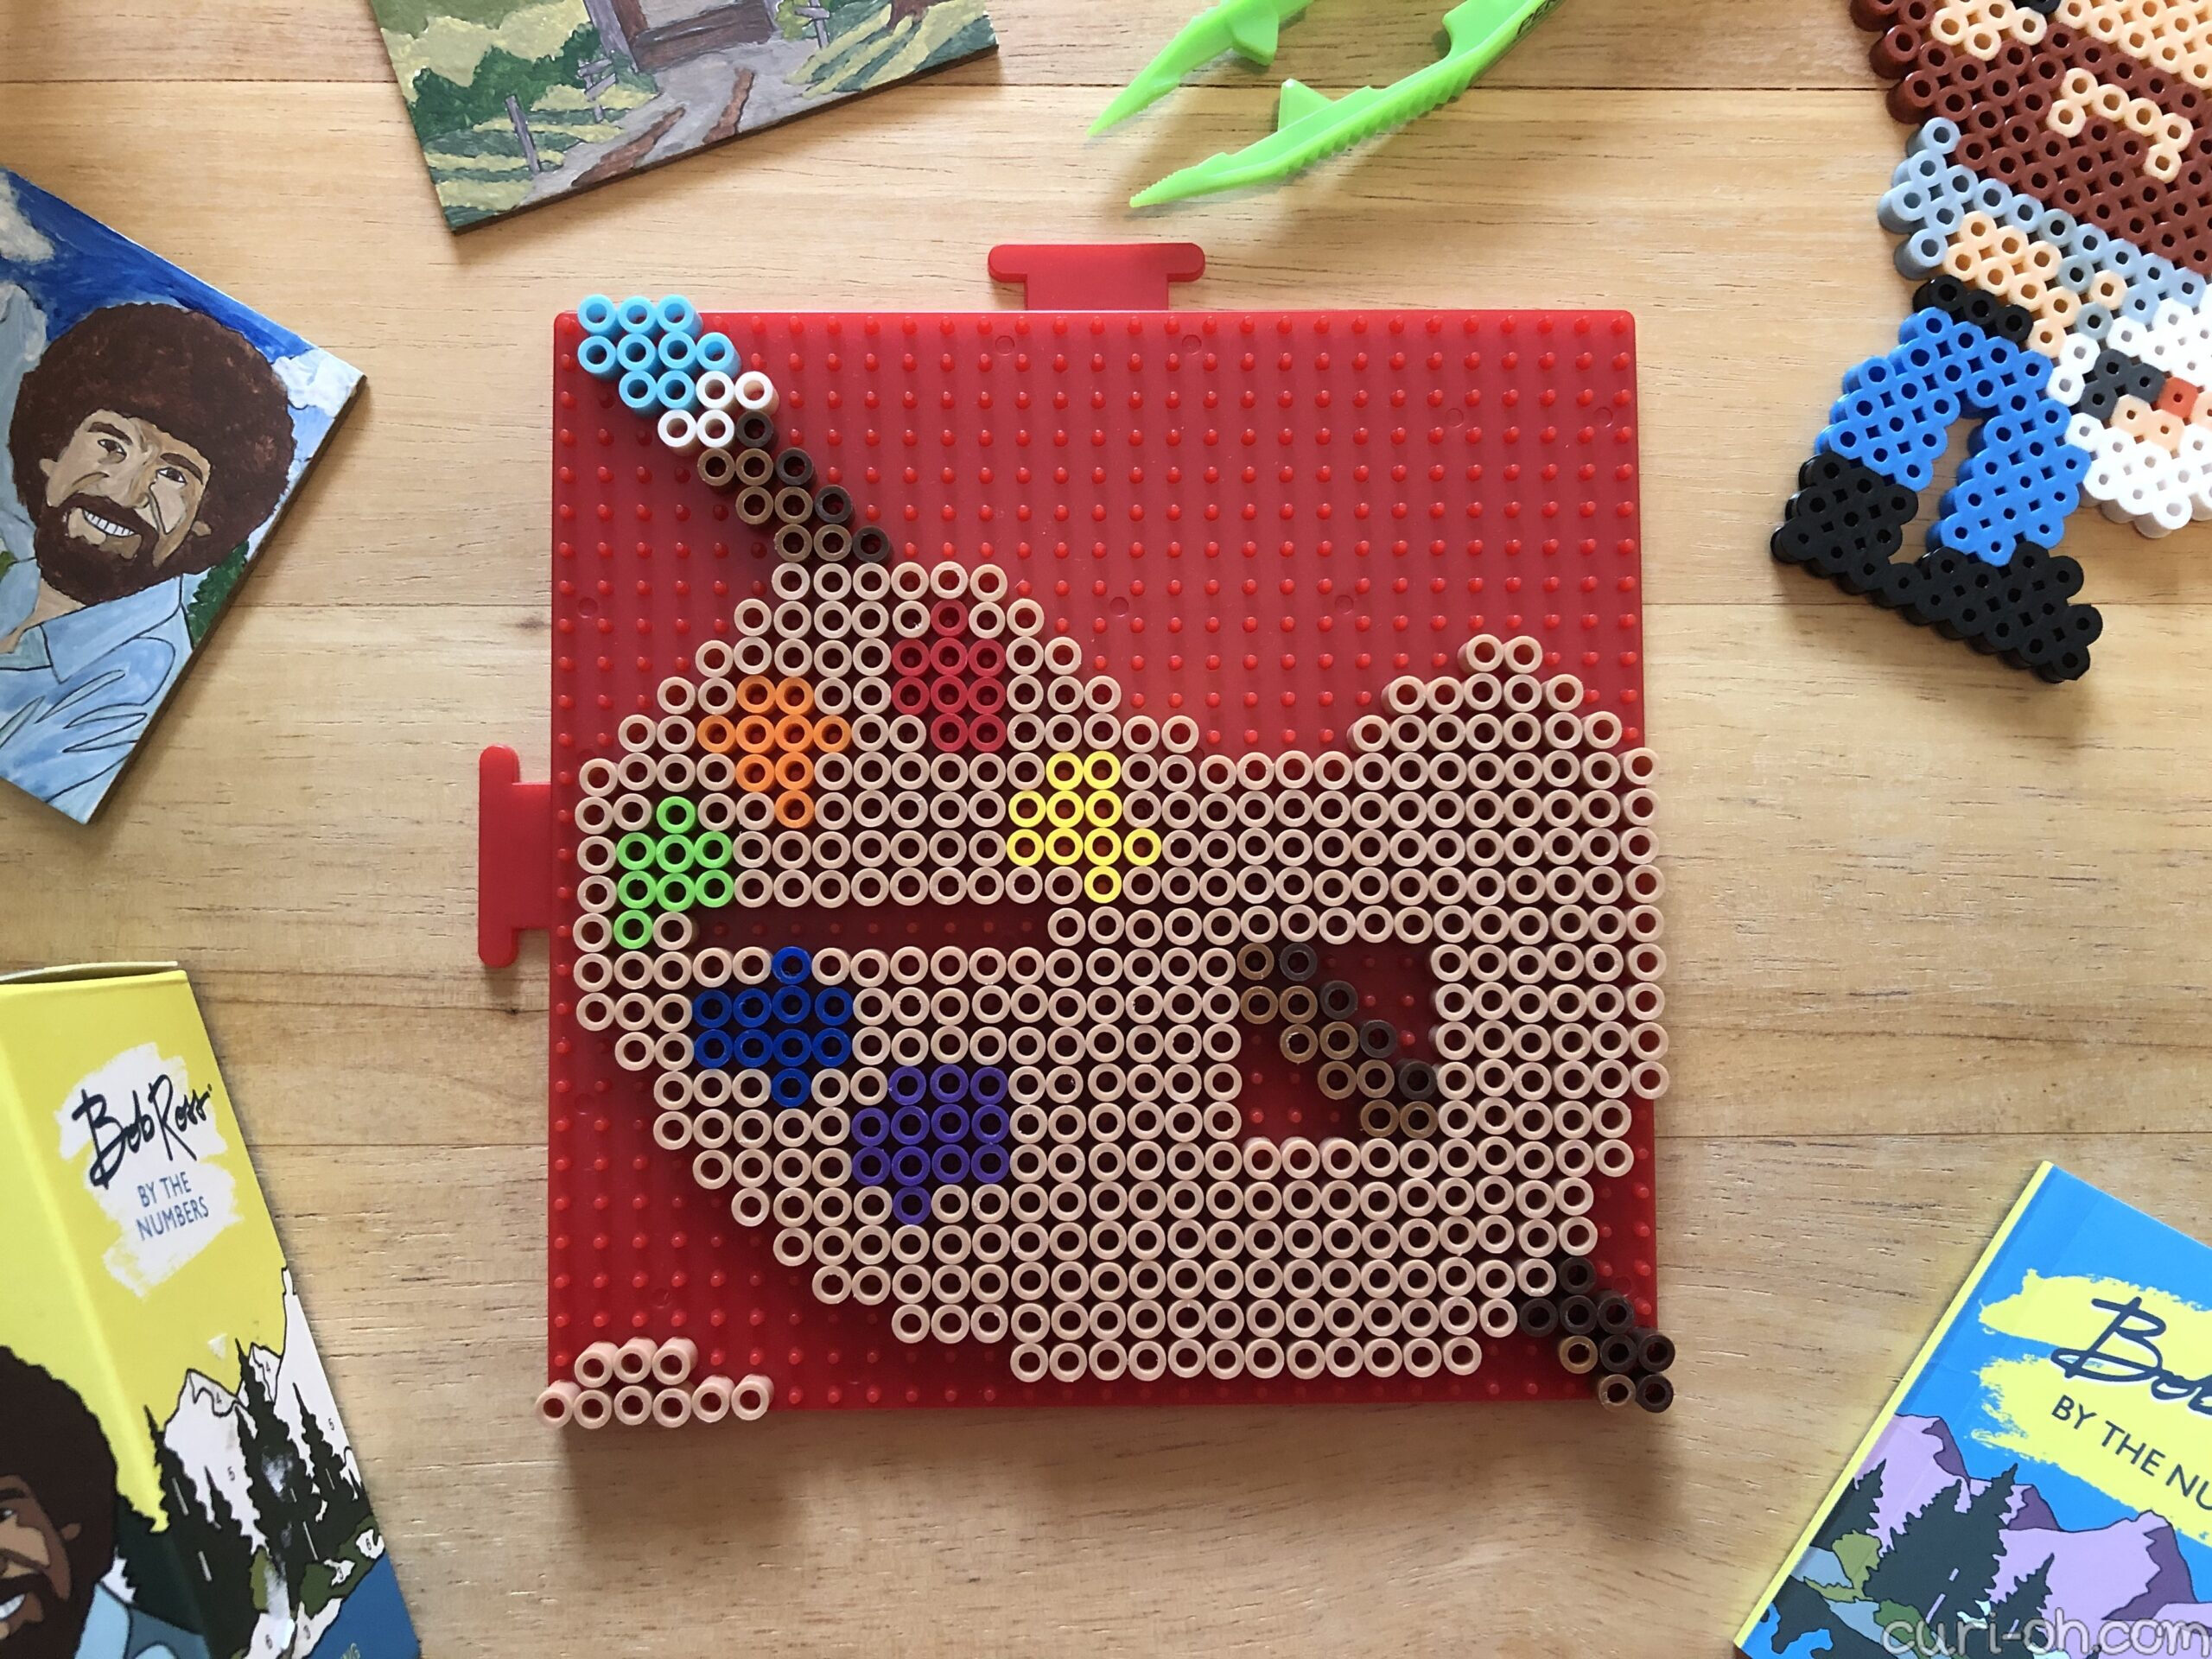
Some beaders like to make their stands one-for-one. For instance, if the extra tab you make on your sprite has five beads, then you would leave a slot in the base for five beads. Other beaders like to allow one extra slot in the base. So if the bead sprite has five beads, you would leave a slot of six empty spaces in the base. The reason for this is that the beads flatten a bit as you melt them, so this gives a bit of wiggle room to accommodate for that. I followed the second method and I believe having the one extra bead extending onto the platform of the stand (the pointed tip of his foot) helps stabilize him.
As for the standee base, I chose a paint palette. The guide I followed in making my stand indicated that it was best for the base to be as large as the standee for balance. I did not want a generic neutral circle since he is so large, so a paint palette seemed the most fitting choice. Thankfully the size allowed me to place the easel from the kit alongside him.
Anyway so there it is! If you would like to make your own I hope this helps you through it. I know you can do it! In case you need some encouragement, I’ll leave you with a happy little link to some of Bob’s best quotes.
This is so fun… I hope you do more of these!
Thanks CA! I made a Sonic the Hedgehog which I gave to my husband a while back. I may turn it into a standee.