Repurposing a Thrifted Mirror into a Memo Board
A few years ago, I got this gorgeous mirror secondhand at a church rummage sale. I saw it in the advertisement for the event and decided my life would not be complete without it. I woke at a ridiculous hour, drove in the complete dark, and stood in line in the freezing cold to be one of the first in the door for the mere chance that I would be the one to bring it home.

Success! I was surprised at my luck, but $30 and I was out the door. Well, then I was back in the door because they had a lot of other cool stuff too.
Then there I was though with this gaudy, feminine, over-the-top mirror and what was I to do with it? It was far too elegant for my house as general home decor. However my office is fair game for me to chase any wild fancy I please – and I very much do! I did not need a mirror there, but I did need a memo board.
Don’t ask me why this style is called a “French” memo board, but that is what you need to search for online if you want to find this type of the ribboned variety.
What you will need for this project will vary depending on what you want and on the specific construction of your individual mirror, but I will share the steps and materials involved with mine.
WHAT I USED:
- Mirror frame and backing
- Batting
- Fabric
- Ribbon
- Brads
- Decoration for brad heads
- Glue
- Staples, staple gun, and staple remover
- Screwdriver, hammer, and scratch awl
- Iron
- Tape
- A large block of leftover styrofoam packing material
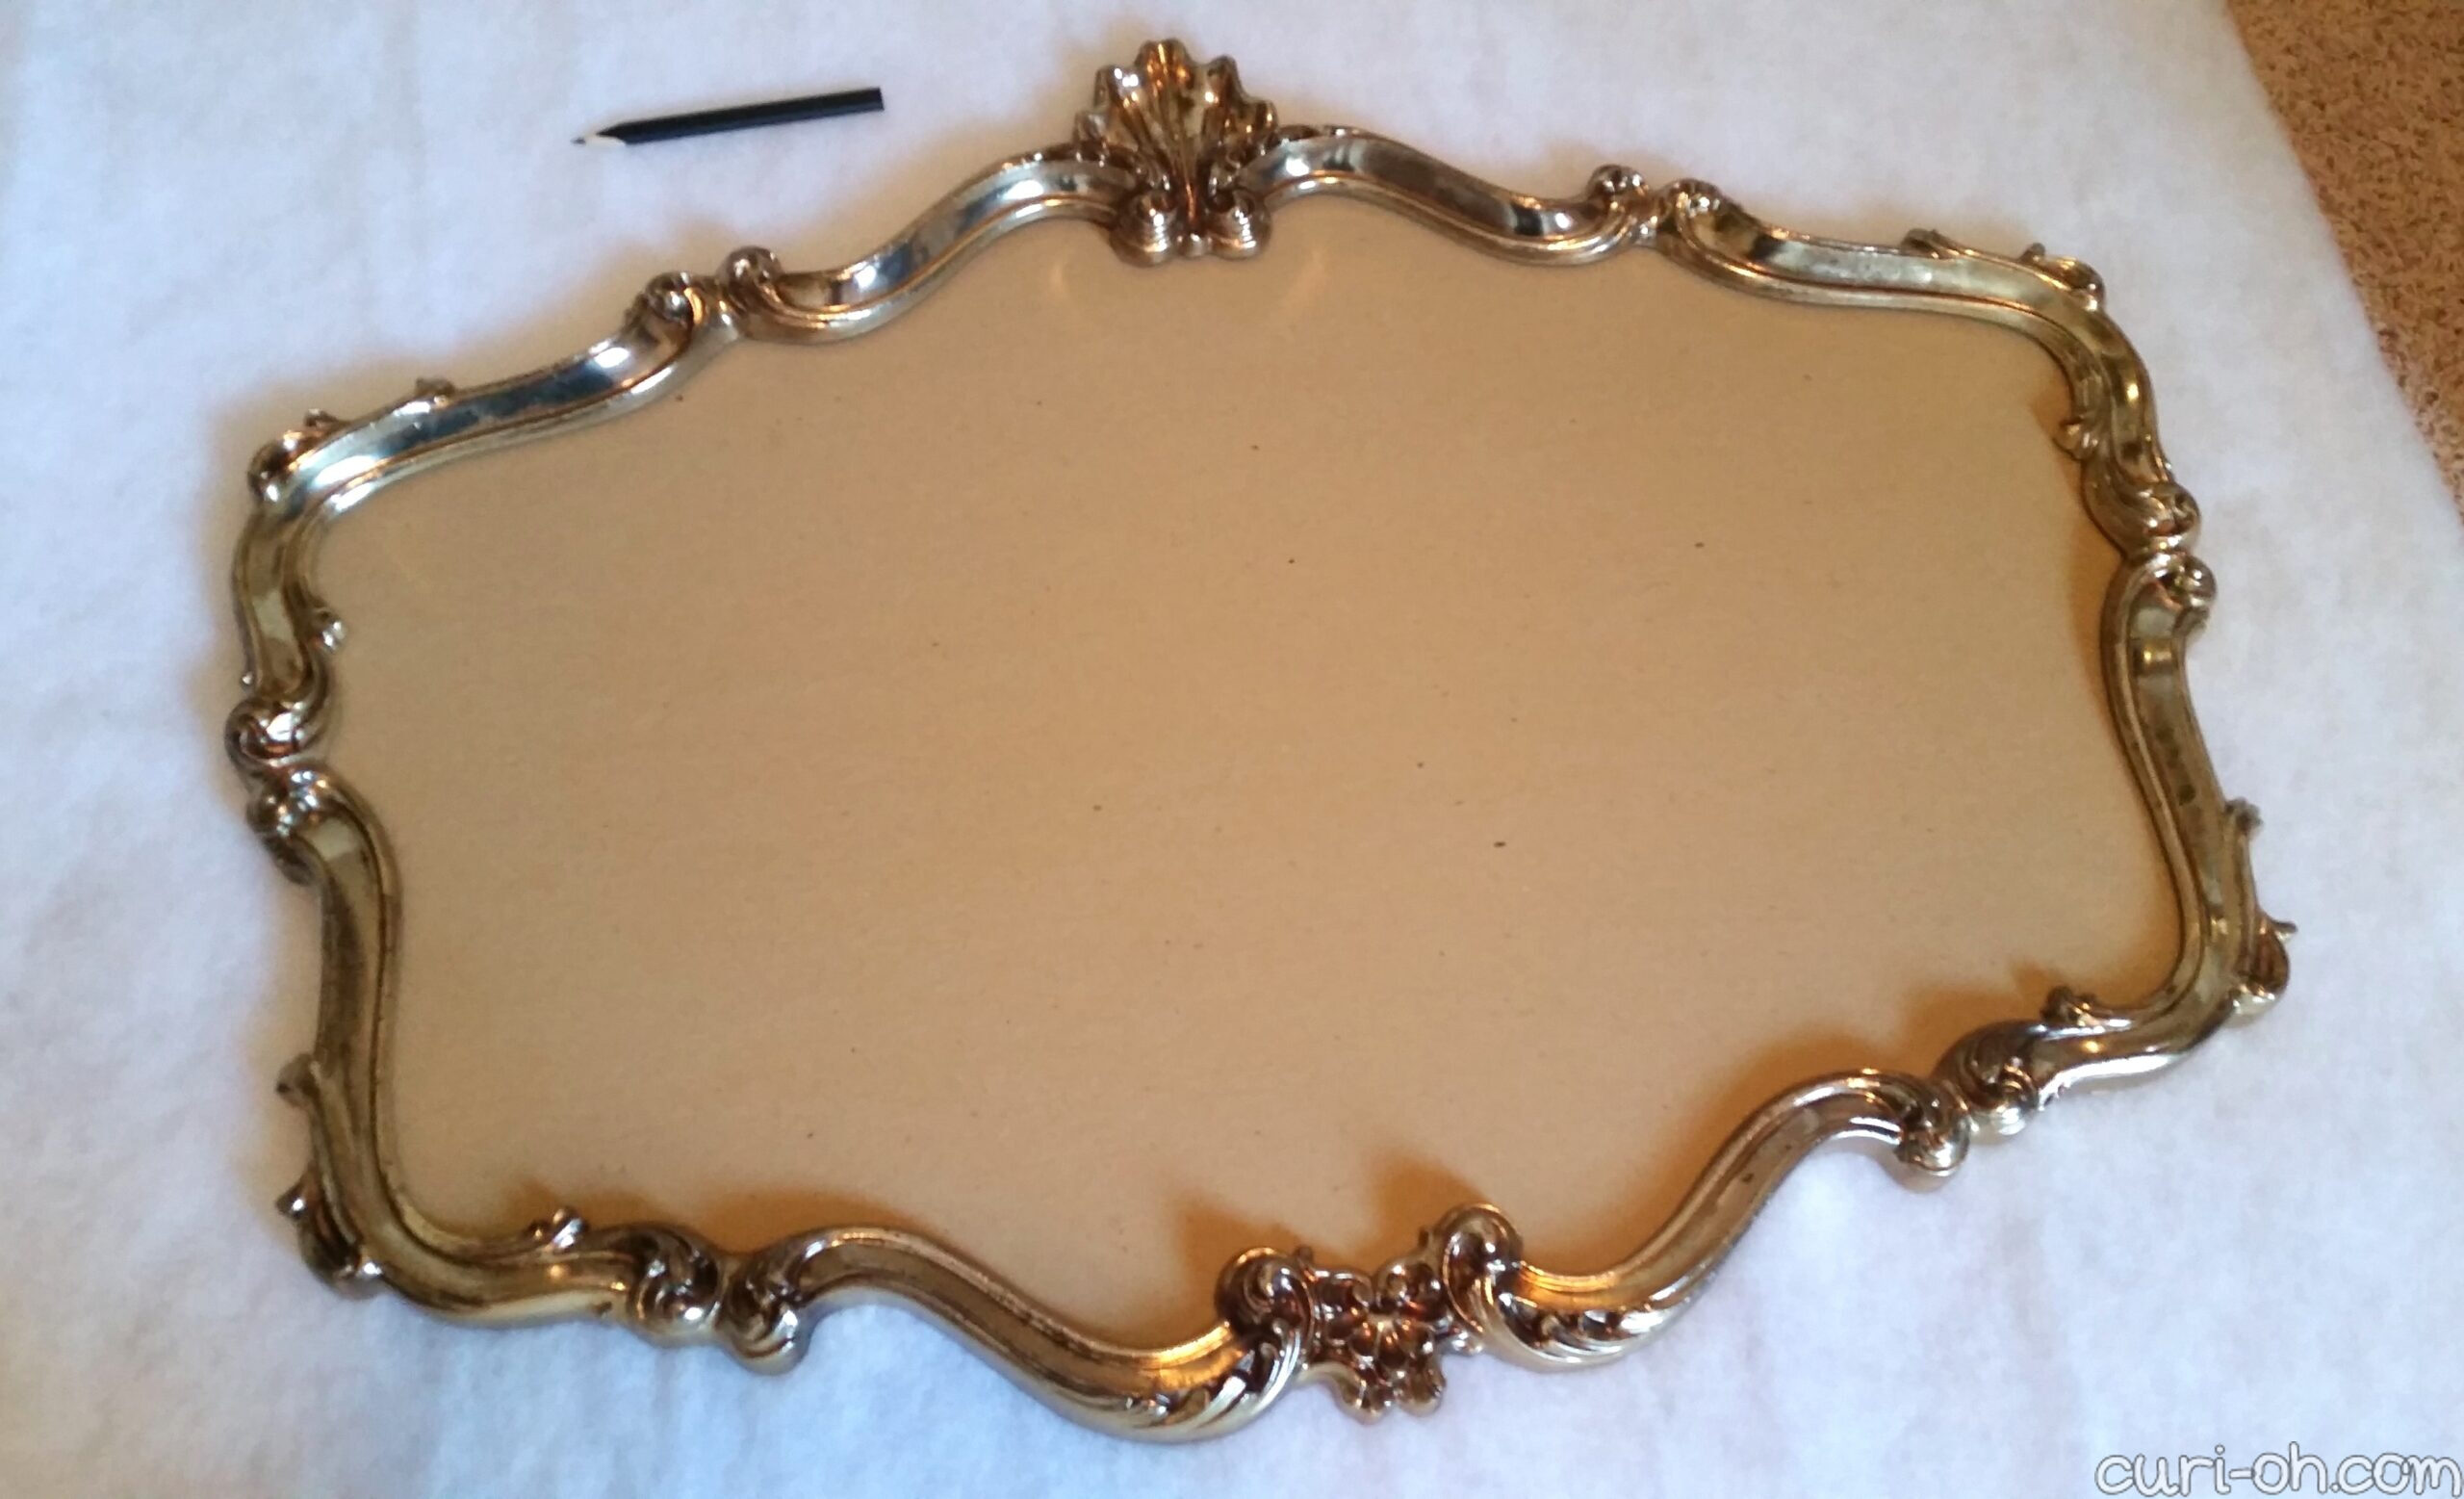
This project was certainly a learning experience and it evolved as I went. I started by removing all the screws and deconstructing the mirror. This left me with the frame, mirror glass, and mirror backing which is possibly fiberboard? I ended up selling the glass itself at a garage sale later.
The mirror edges can be sharp, be careful!
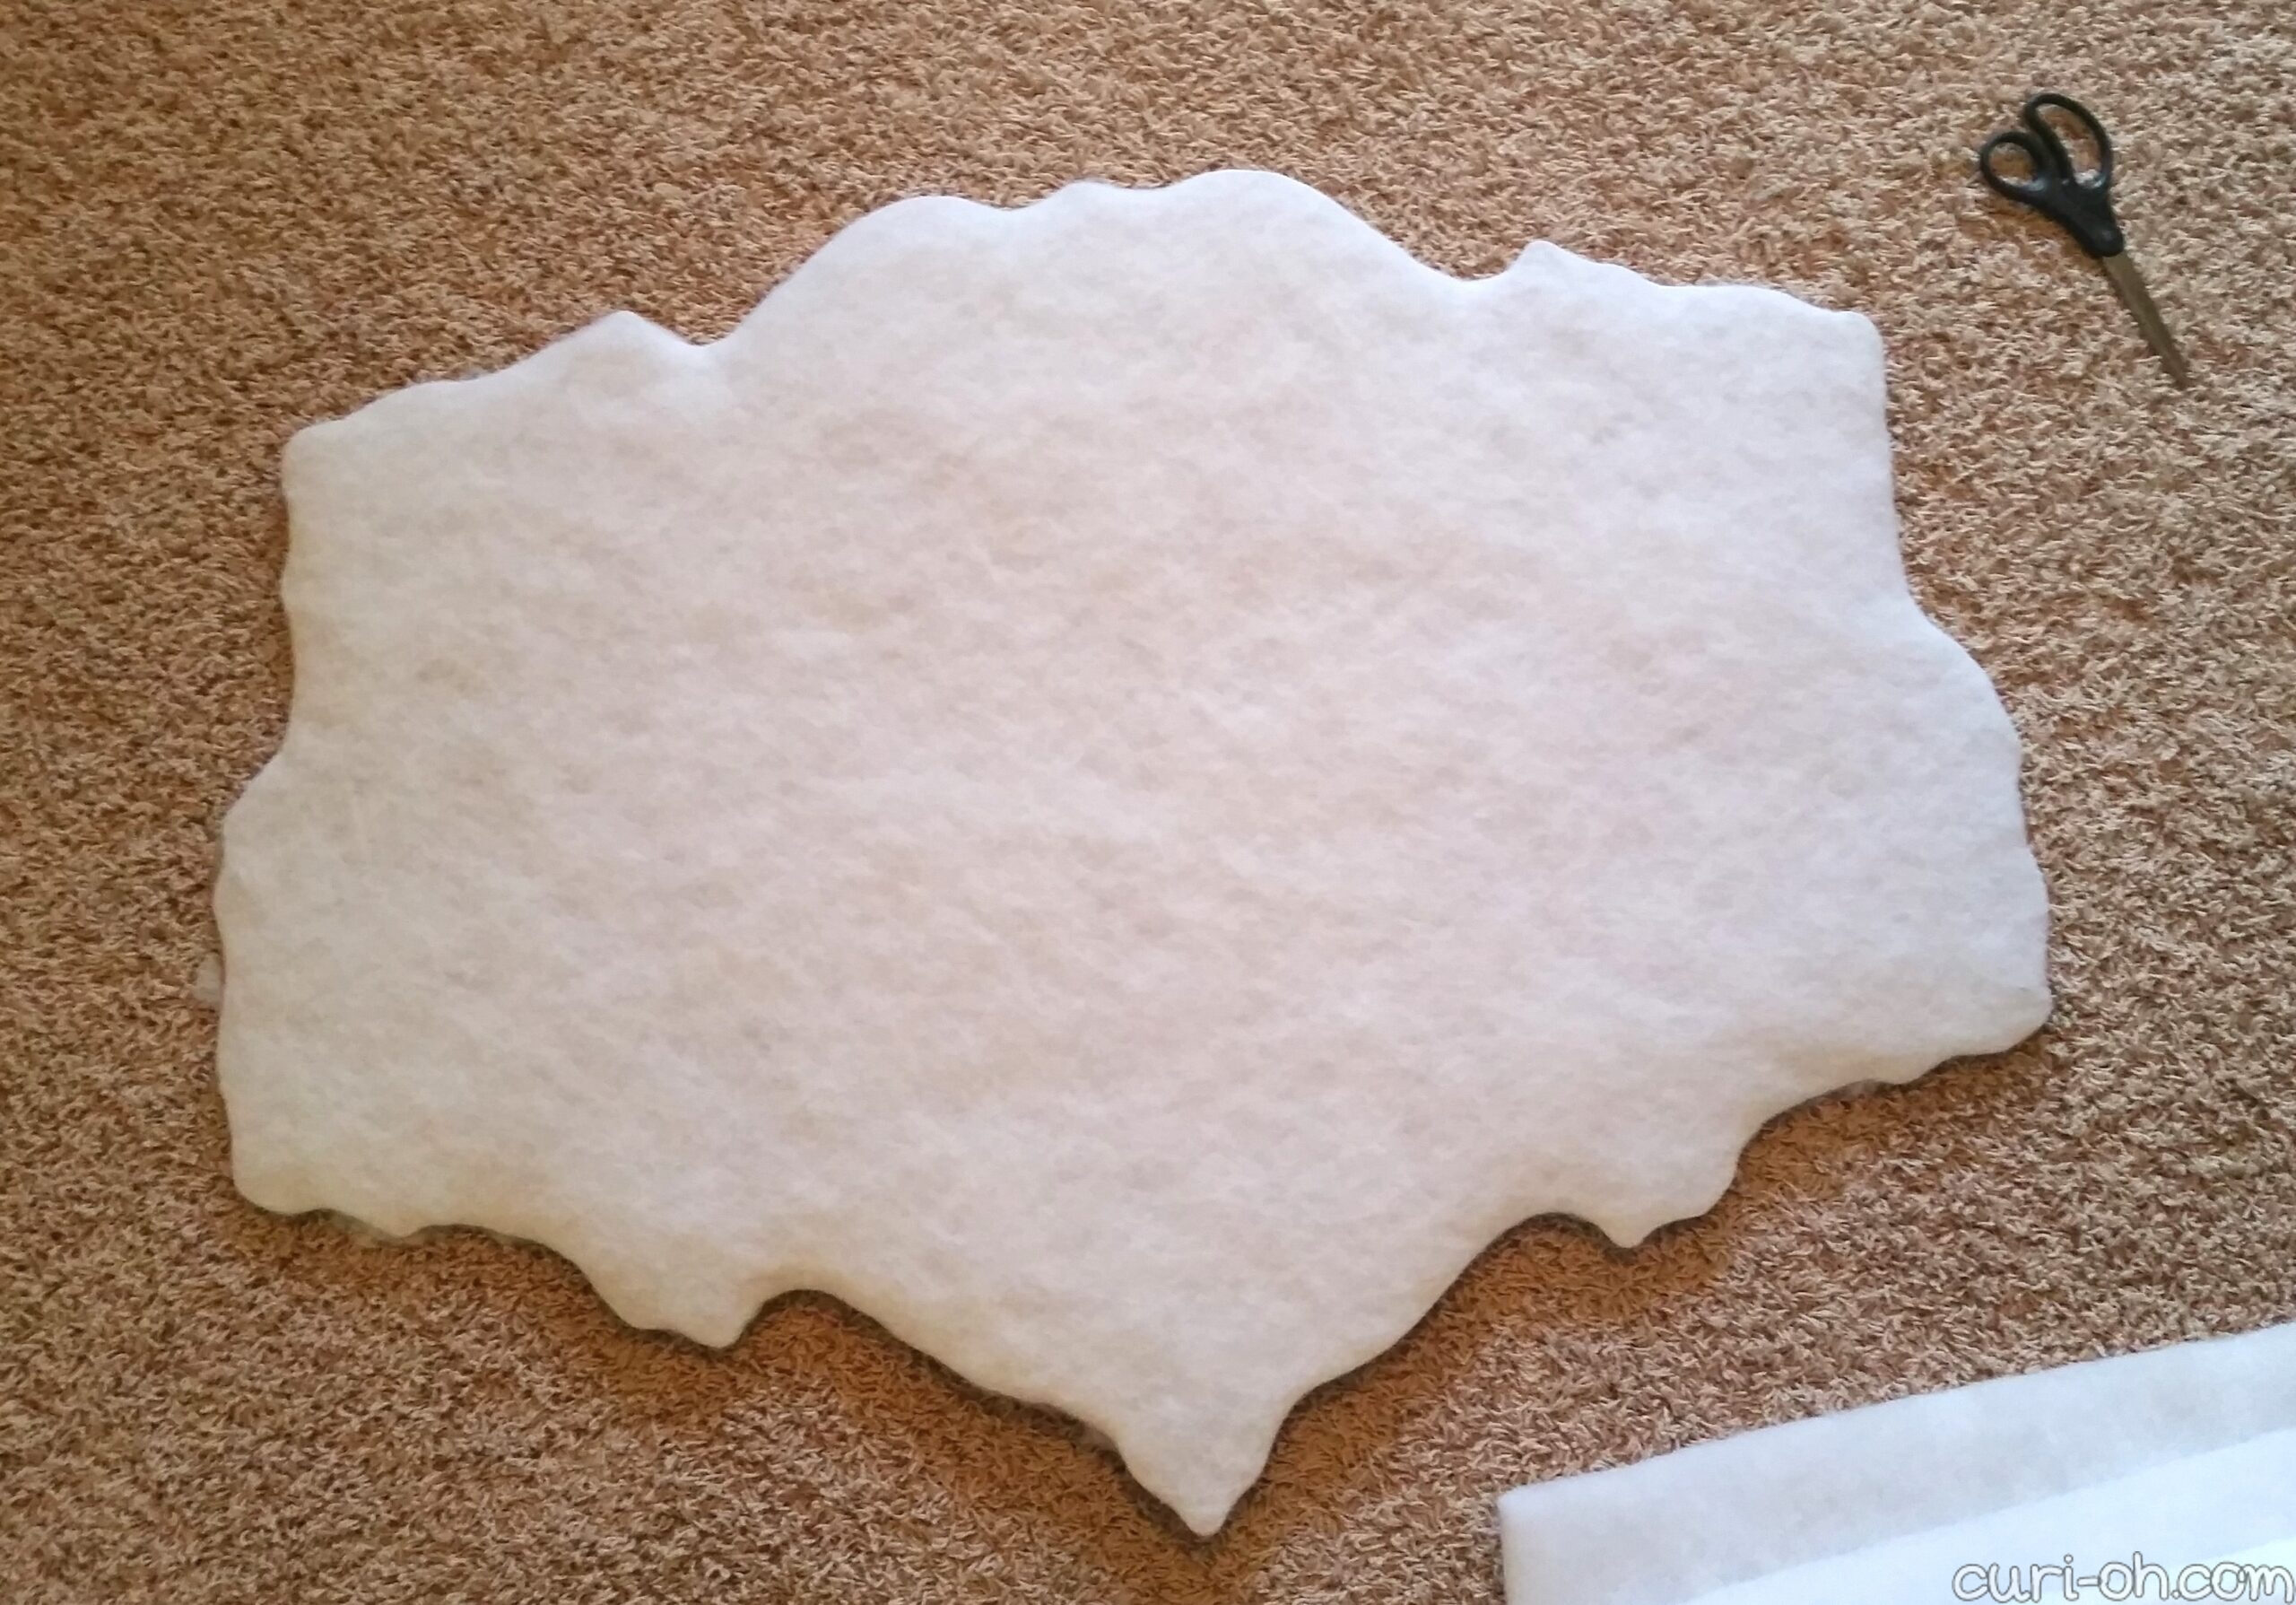
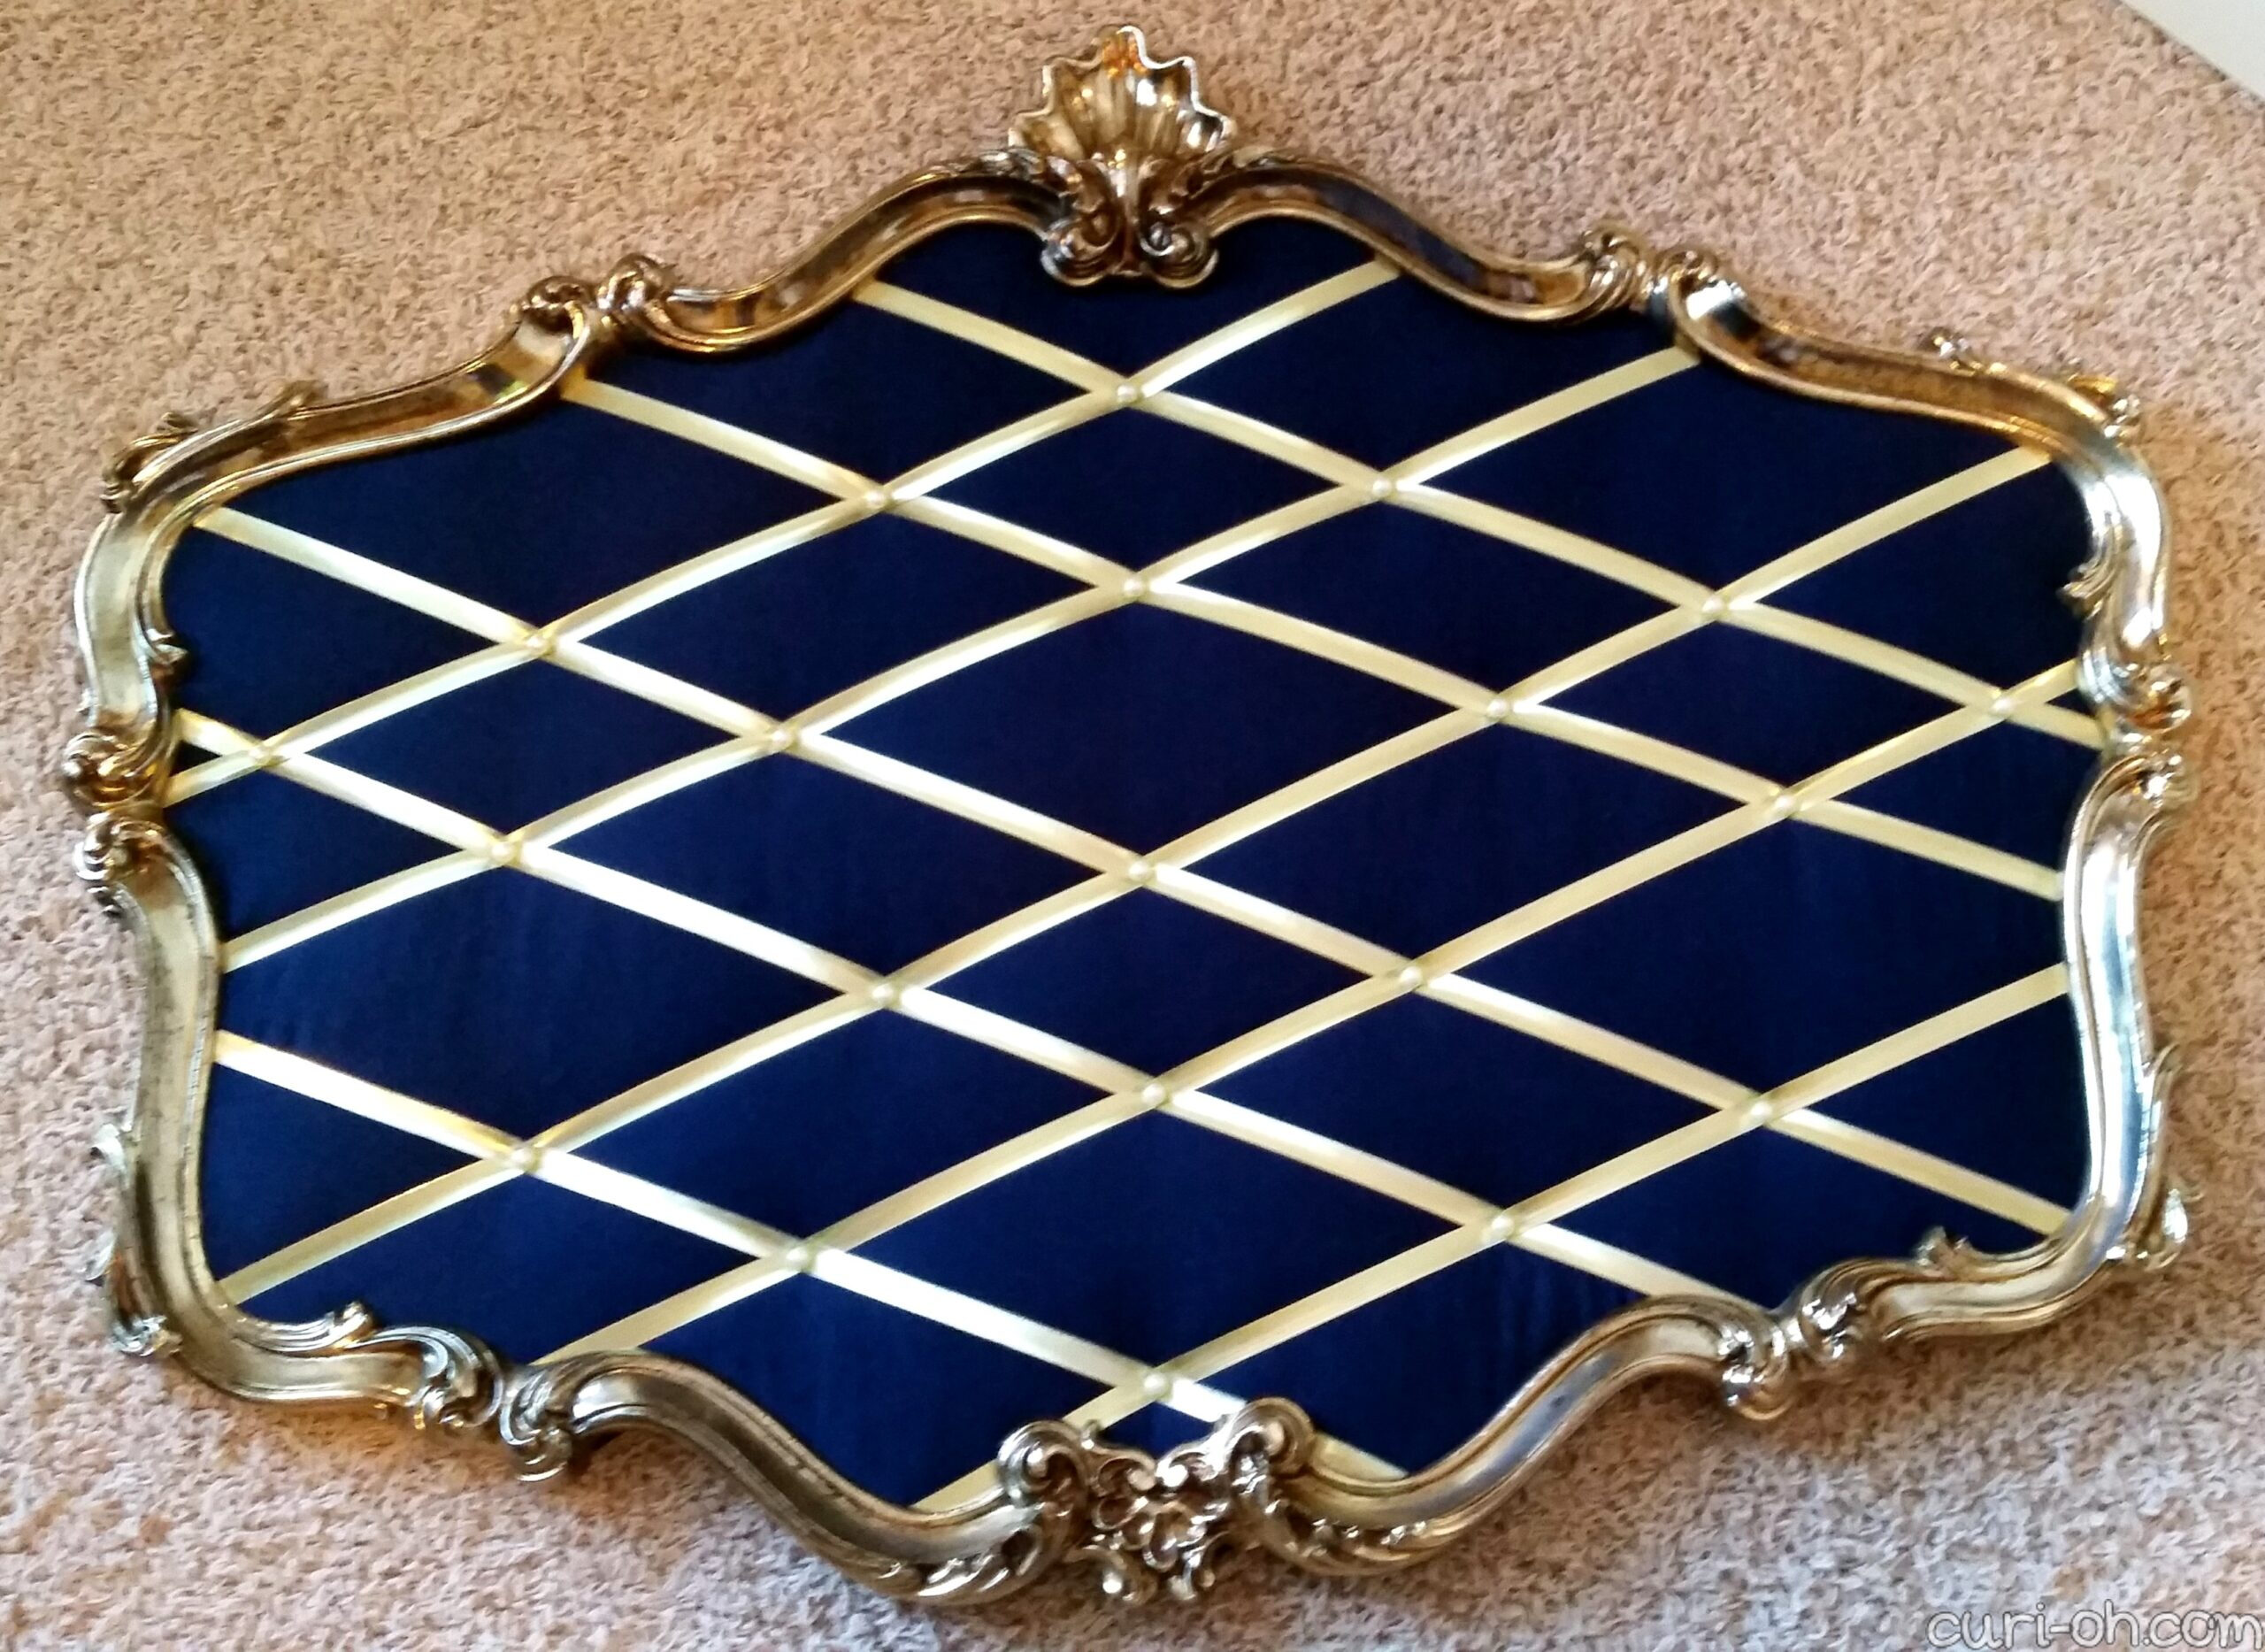
I covered the backing board with two layers of quilt batting – since I wanted mine to be super plush – using the staple gun and keeping it taut.
I washed my fabric and ironed it first to ensure no wrinkles or seams. I then covered the board with the fabric, using the staple gun again and keeping it taut as before.
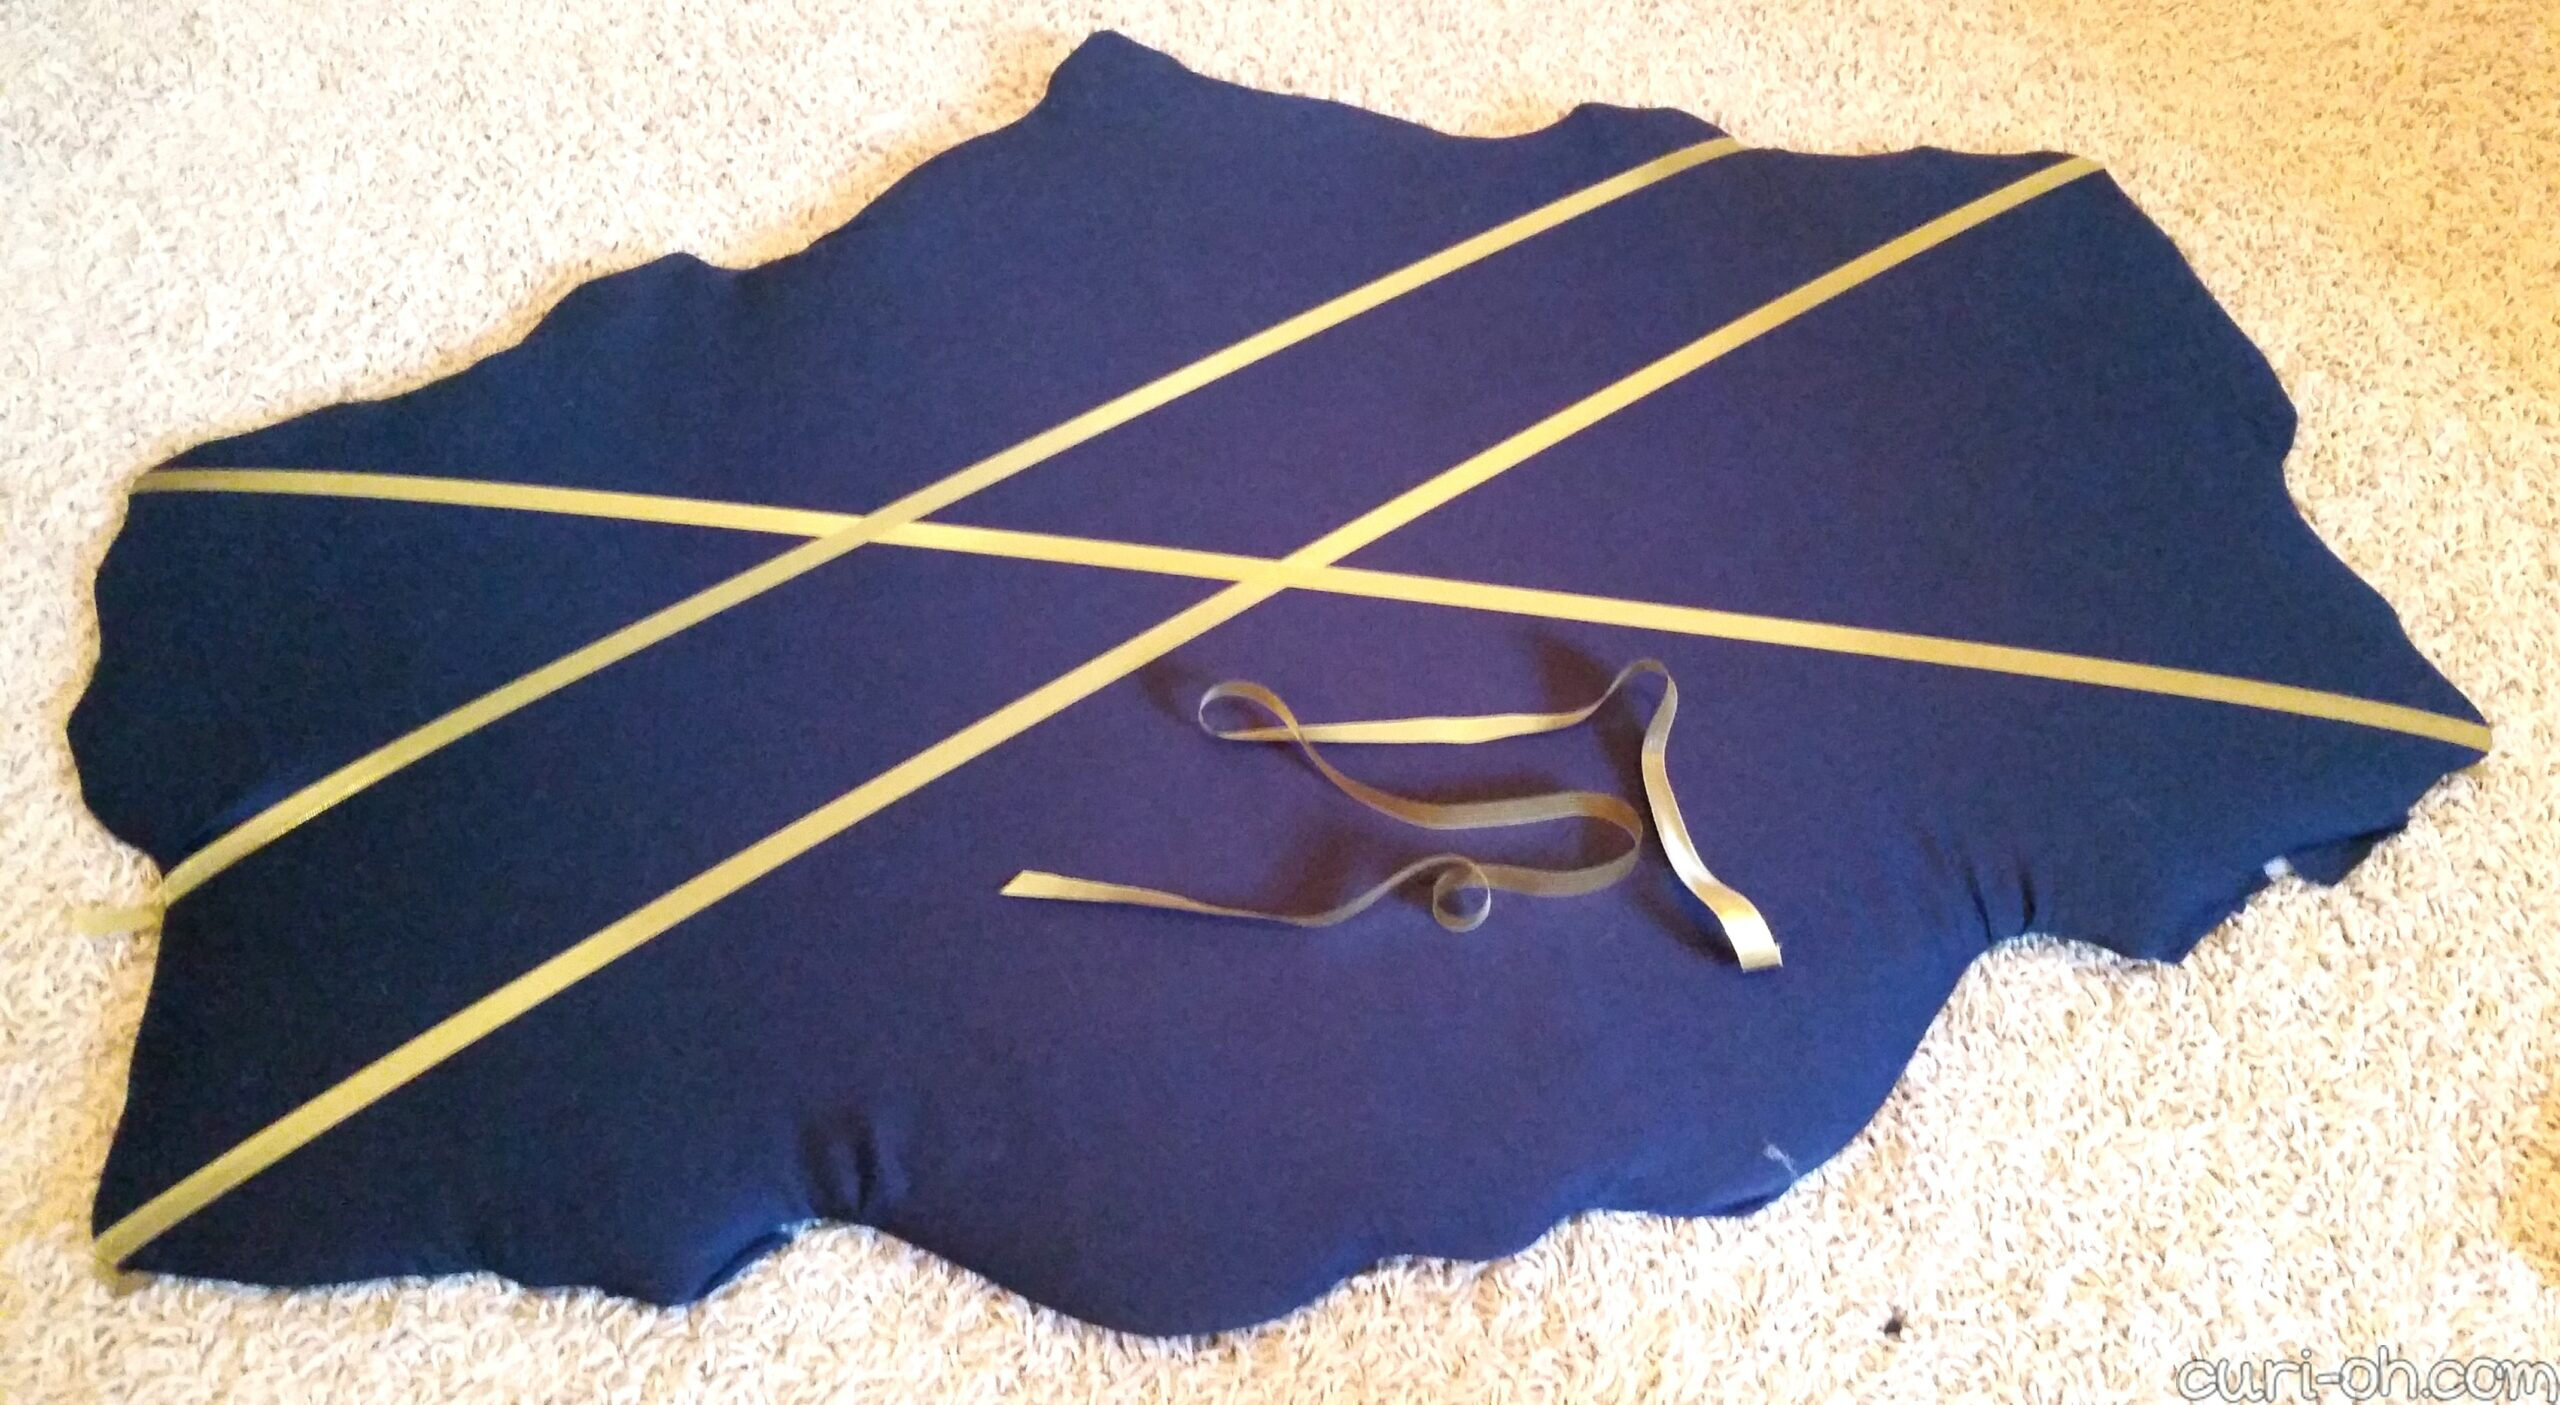
The next part was trickier than it probably looks. I ran the ribbons across the board and stapled them on the back with the fabric and batting, again keeping it taut. With the twists and turns in my mirror, I just followed its natural curvature in mapping out my ribbons. That made it easy to keep them consistent and parallel. If your mirror is more square, then you will likely need to use a ruler.
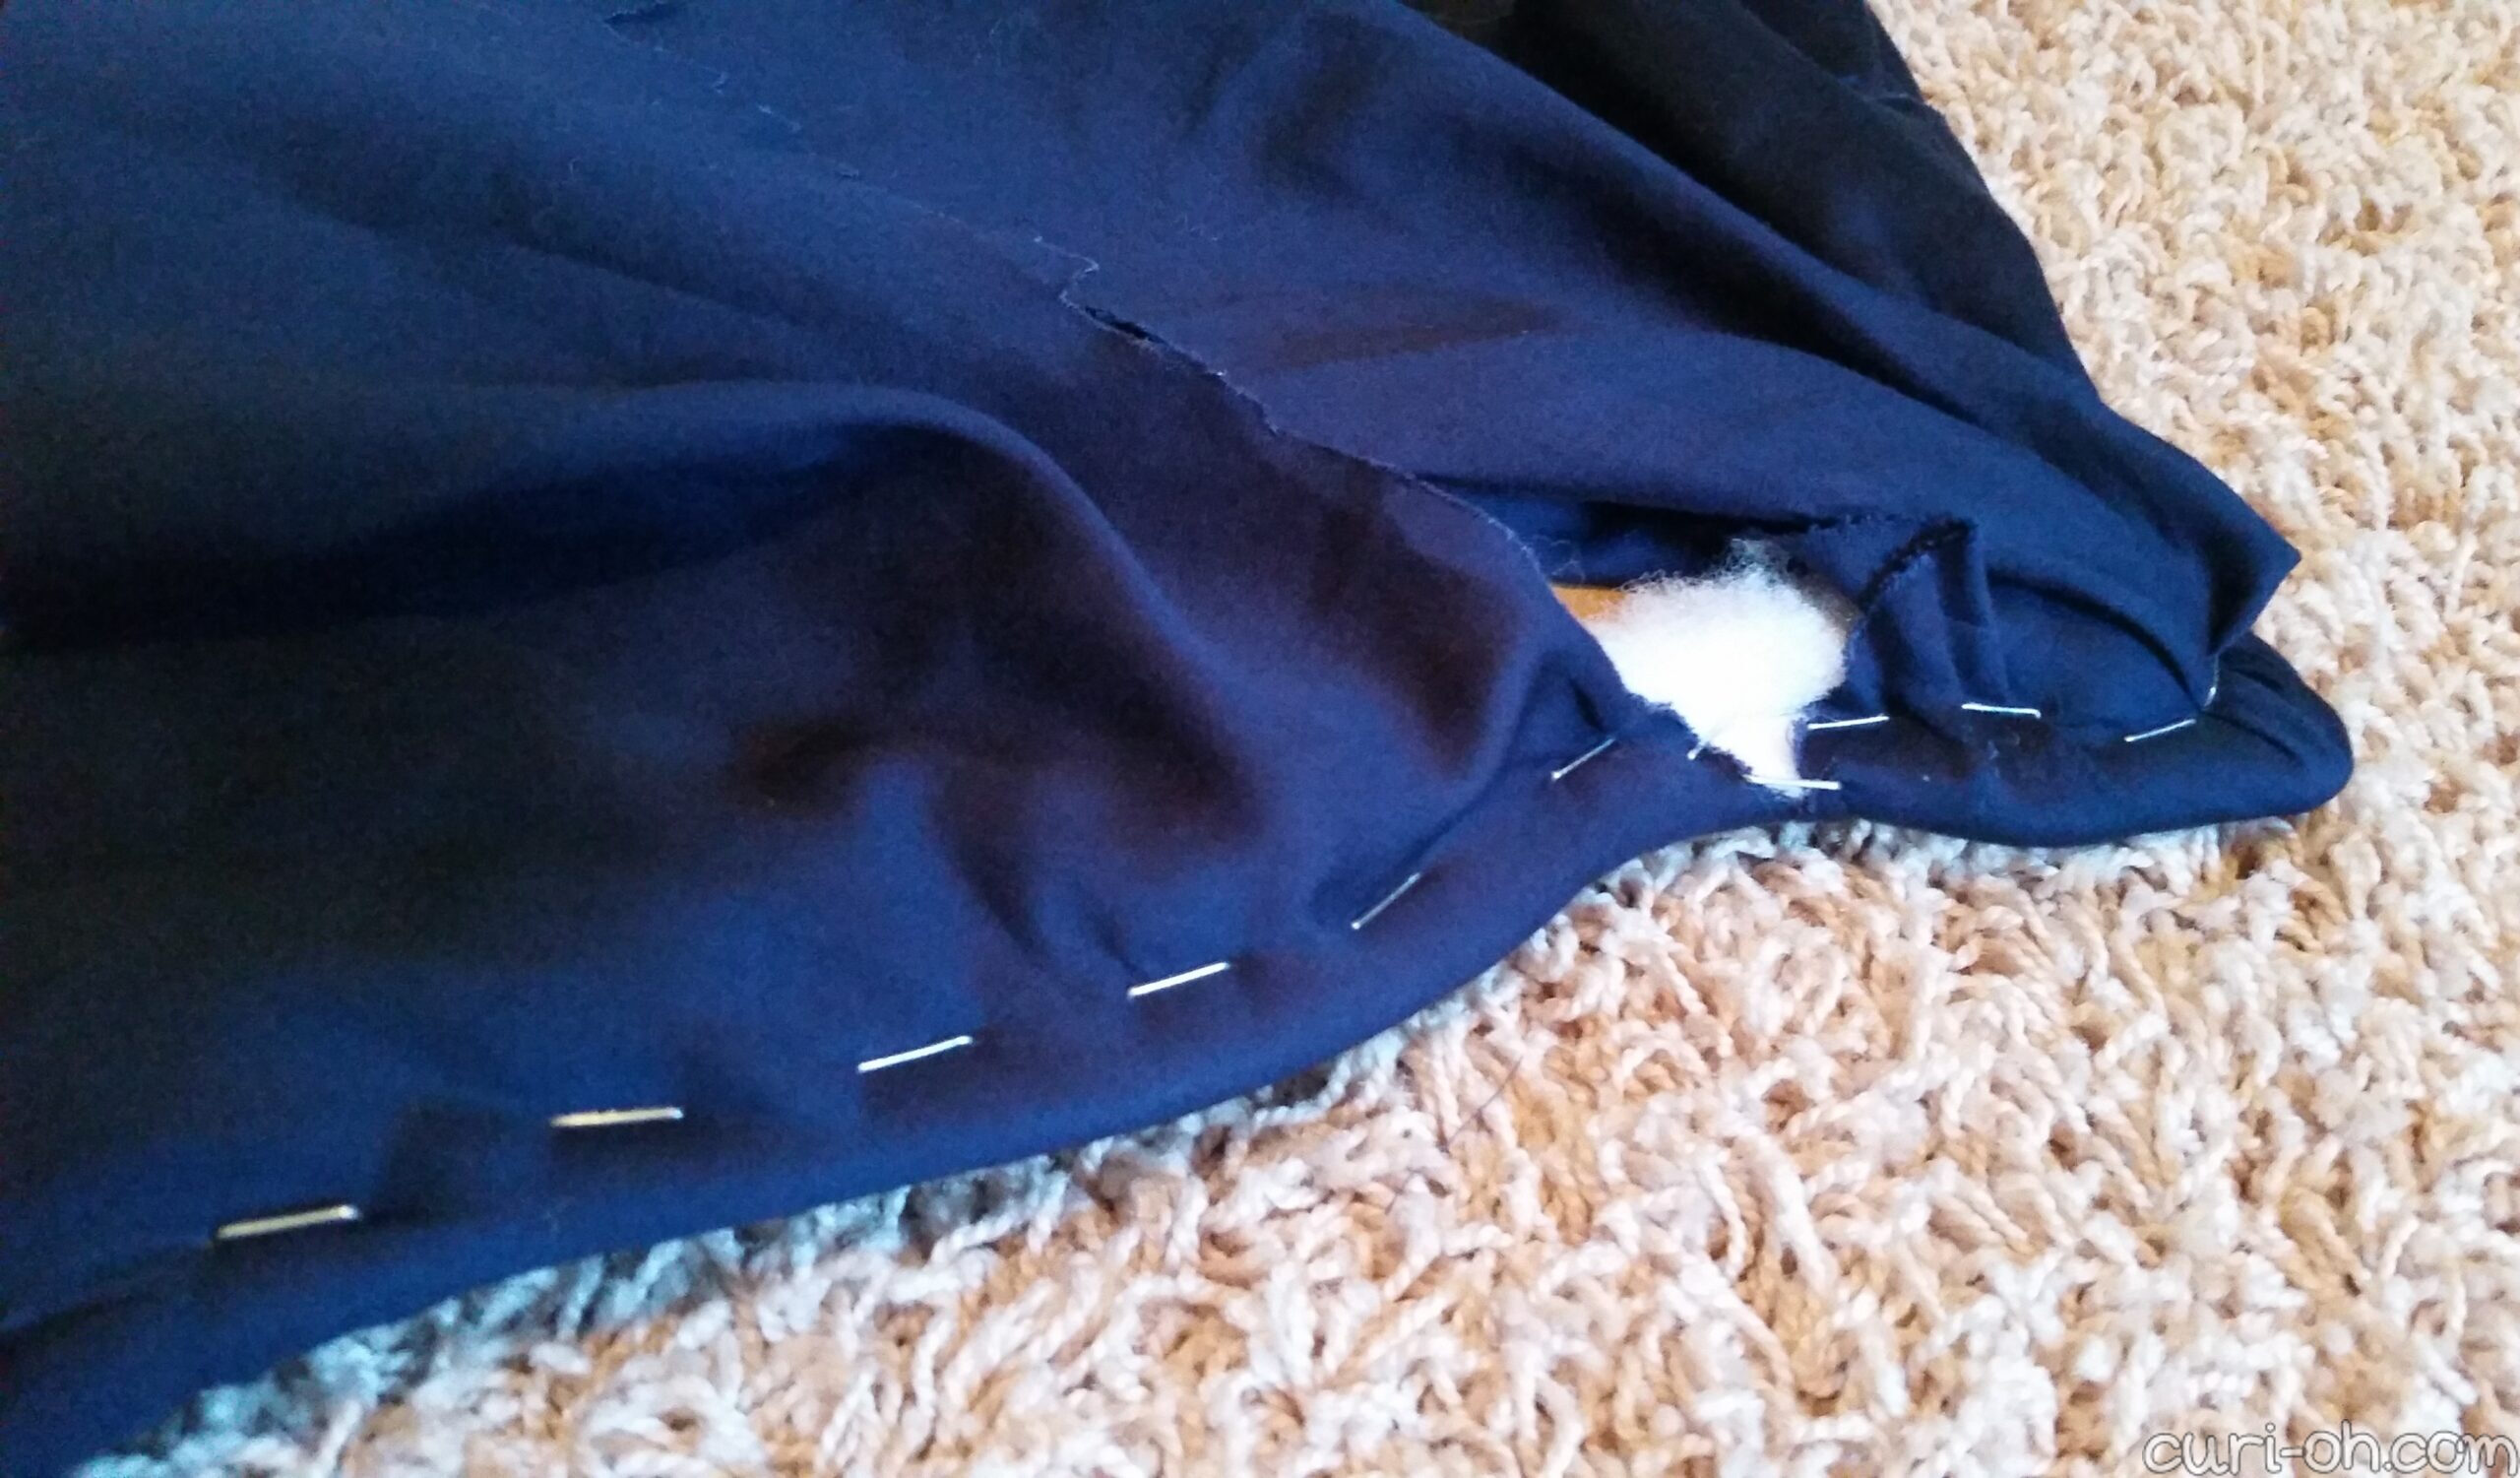
My “Oh God, what have I done?” moment came once I laid the frame on top of the board. I thought it had too much of a royal French palace sort of thing going on. I recalled attending an exhibit called “The Splendors of Versailles” as a child. I was also finding it impossible to punch holes through the fabric and the board. It was all so thick! I began to despair a bit.
Thanks to a helpful man at the hardware store, I found a tool called a “scratch awl” which is supposed to be used to start nail holes. We had a large, thick piece of styrofoam left over from a package, so I sat the board on top of that and hammered the scratch awl to create a clean hole through all the layers. It worked perfectly!
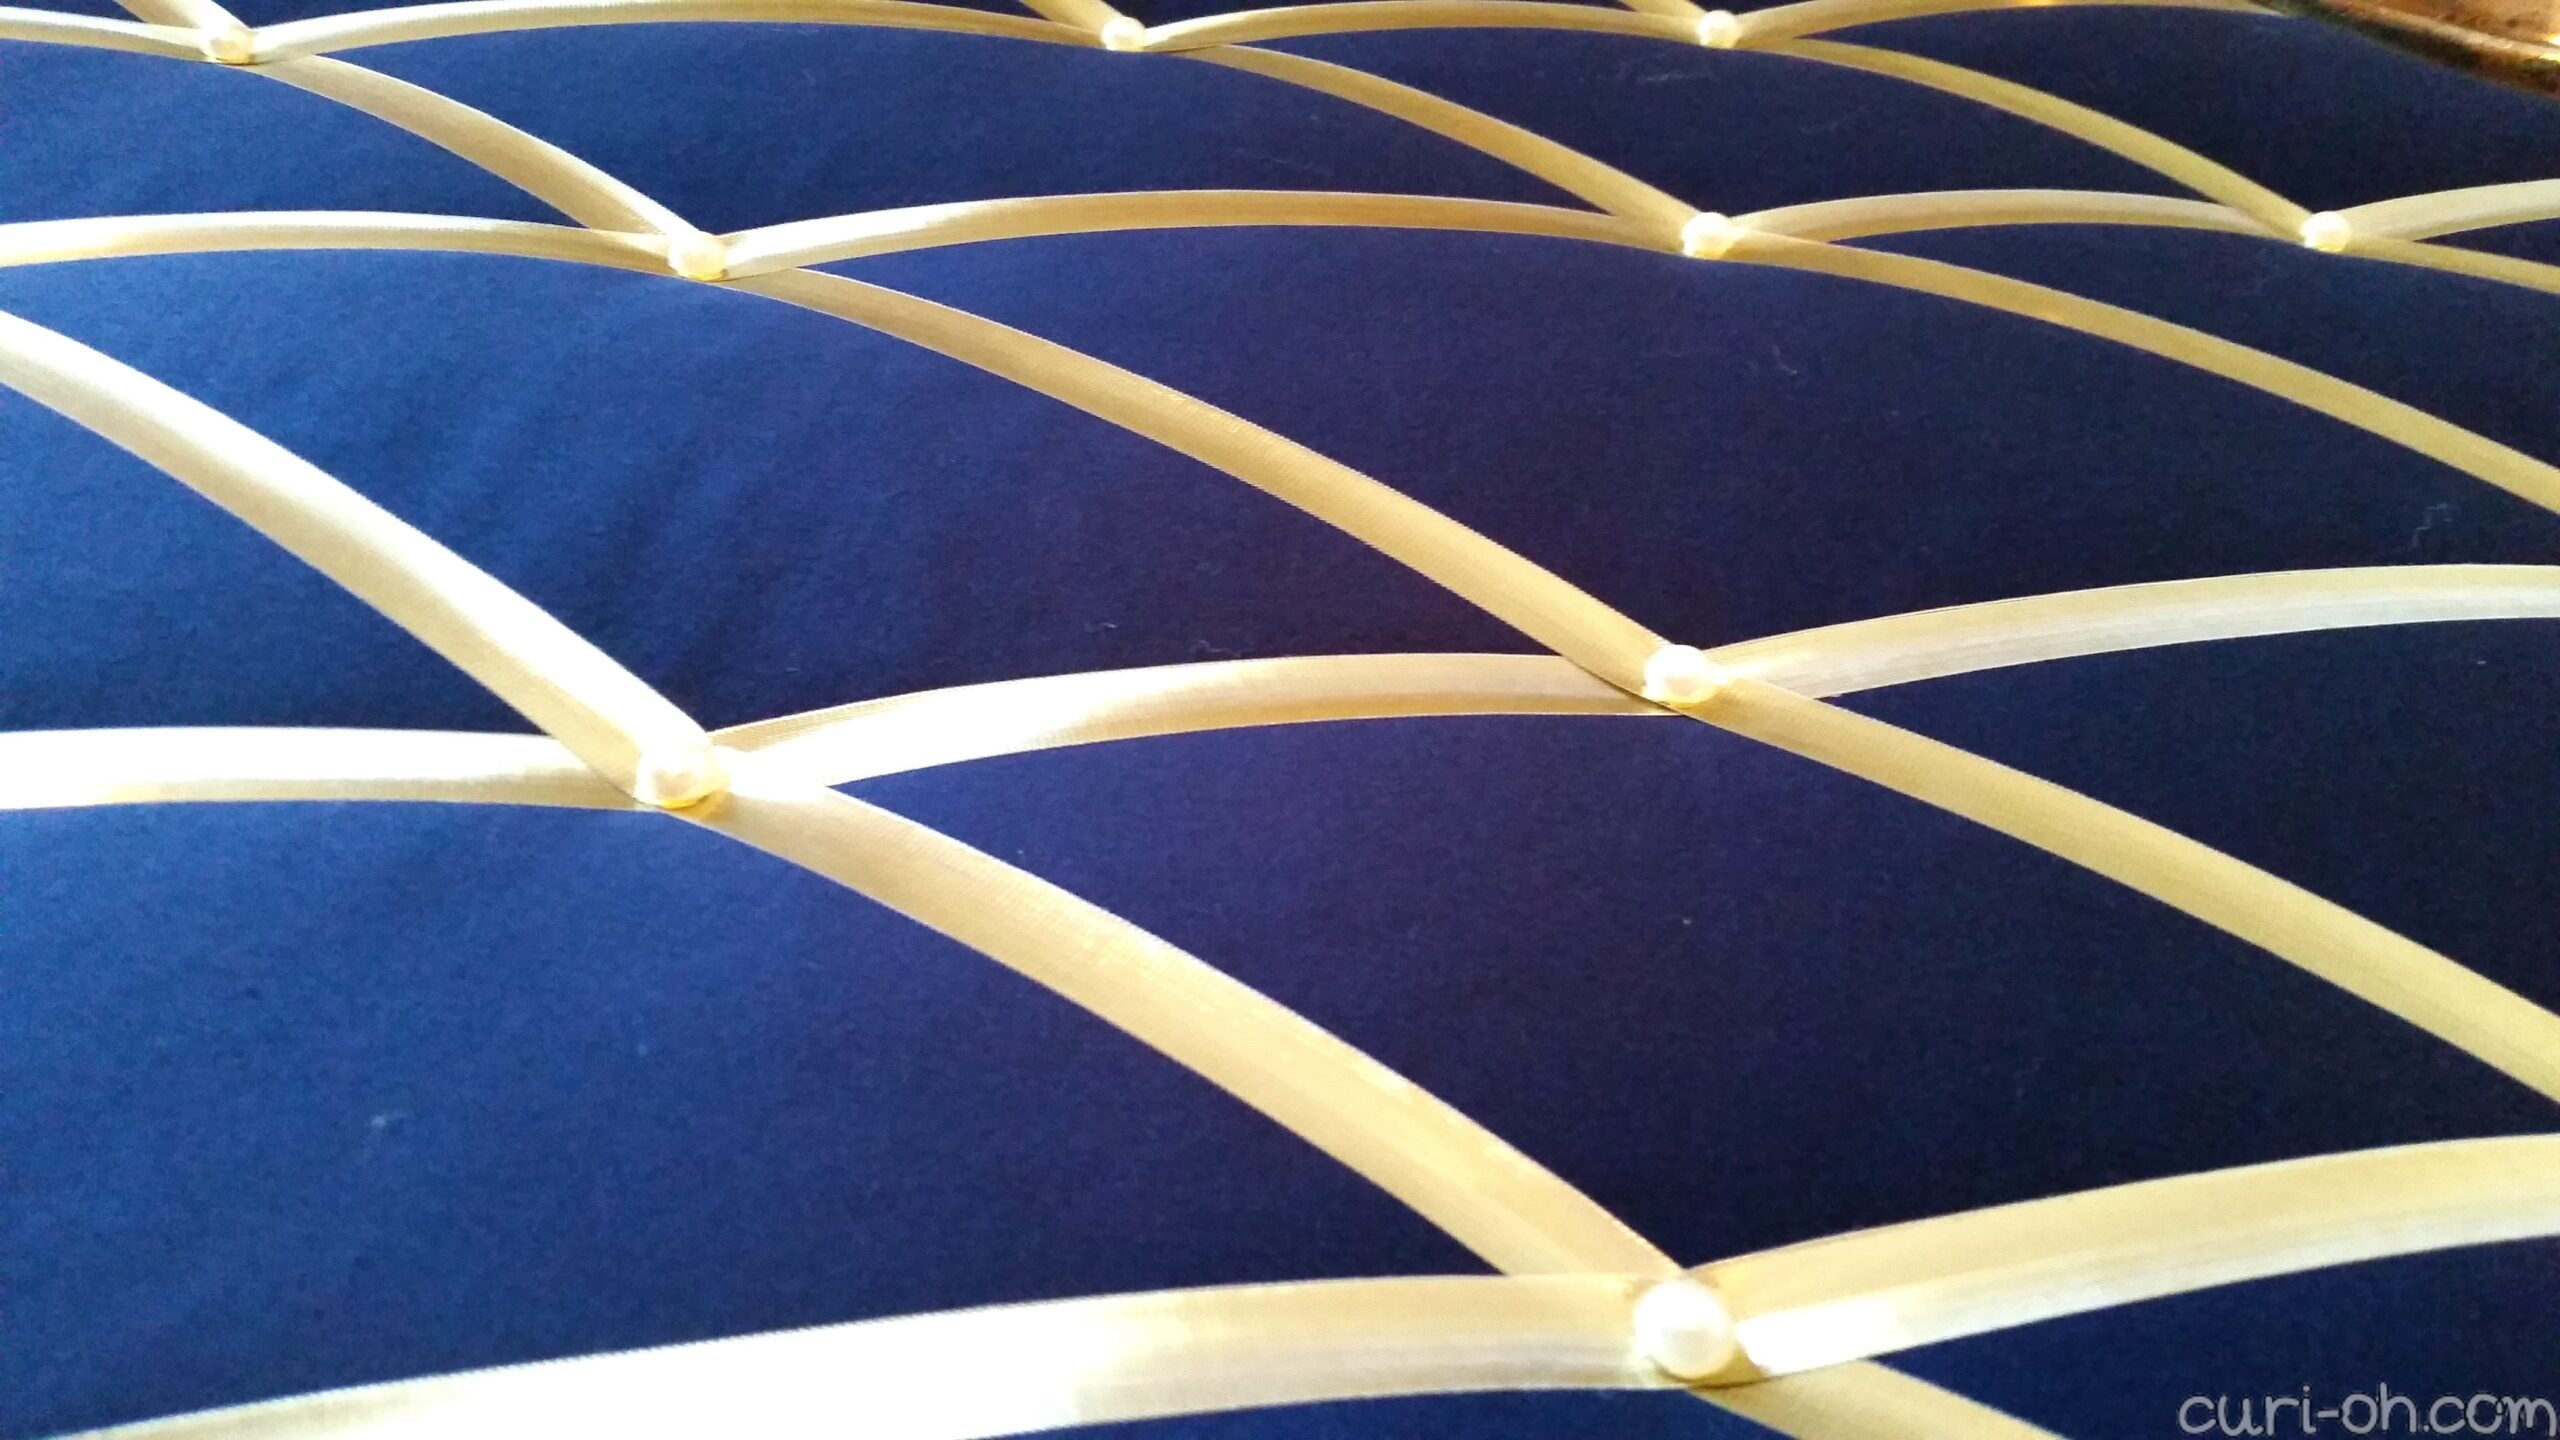
Next I placed brads through the holes and secured them on the back. I pulled mine all the way down tight to give it that tufted look.
I found these half pearl shapes in the scrapbooking section of the craft store and used them to decorate the tops of my brads by applying them with glue dots. As a last step, I covered the exposed brads on the back with a simple piece of tape so they wouldn’t scratch the wall on the off-chance they bumped it.
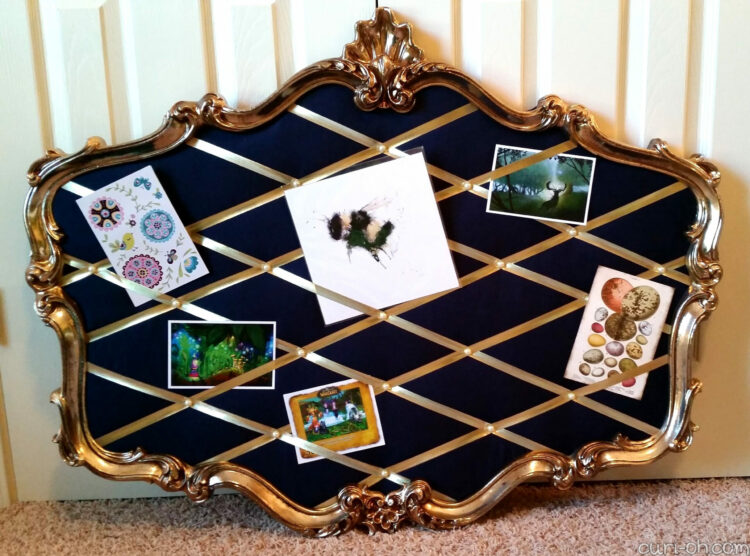
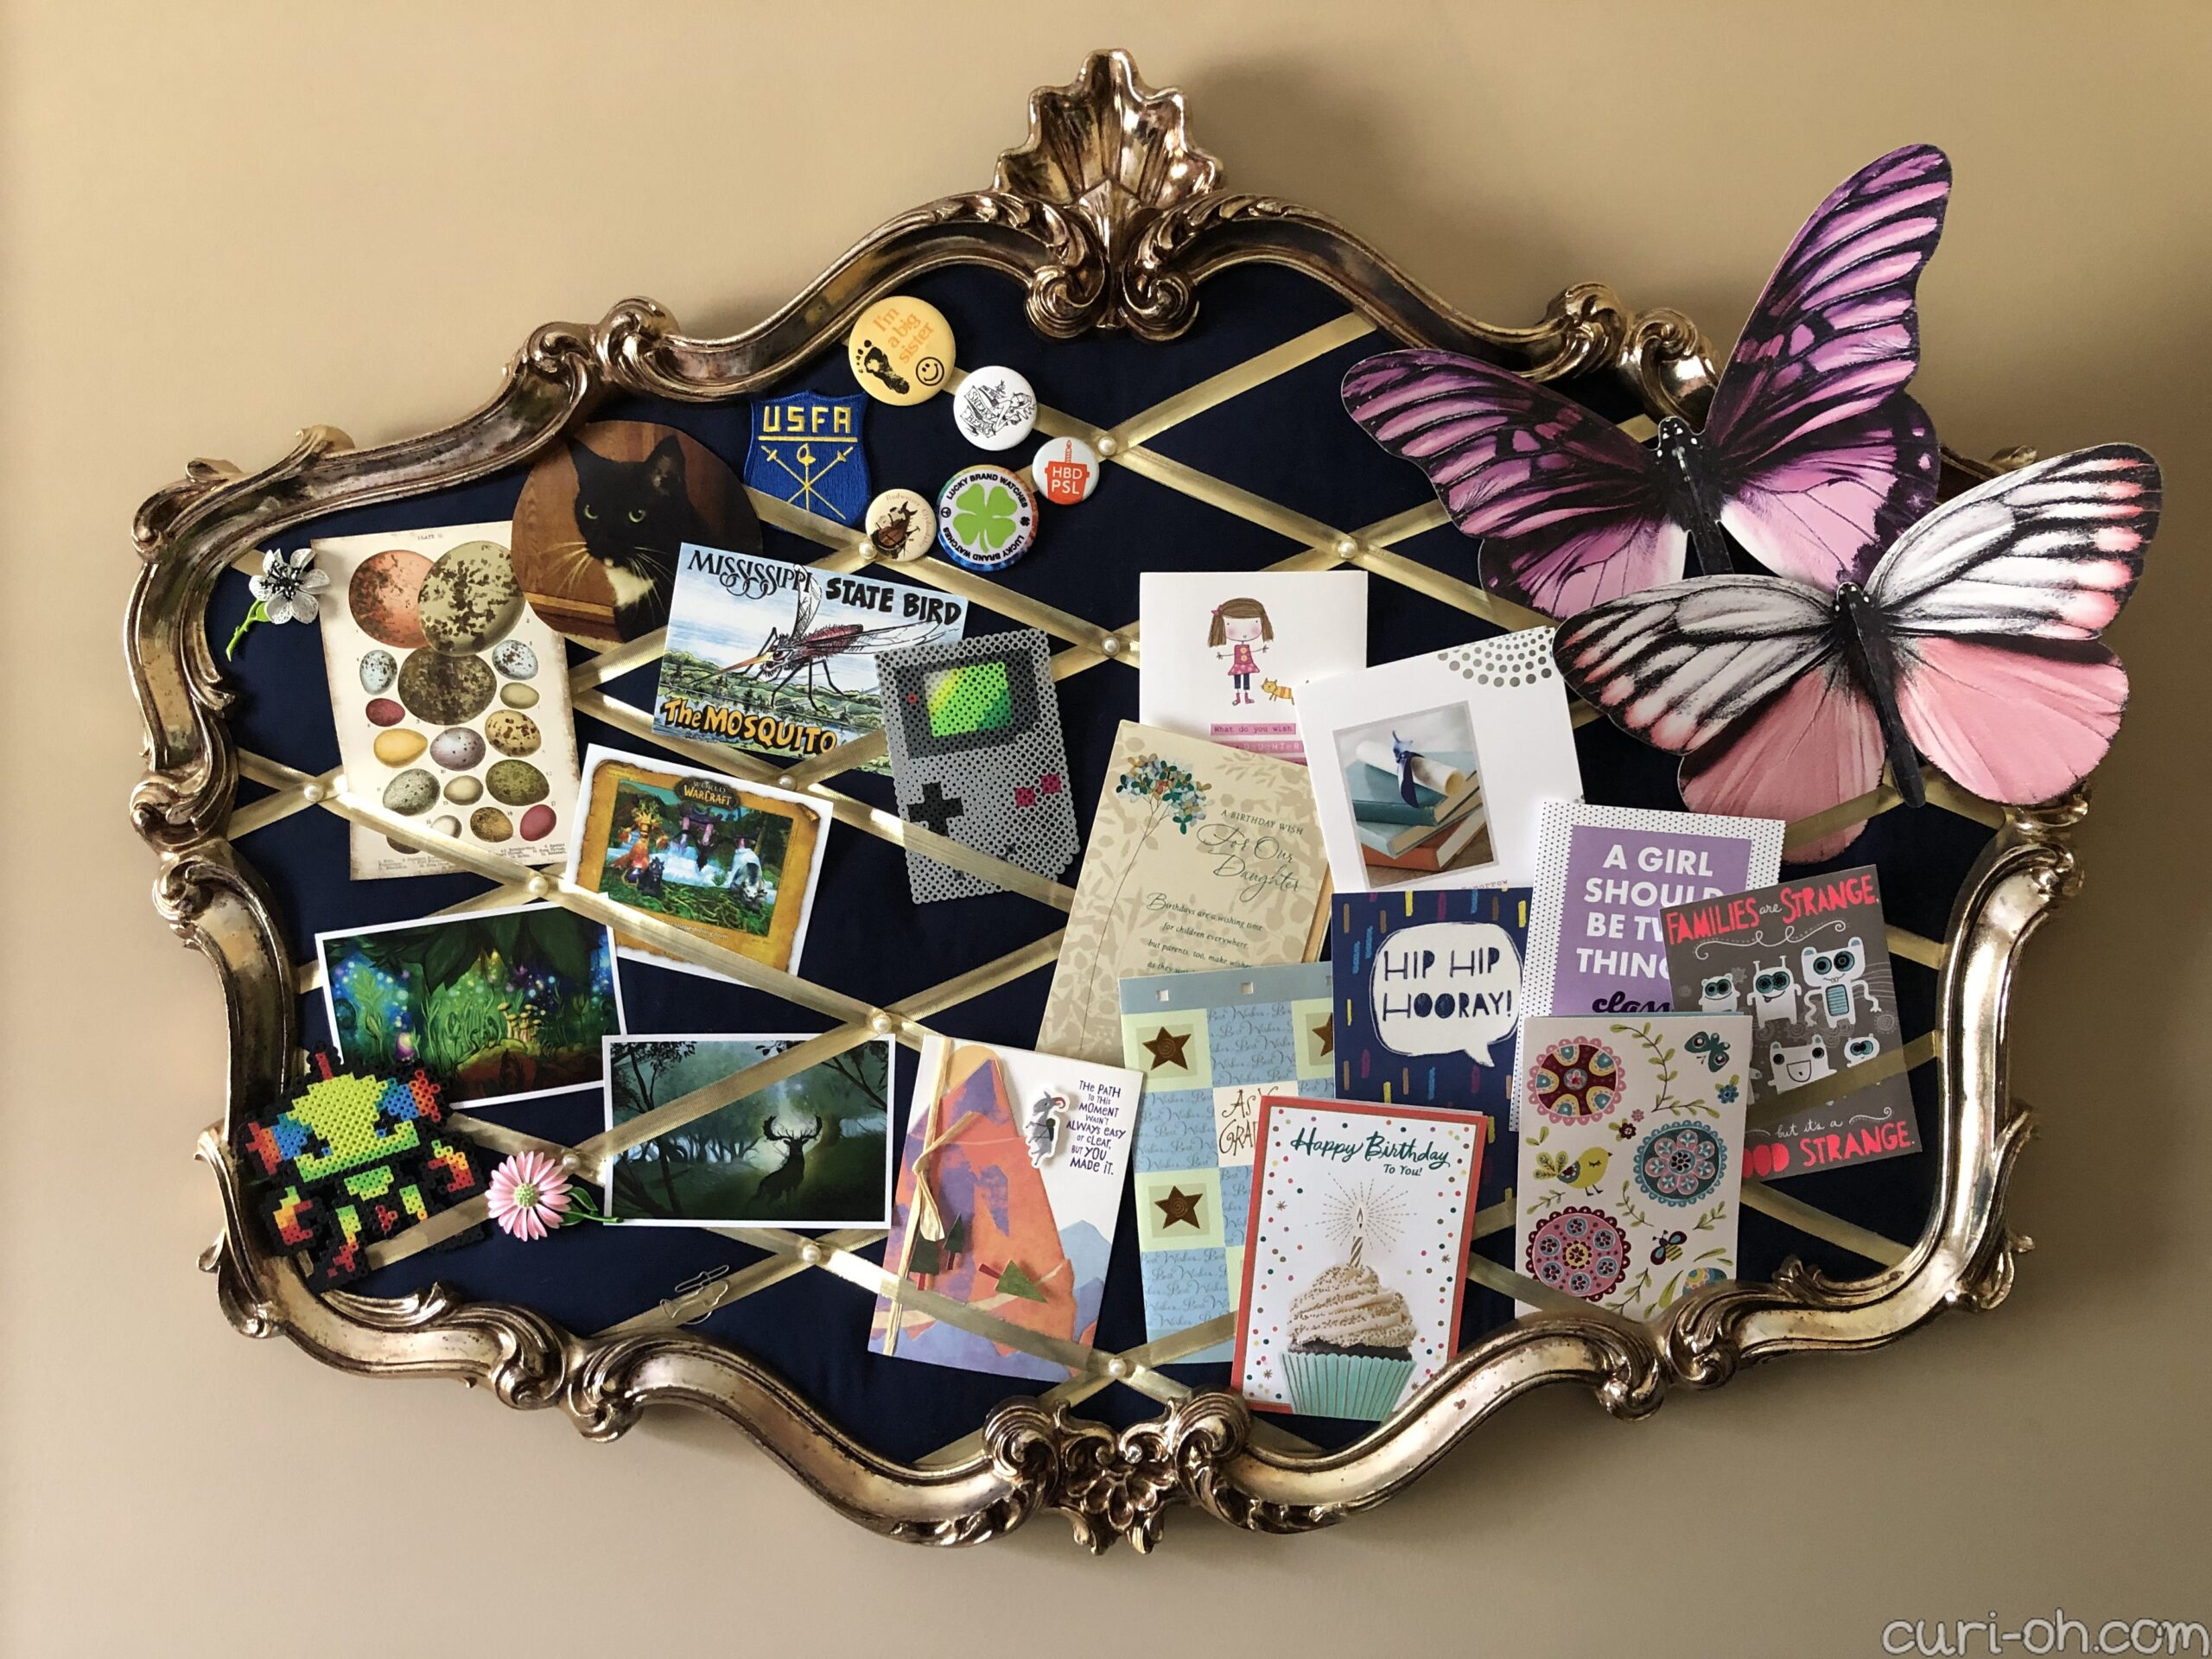
Voila! I admit, it is over-the-top, haha, but I love it! Besides, “If it’s not Baroque, don’t fix it.” I am so proud of the way it turned out. And here it is in full use today:
There are mirrors to thrift aplenty so I hope this inspires you next time you see one that you love!