My Custom Fuse Bead Storage Cabinet!
Greetings! I hope you had a wonderful Thanksgiving holiday (all my fellow Americans anyway). I didn’t post last week. I’d love to say something wholesome about spending quality time with my family, but the truth is I mostly took the time to be incredibly lazy. Like, ashamed of myself kind of lazy. I ate too much good food, played a lot of Overwatch, and had some chill fun. No regrets!
I’ve been working on a lot of projects that I intend to feature on the blog, but they have all been slow-going. Finally though I finished one right before the start of the holidays…
As may be obvious by now, I love fuse beads! I typically don’t get very “into” any one hobby too deeply because I like to try new things, but I keep coming back to fuse bead projects. They are just so fun! As my color selection grew though, I was becoming increasingly unhappy with how I was storing them.
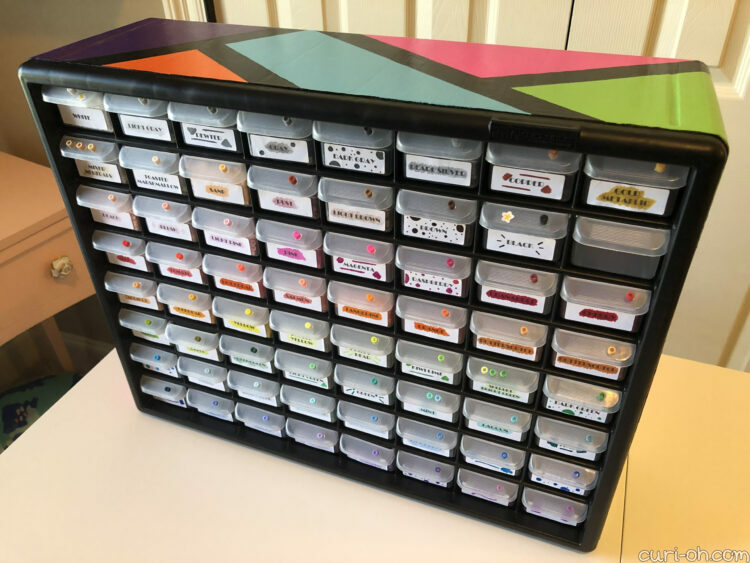
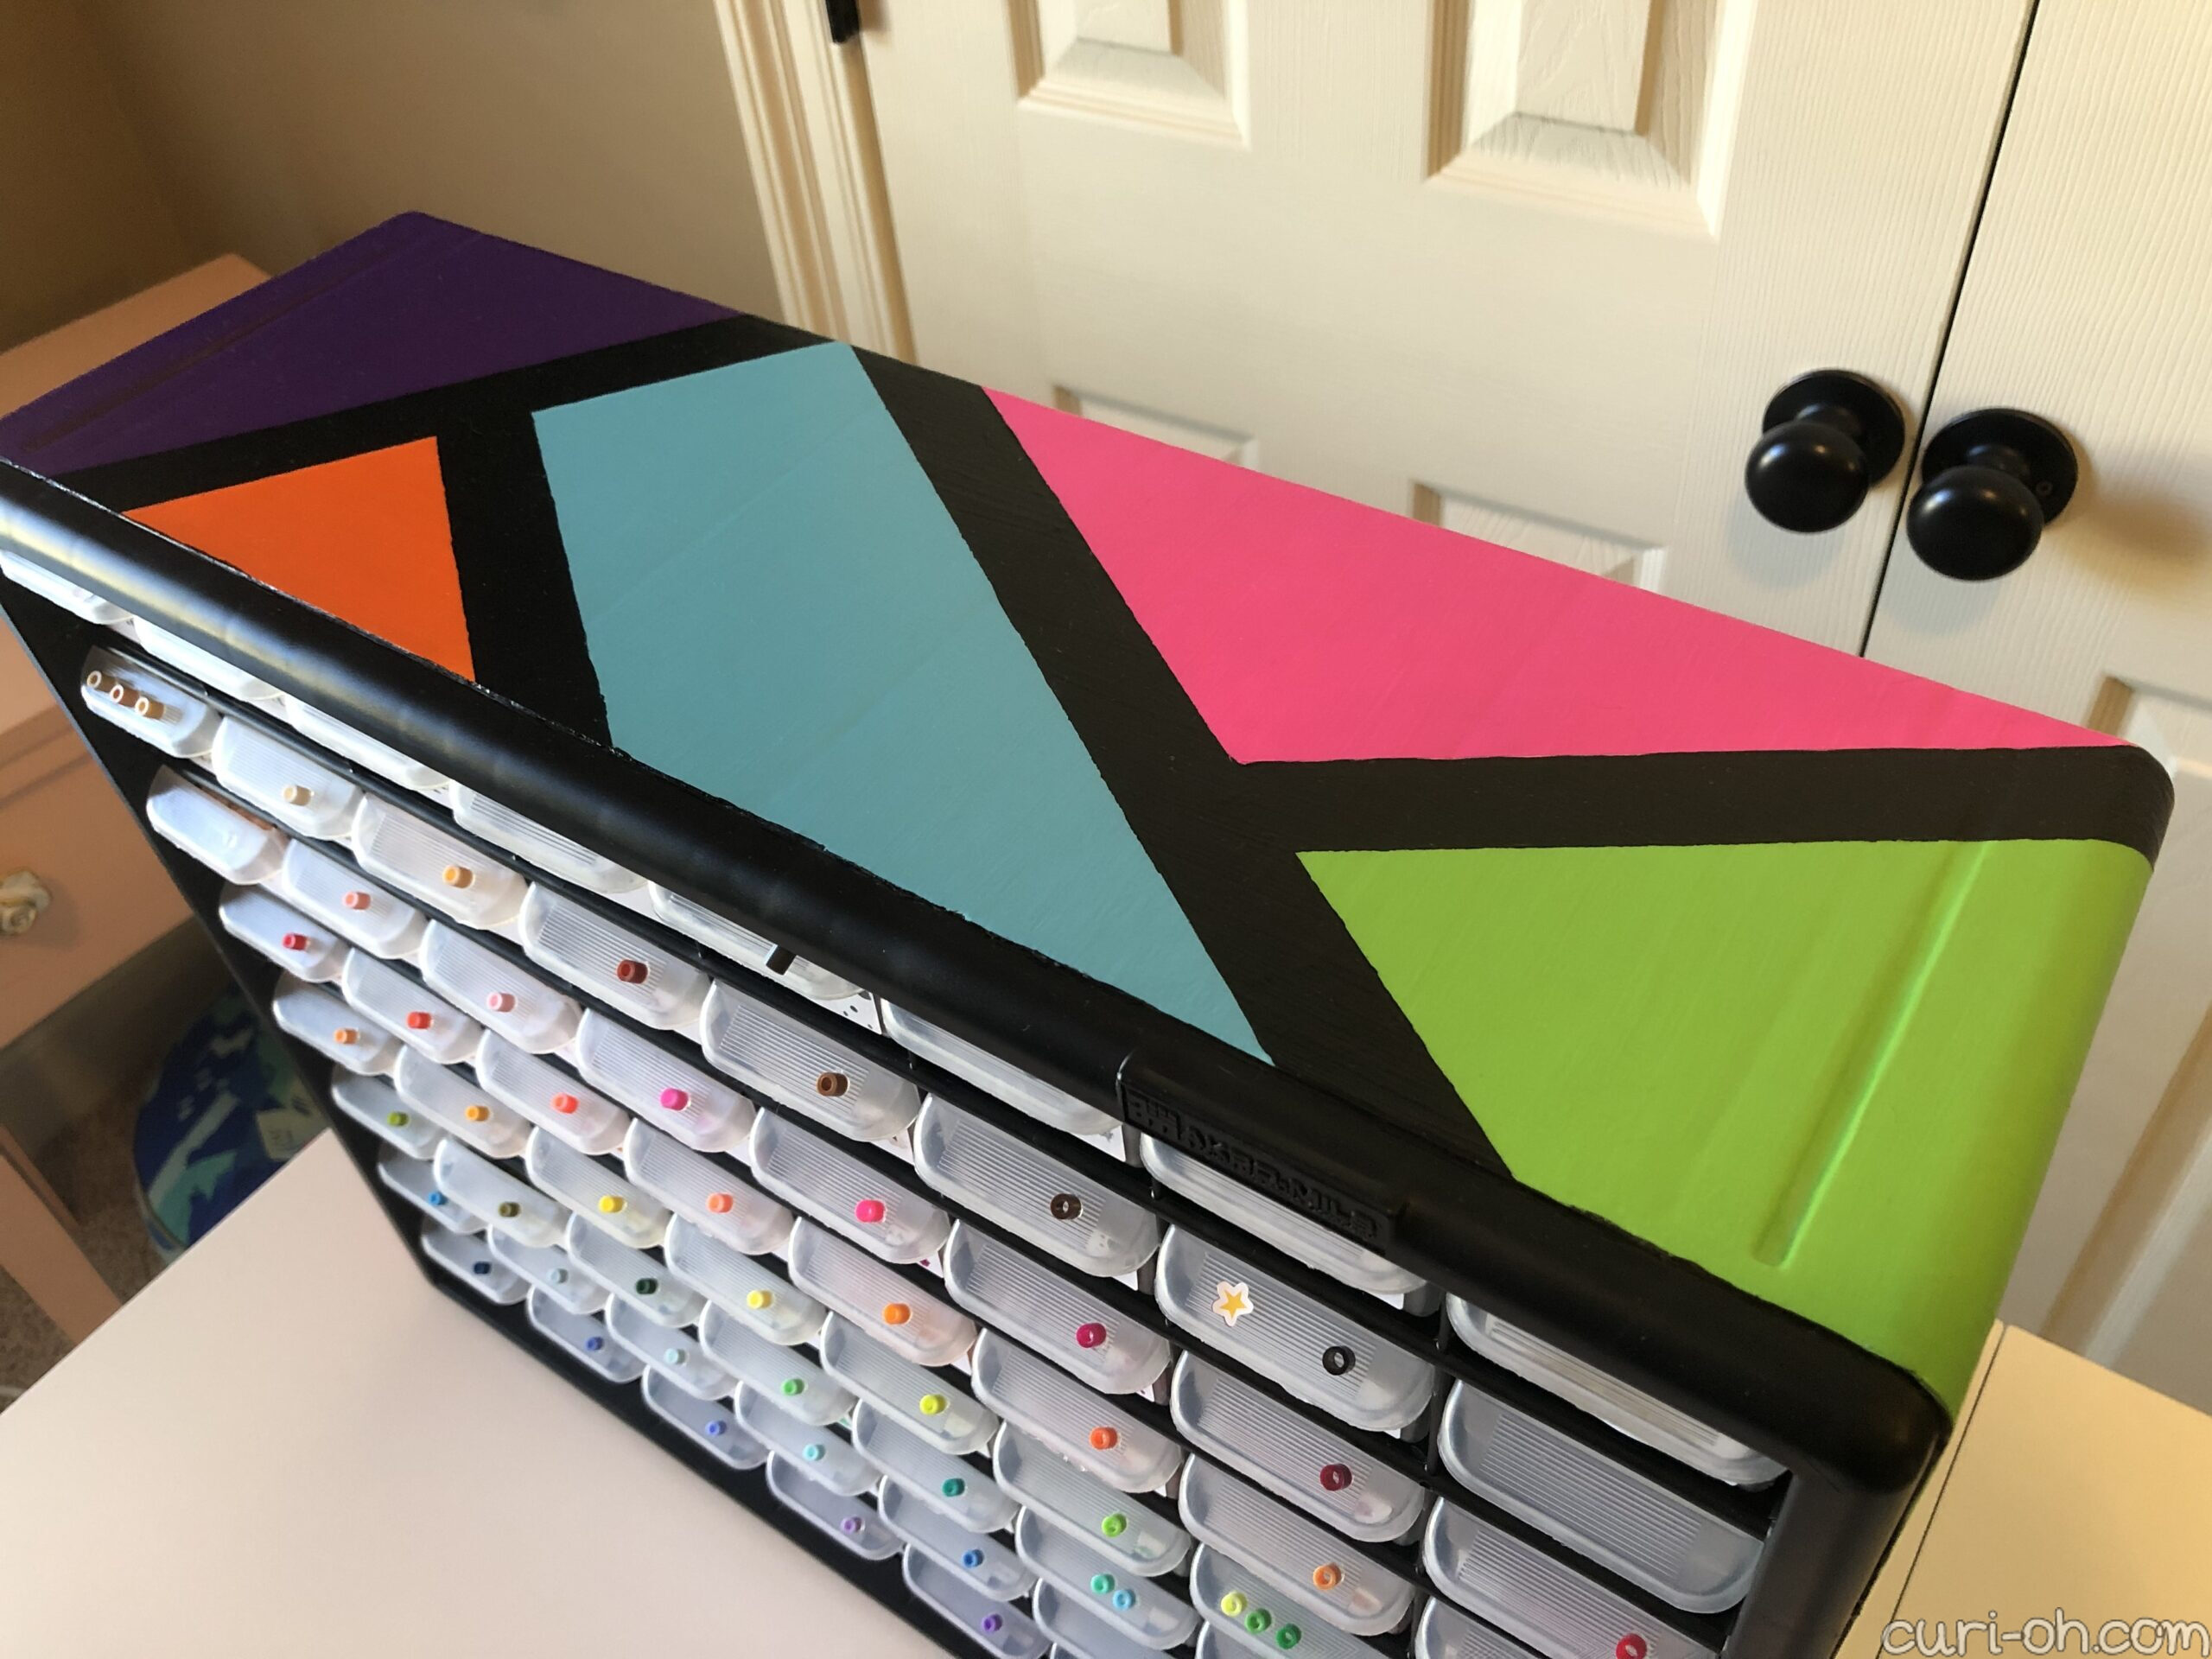
Enter the Akro-Mils 64-drawer cabinet for small parts. I’ve had my eye on this baby for a while. Each drawer holds a 1,000 piece bag of Perler beads with plenty of room to spare. You can also add in dividers to split the drawers in half. A few dividers come with the cabinet, but I thought my box was just missing them, so I ordered a pack since I wanted plenty anyway. However, I noticed later that they are actually part of the back and you have to cut them out. Weird!
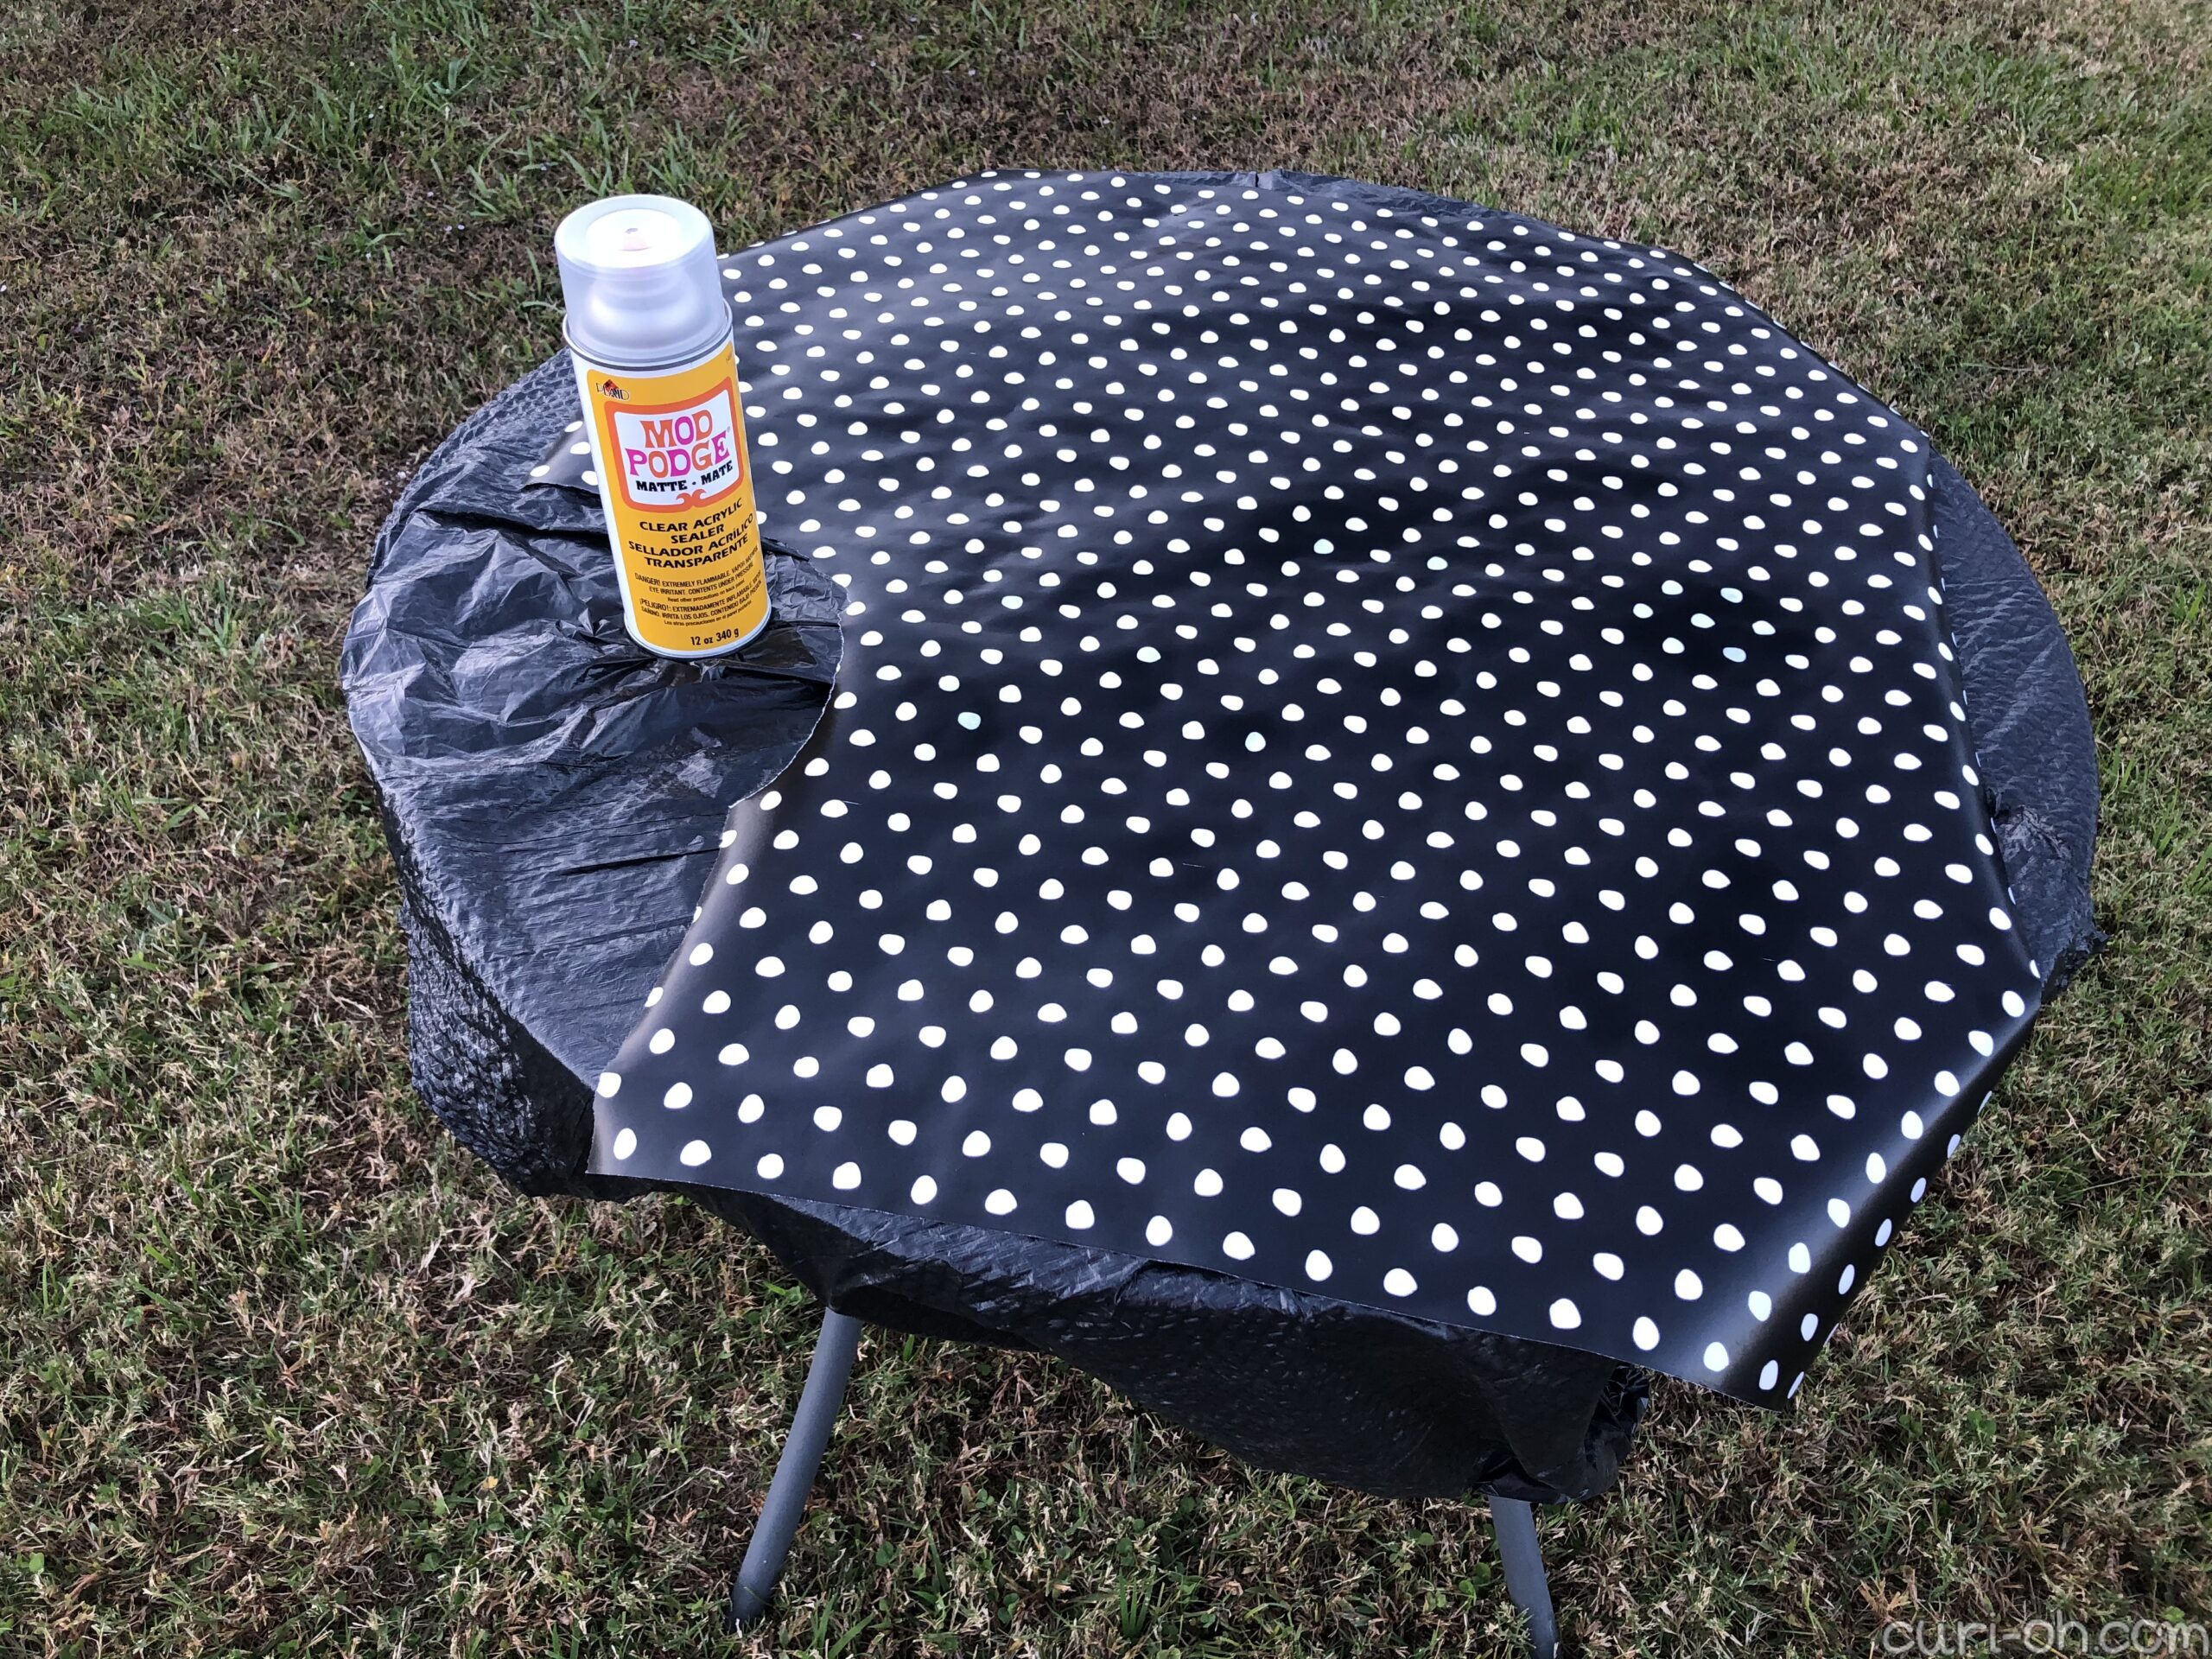
Anyway what better way to show my love for this long-awaited item than by customizing it! This turned into quite the ordeal though. My initial plan was to decoupage the plastic surface with a black and white polka dot gift wrap paper I had. I wanted to stick with a color theme anchored around black so I wouldn’t have to worry about decorating the grid part.
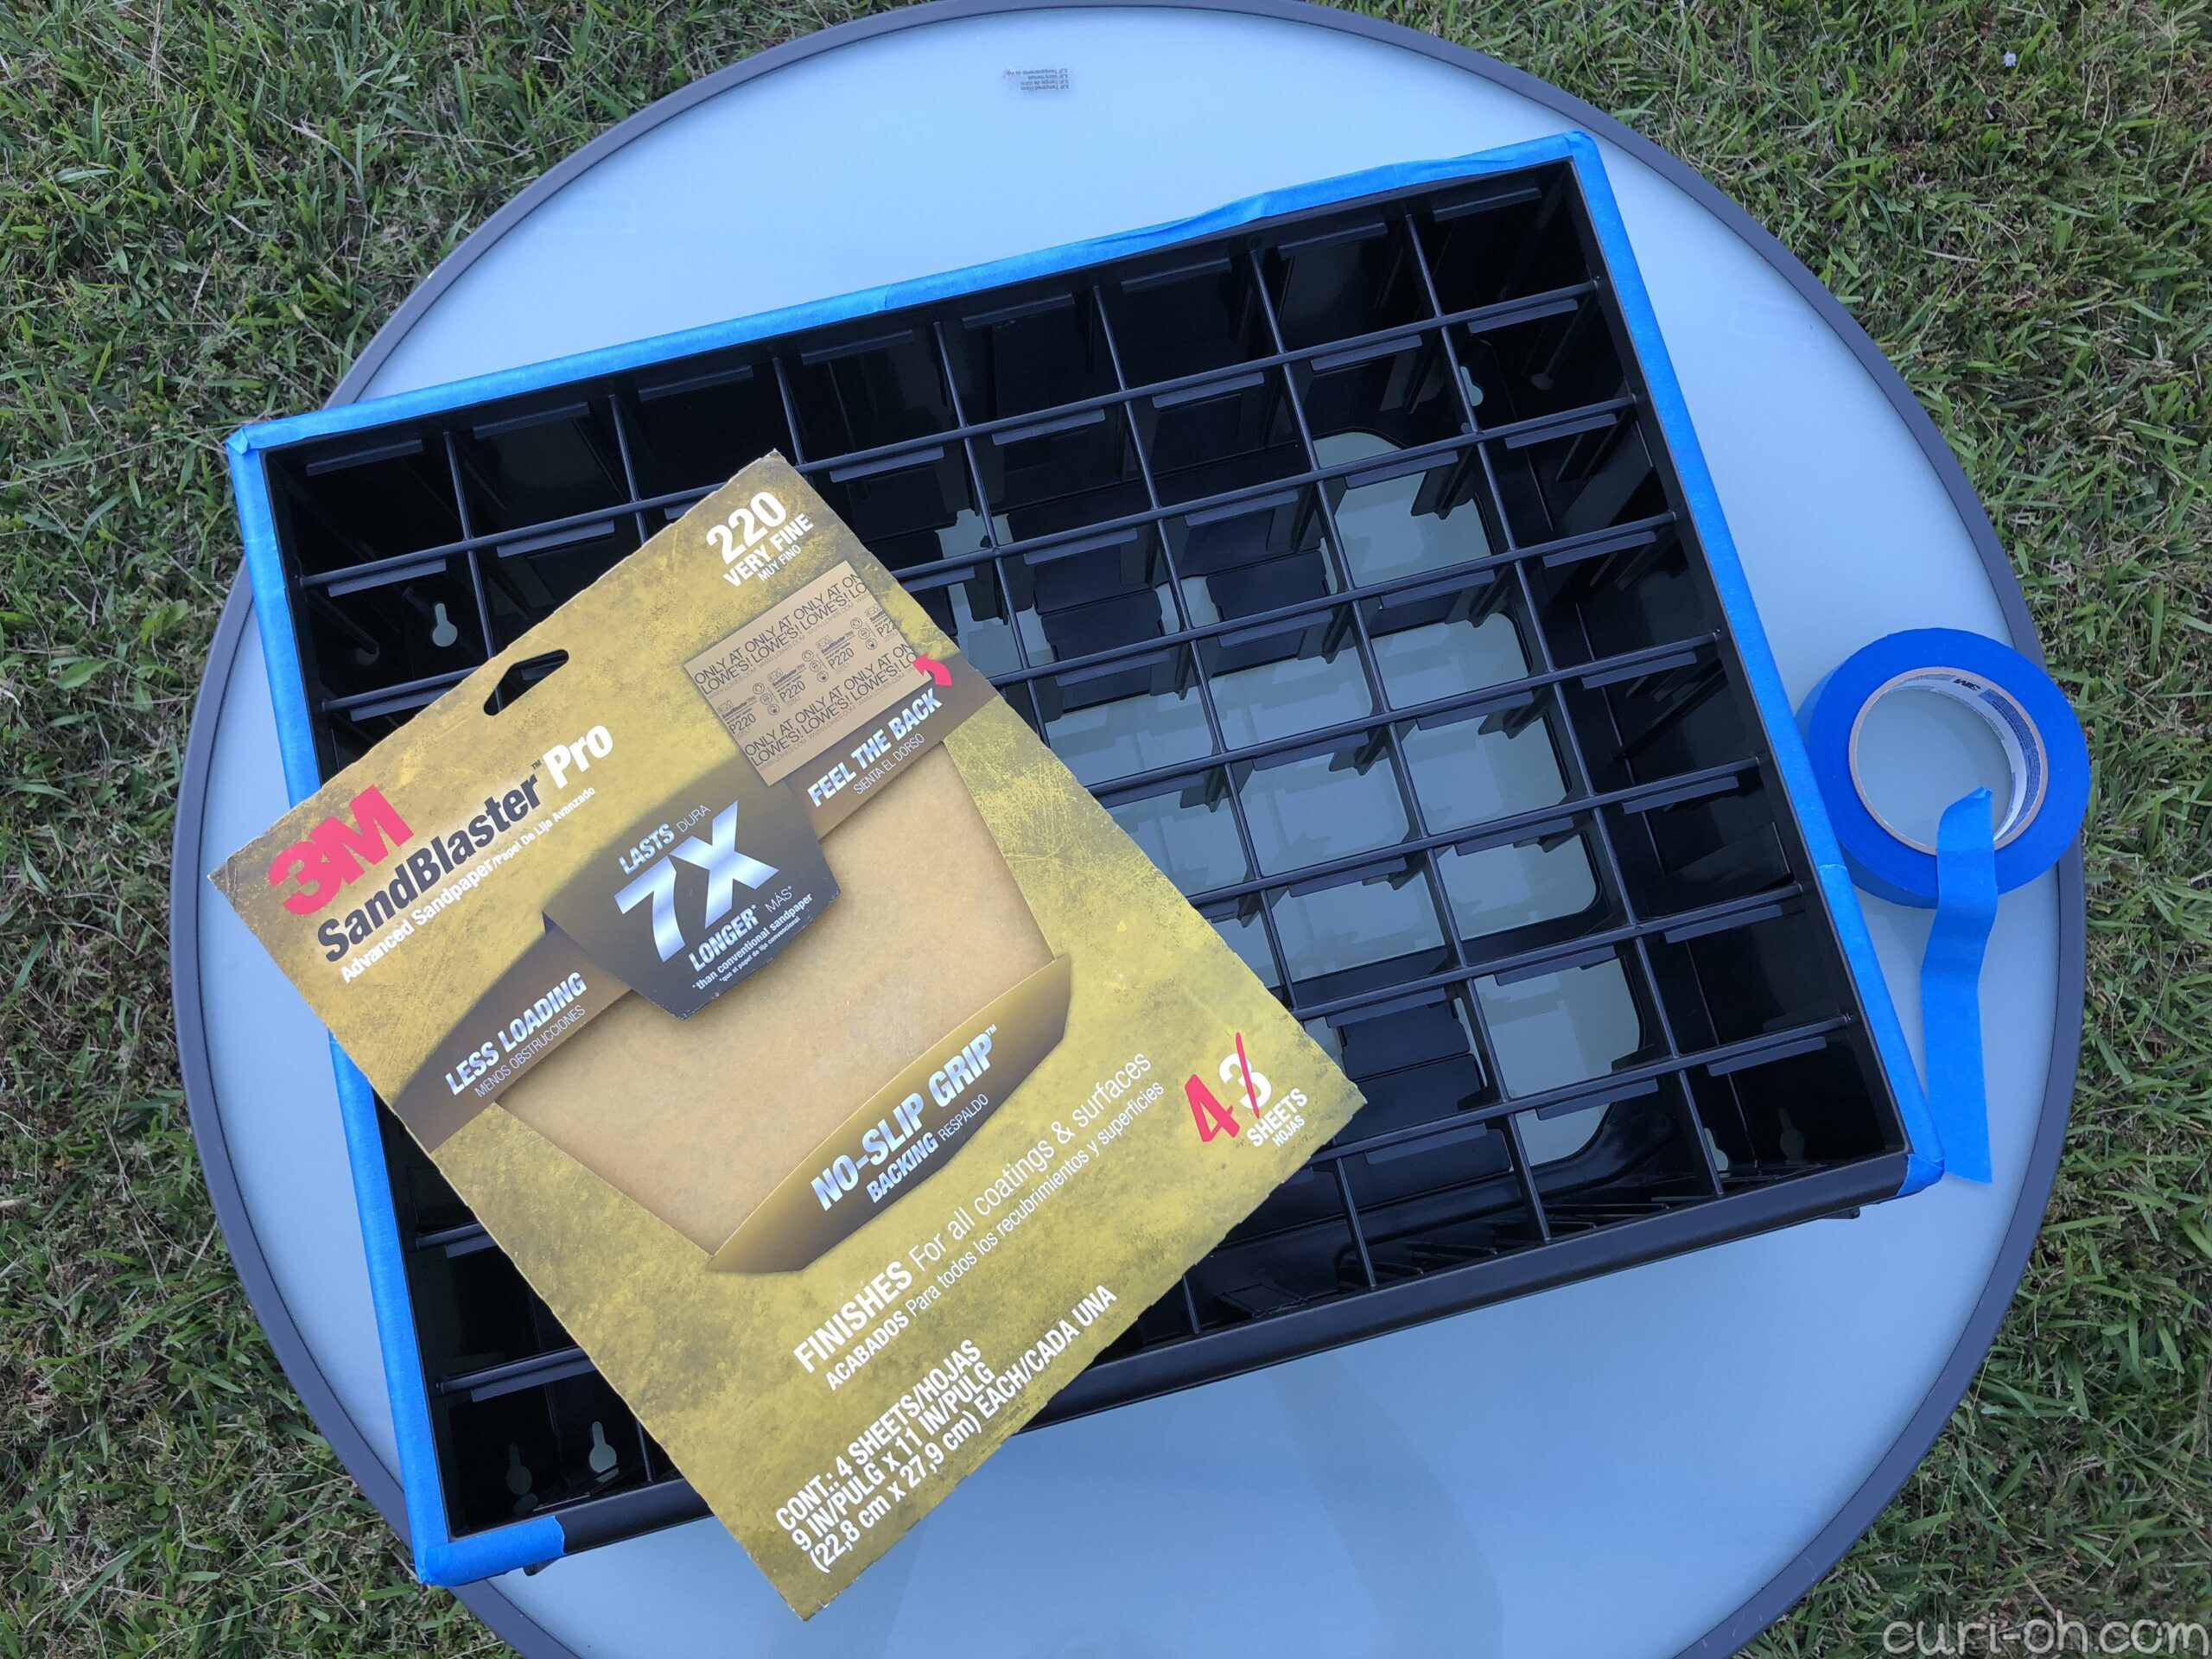
I took the cabinet outside to sand the plastic so the decoupage would have some texture to stick to. I taped off the edges so I would not scratch them and could leave them untouched. Using very fine 220 grit sandpaper I prepped the surface by sanding in a cross-hatch pattern: first one direction, then the other.
I removed the tape, dusted the cabinet off, and then carried it inside for a rinse in the tub to remove any loose particles, allowing it to air-dry afterward.
I wasn’t sure if I wanted to tear the paper and apply it in a patchwork scrappy sort of fashion, or if I liked the idea of cutting precise strips. I decided to try the scraps first, because honestly I was a bit worried and wanted to test a small area. I do not have tons of experience decoupaging, but I knew that sometimes papers can be too thin and wrinkle easily during the process.

Well that happened. It stuck quickly and wouldn’t peel off entirely, so then I had to sand that off and dust and rinse and dry all over again.
For thin papers, Mod Podge recommended strengthening them with coats of their clear acrylic sealer product. My paper was very thin, so I decided to try that and applied the maximum recommended coats.
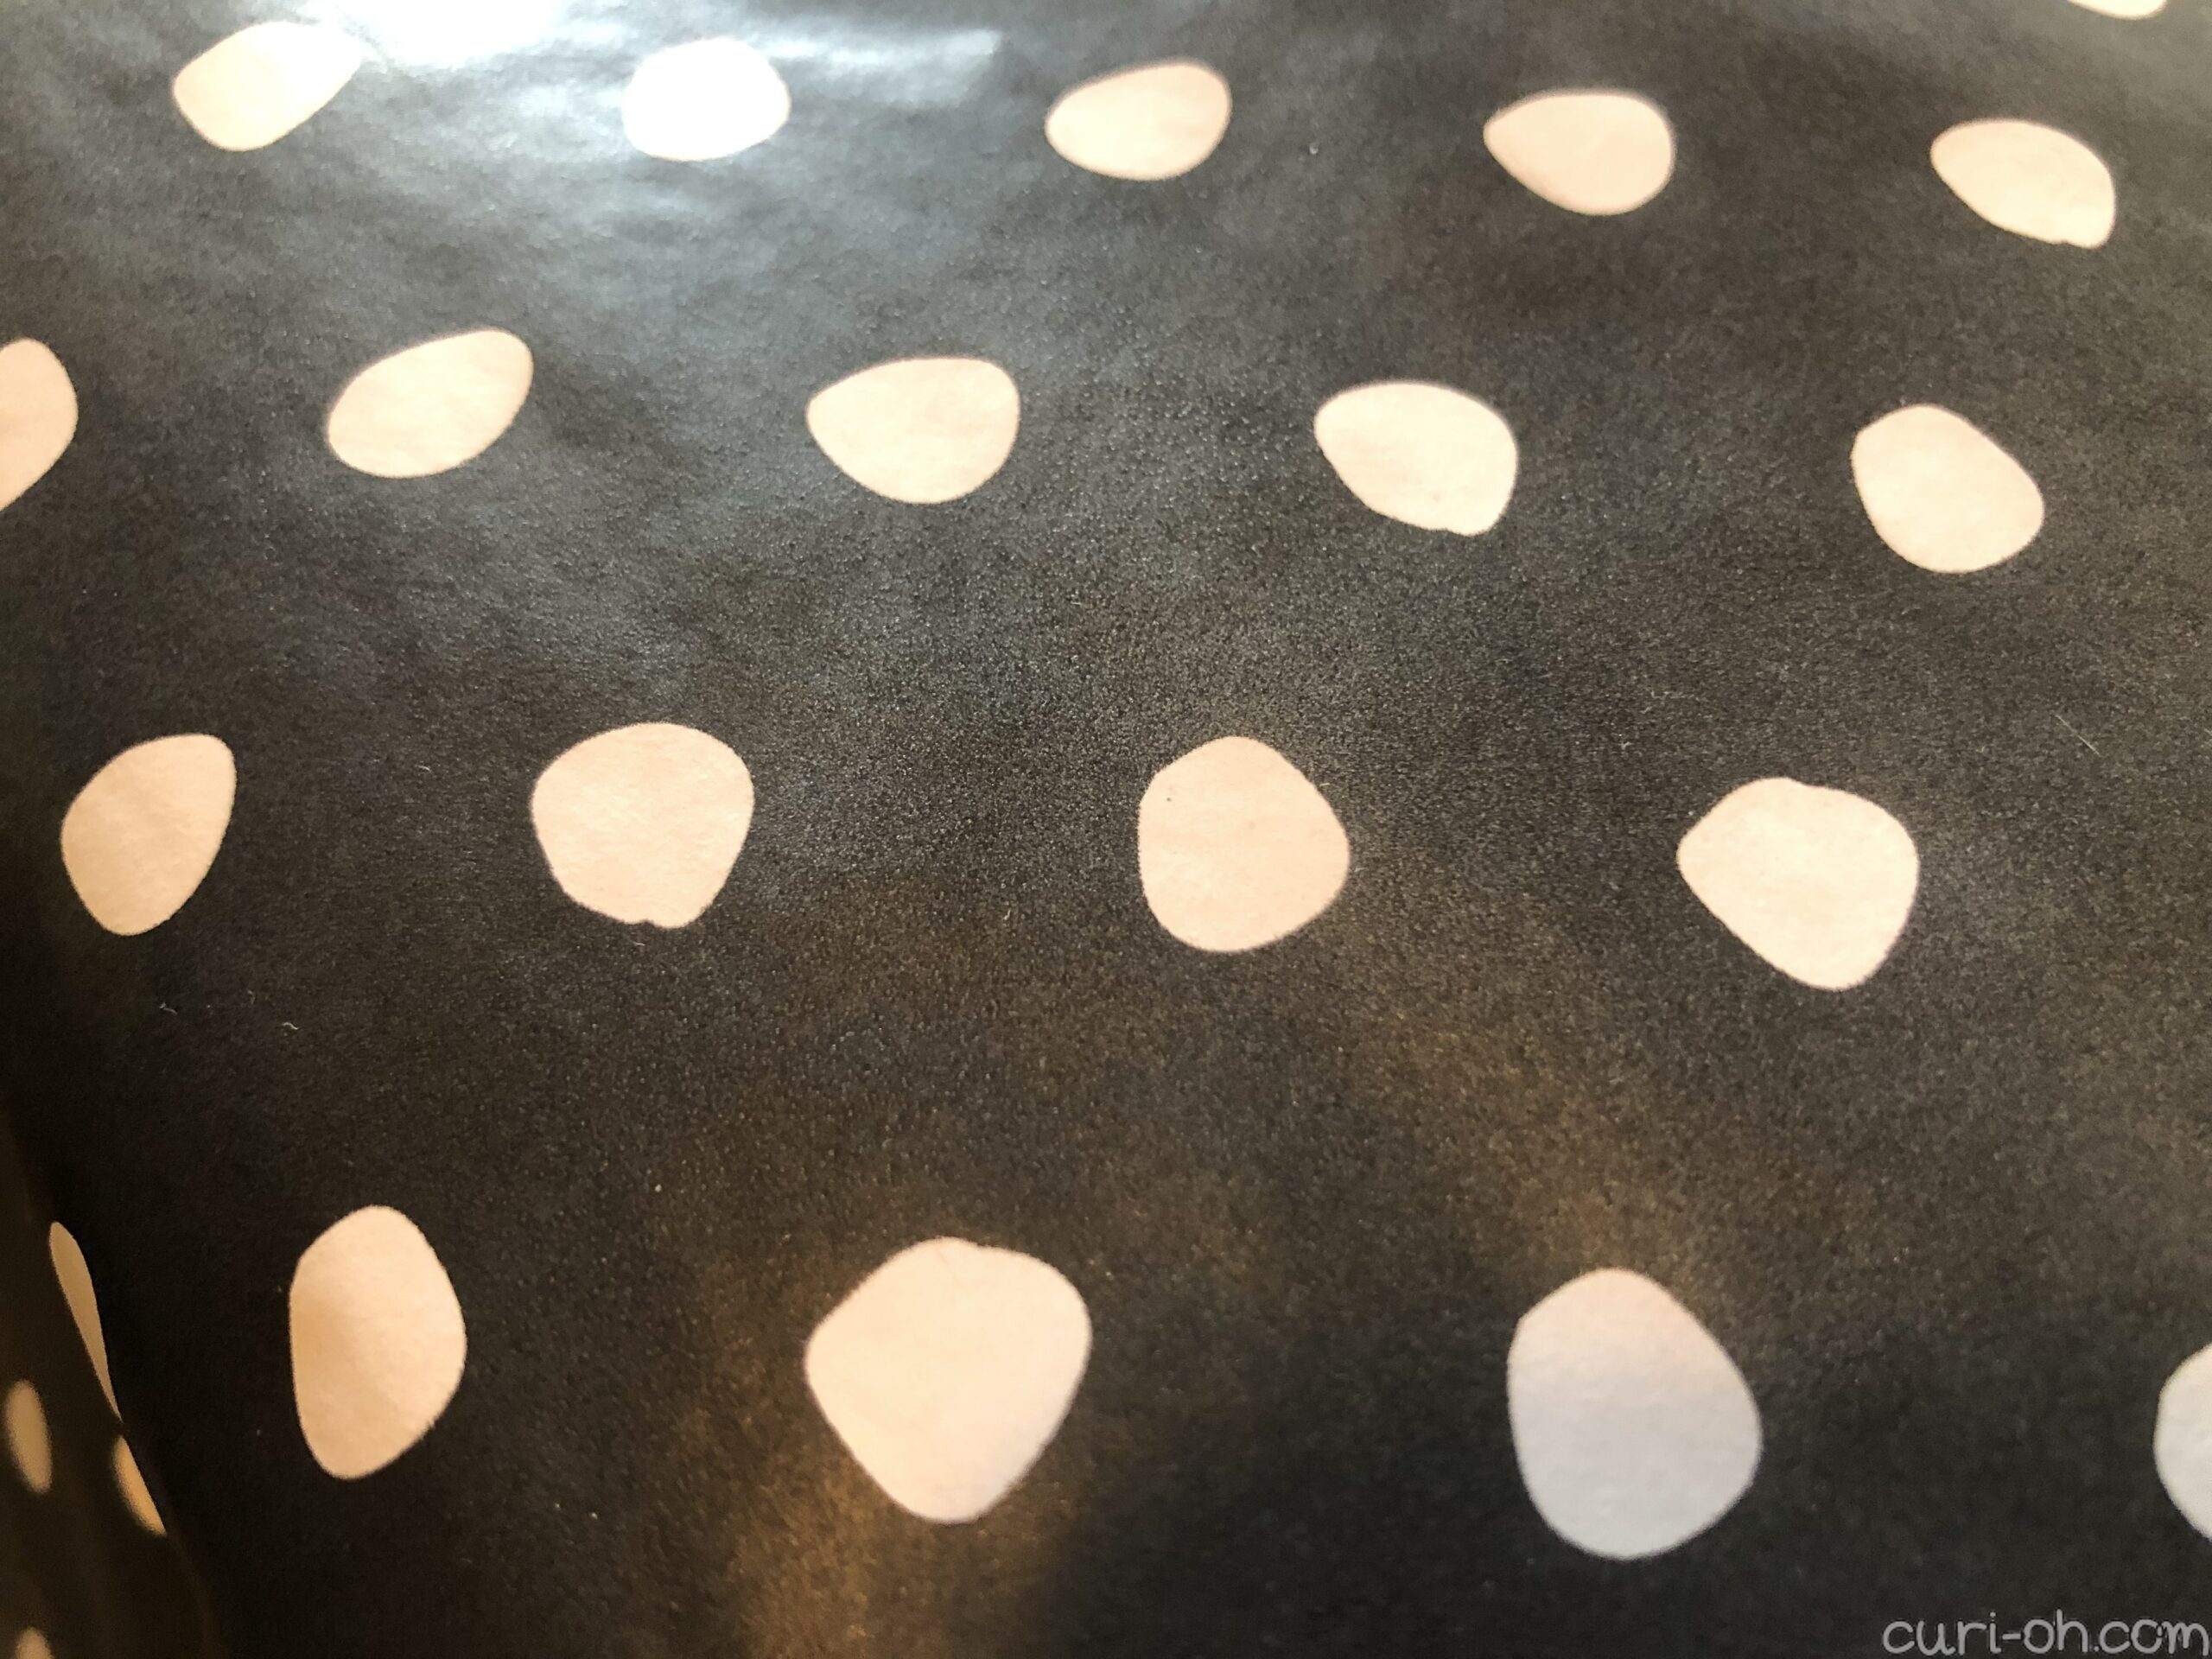
Failure again! Though that may work on some materials, it left a frosty residue on my shiny black paper and the white seemed a bit yellowed.
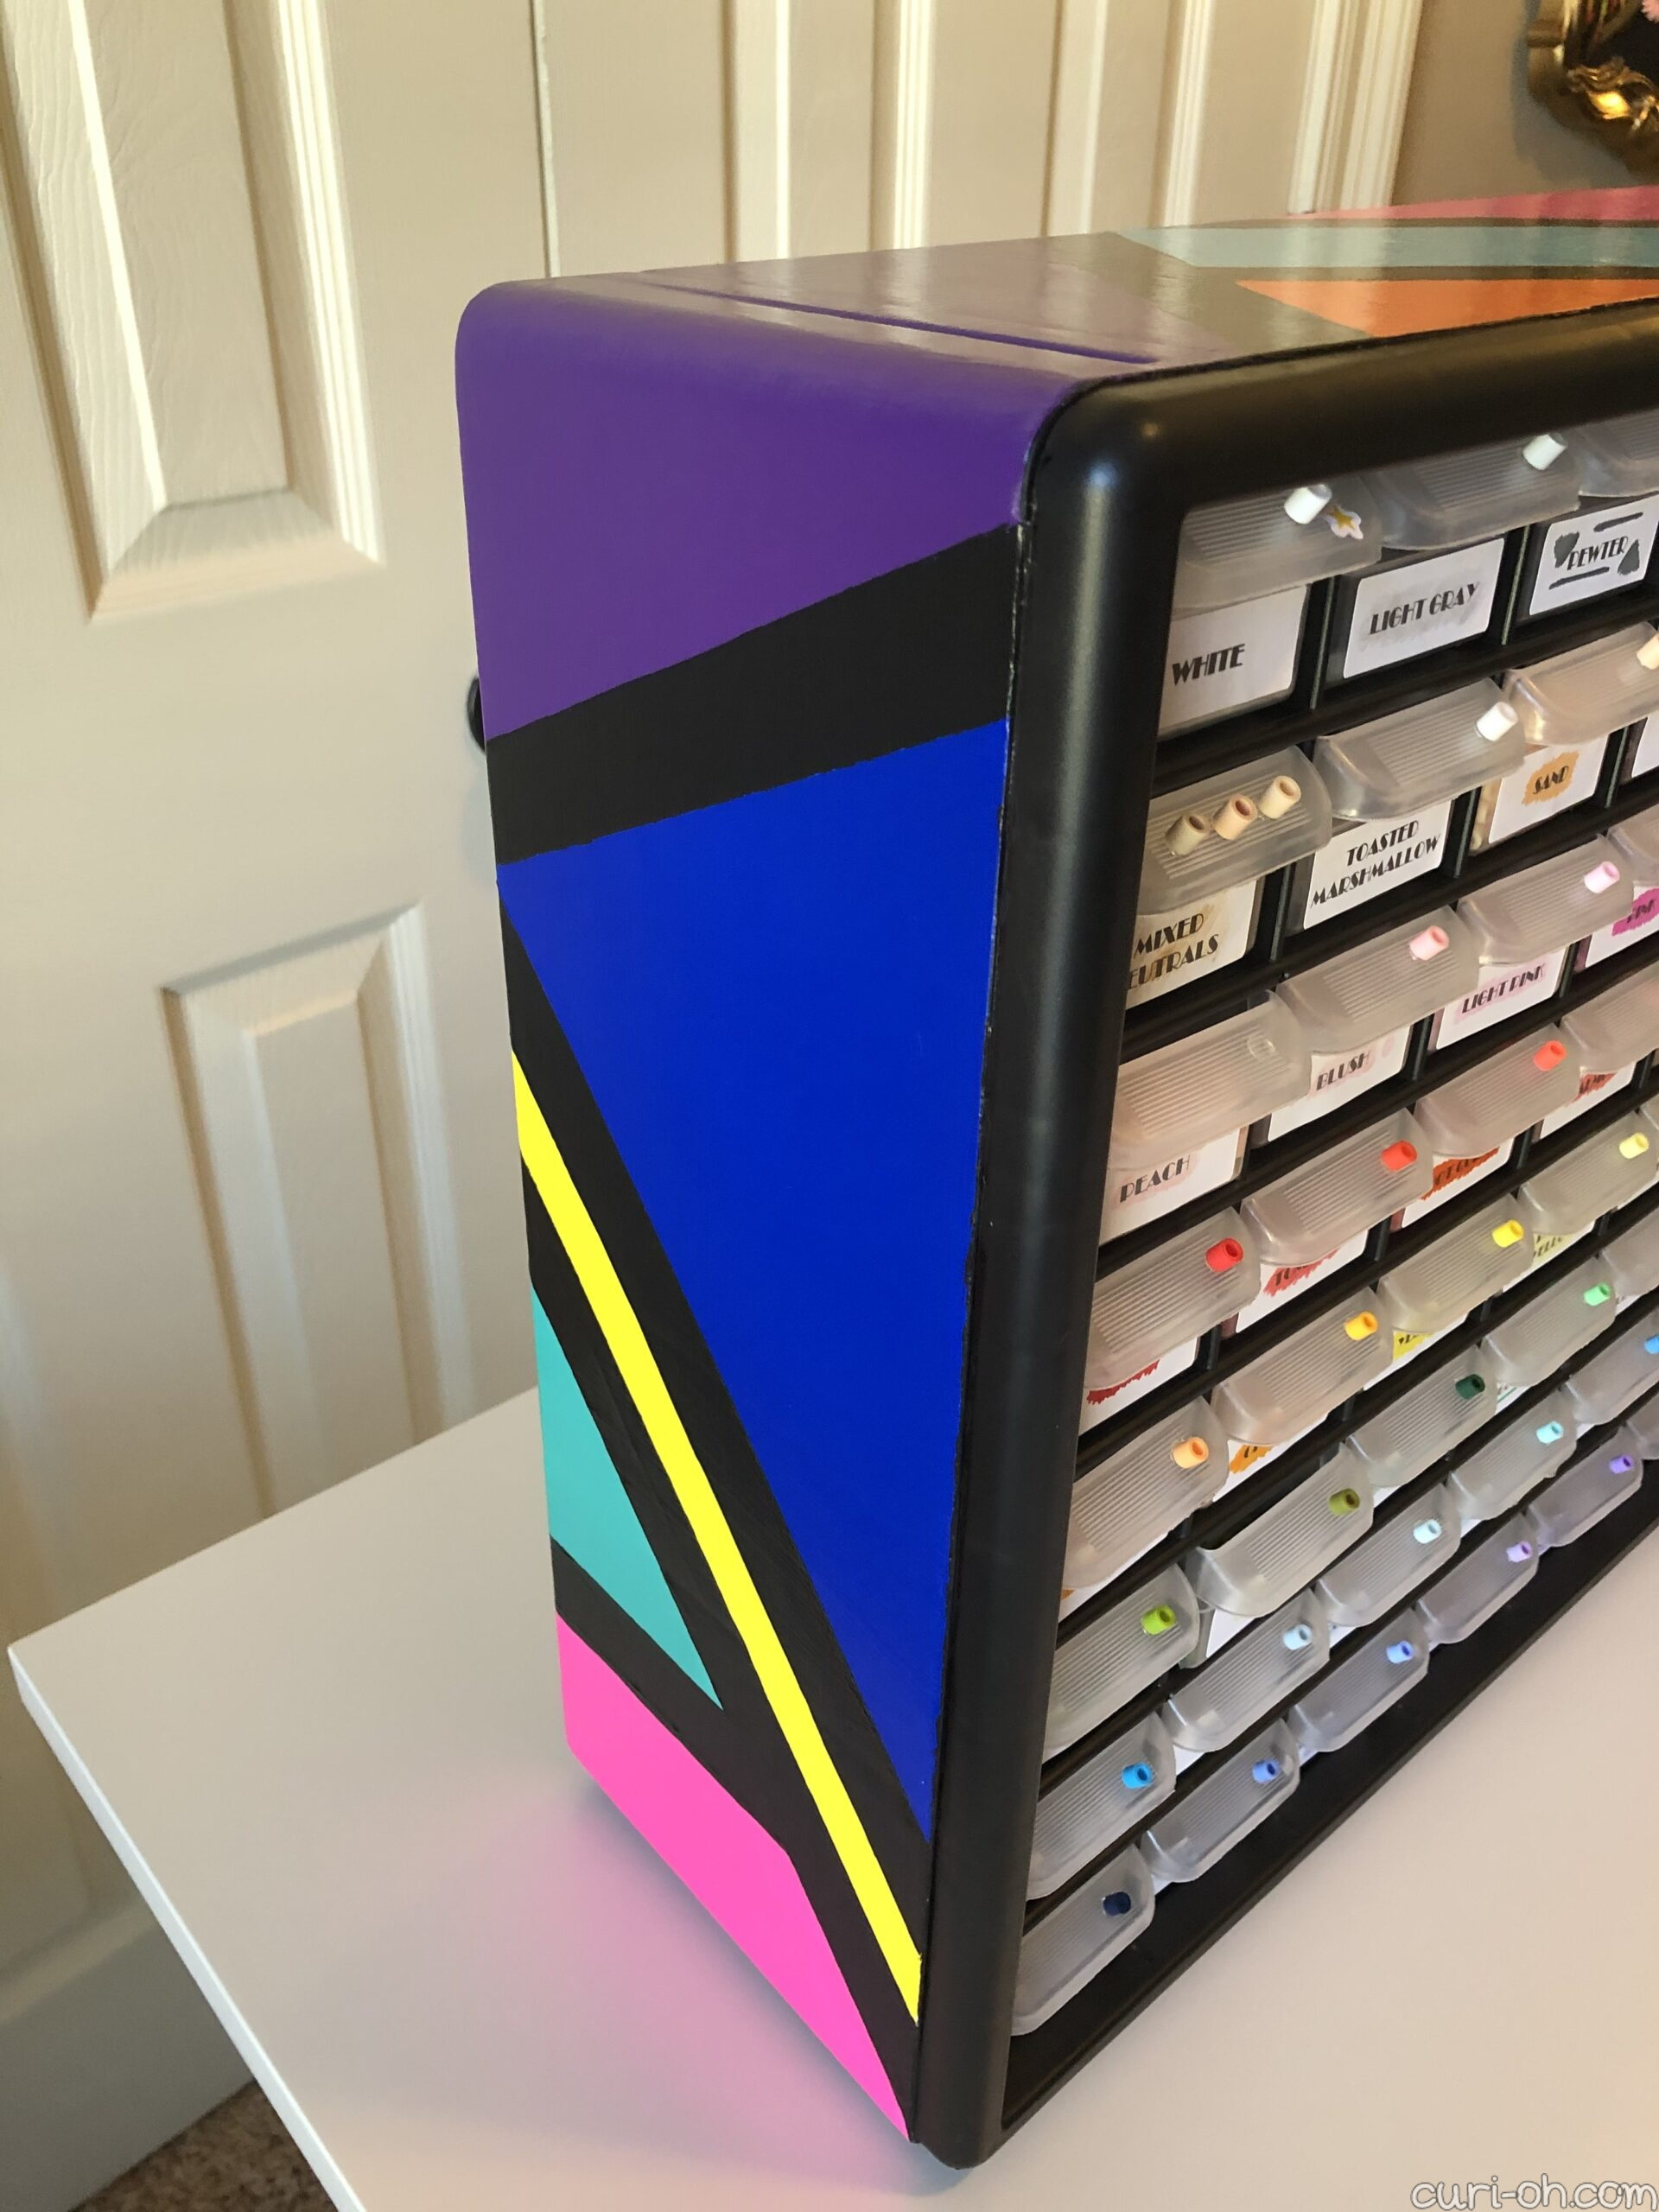
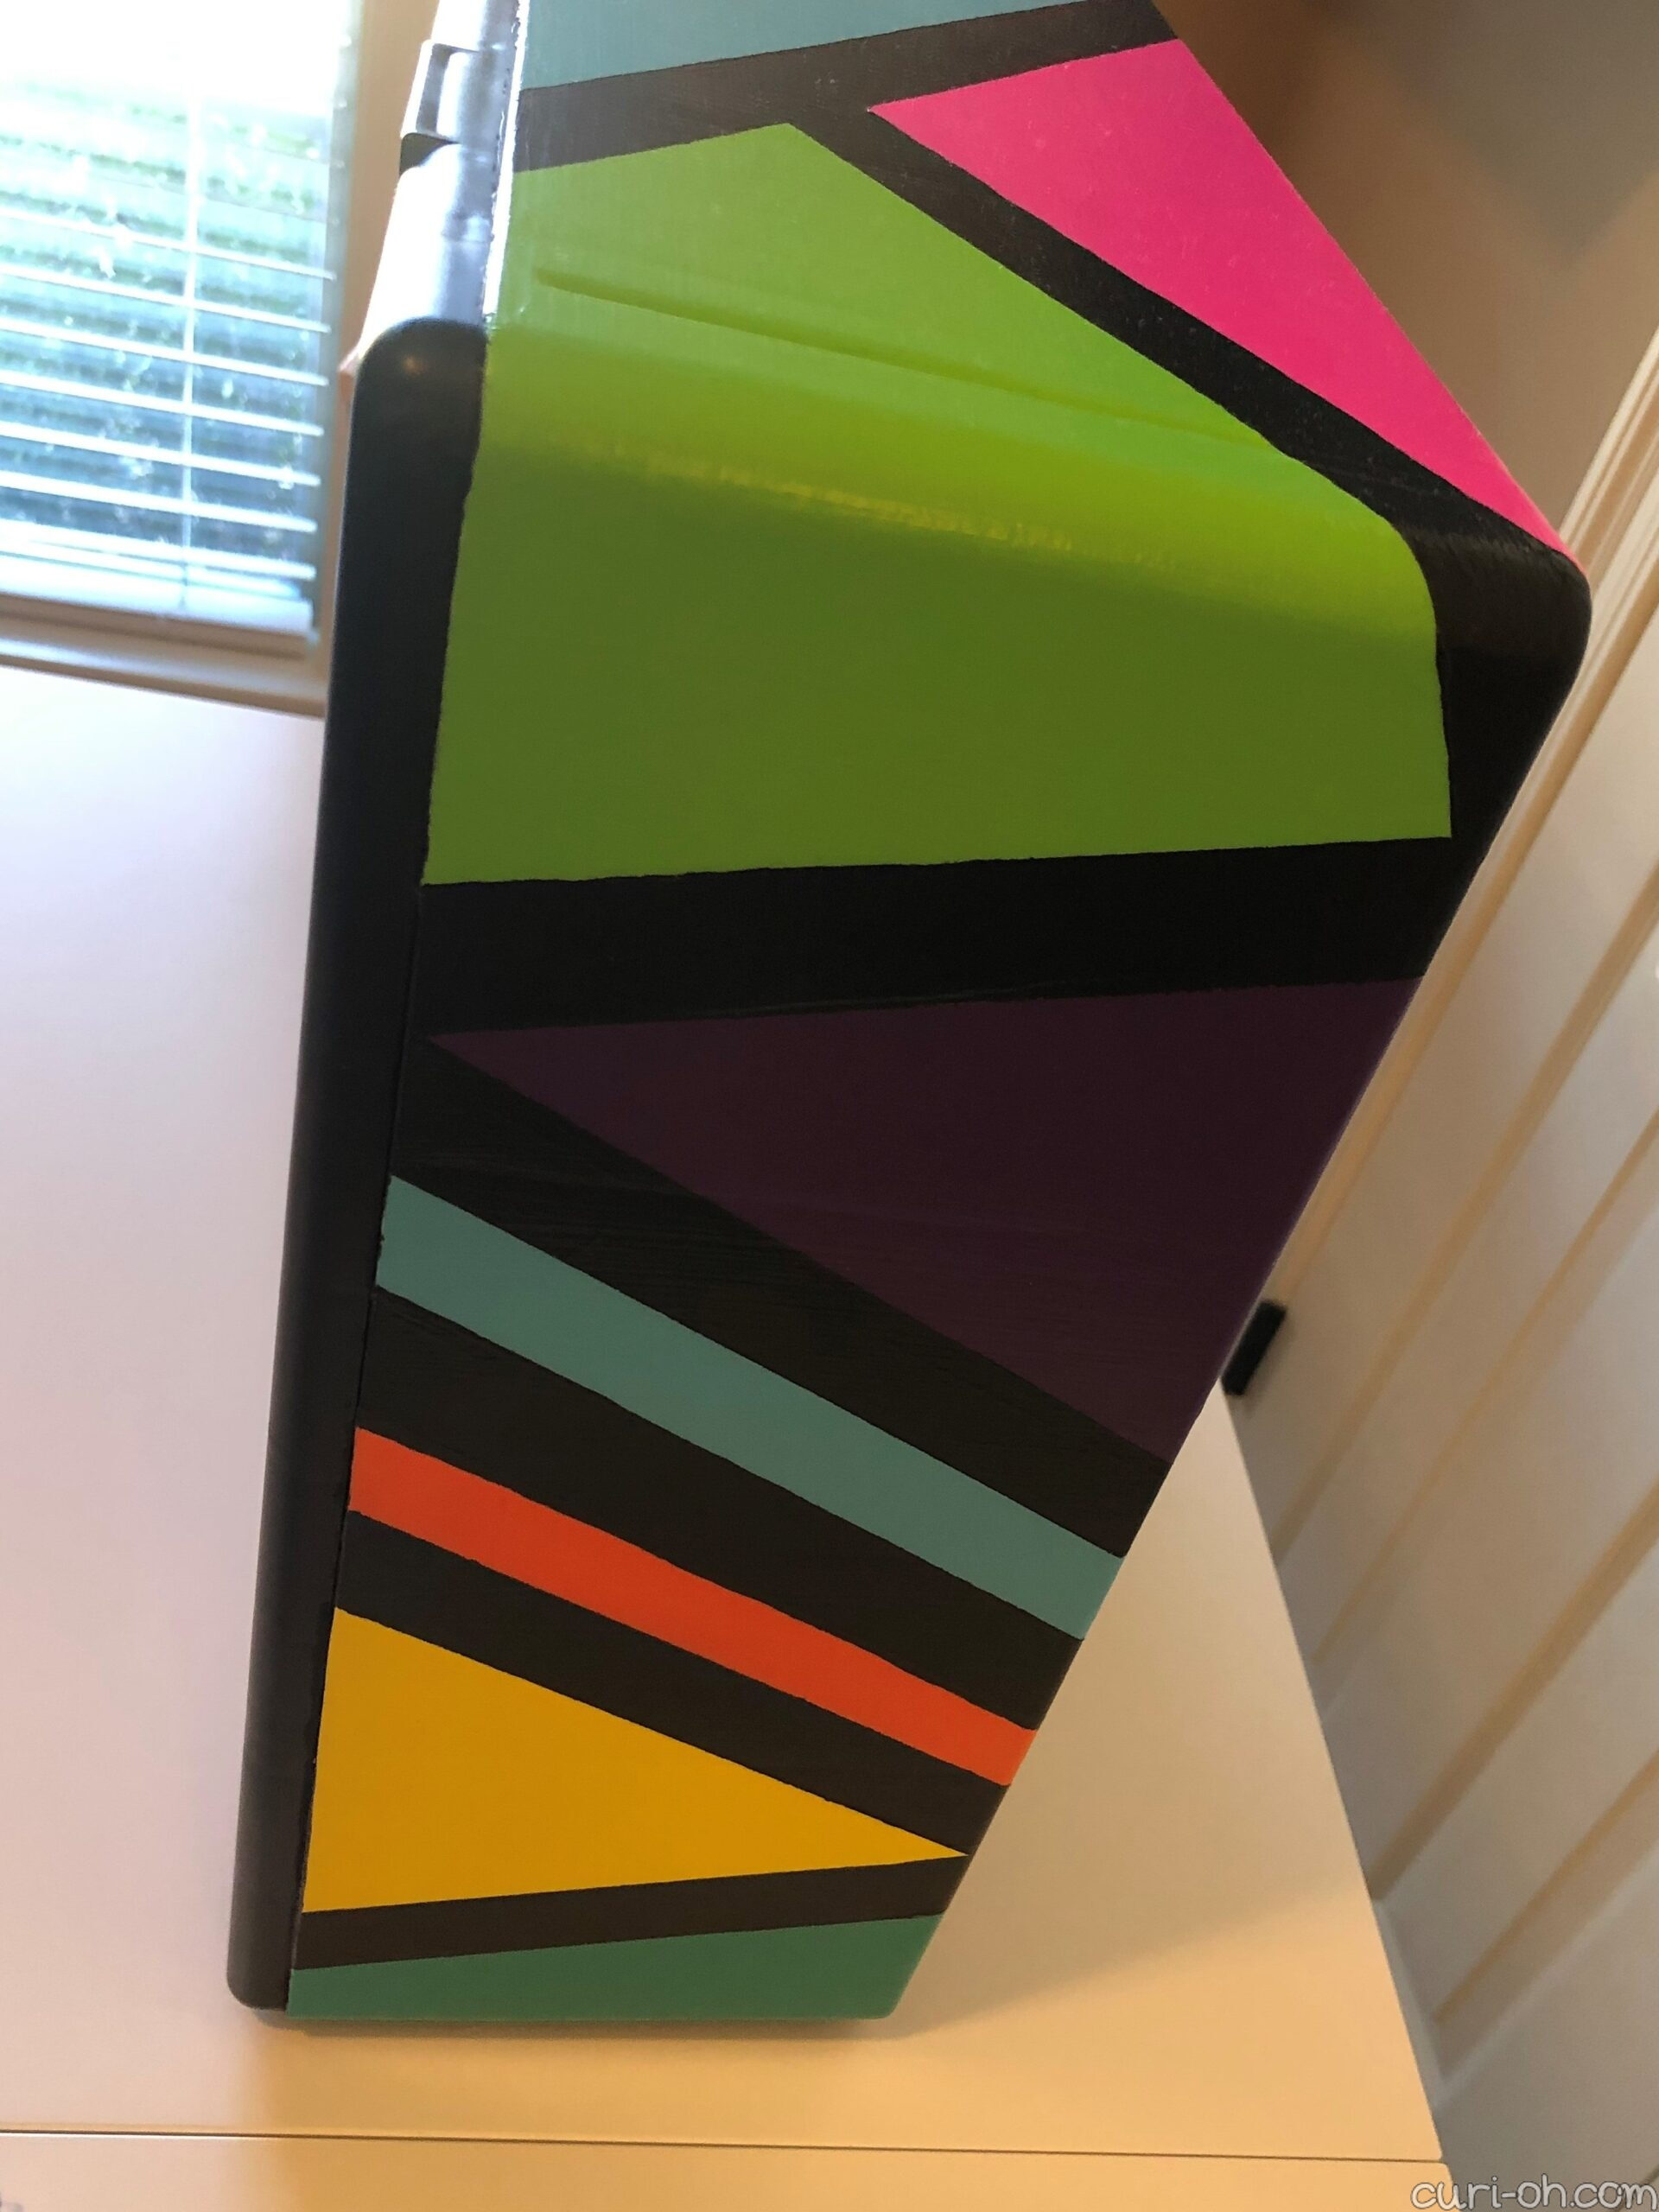
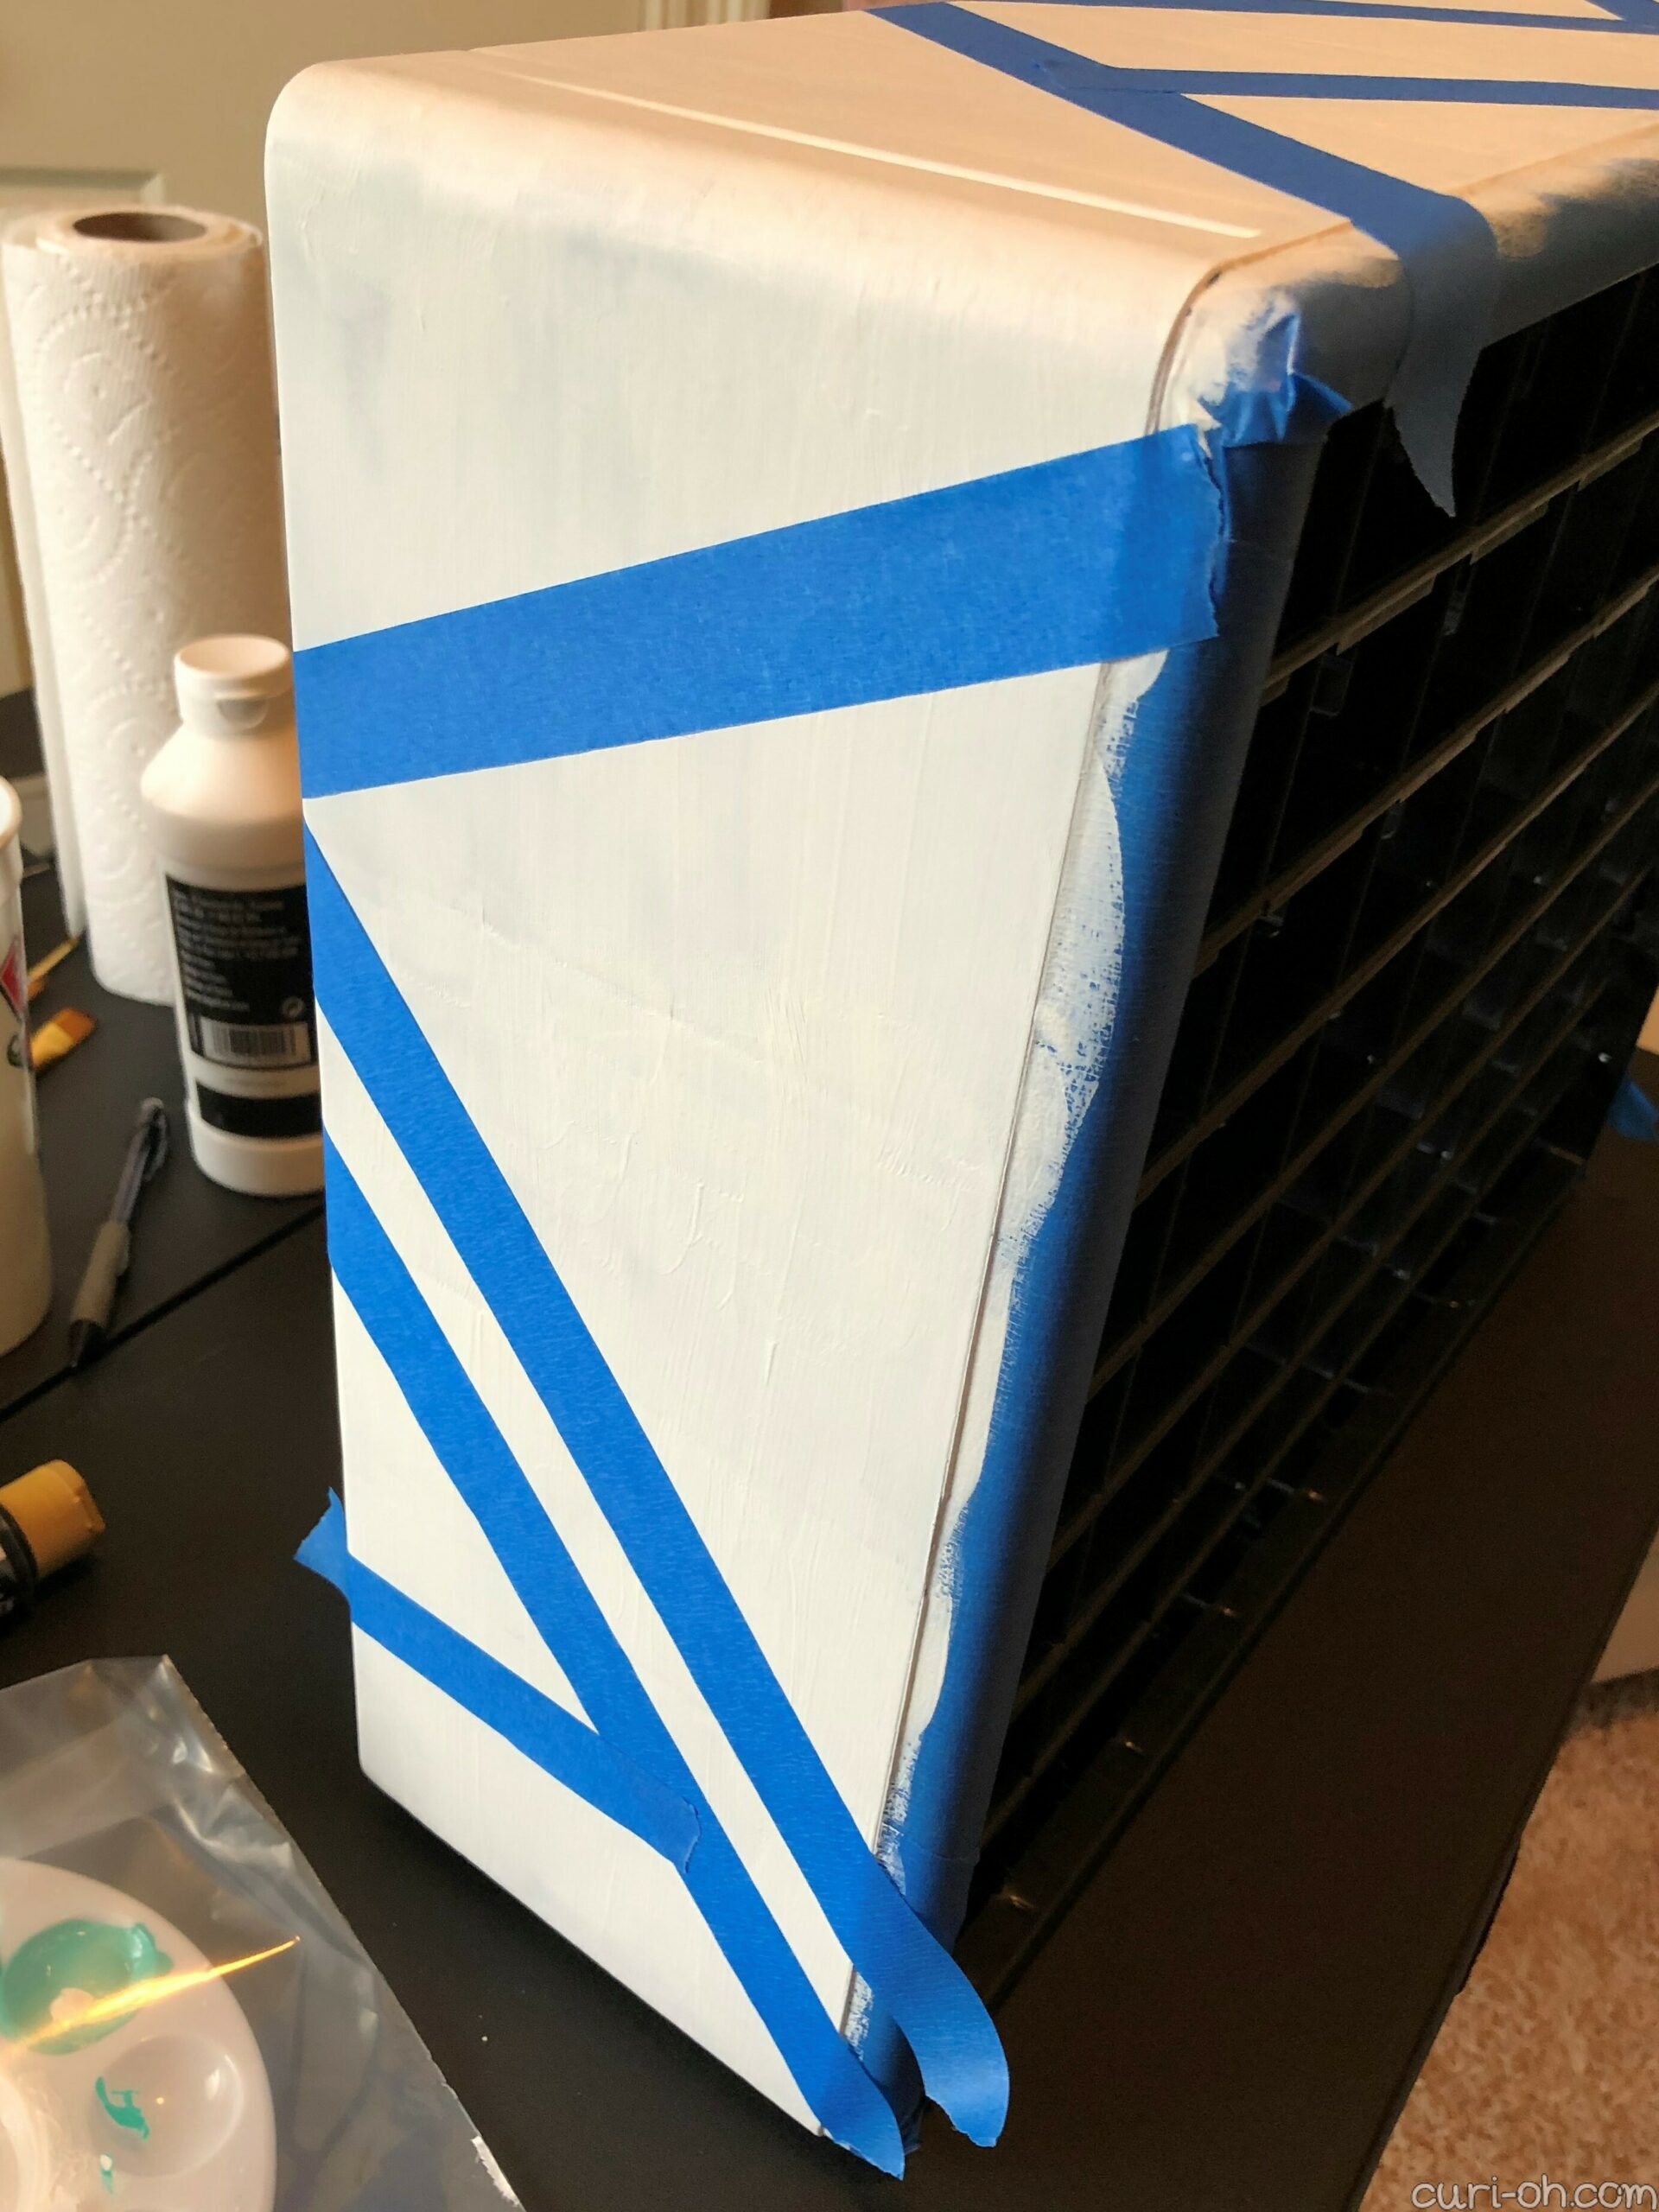
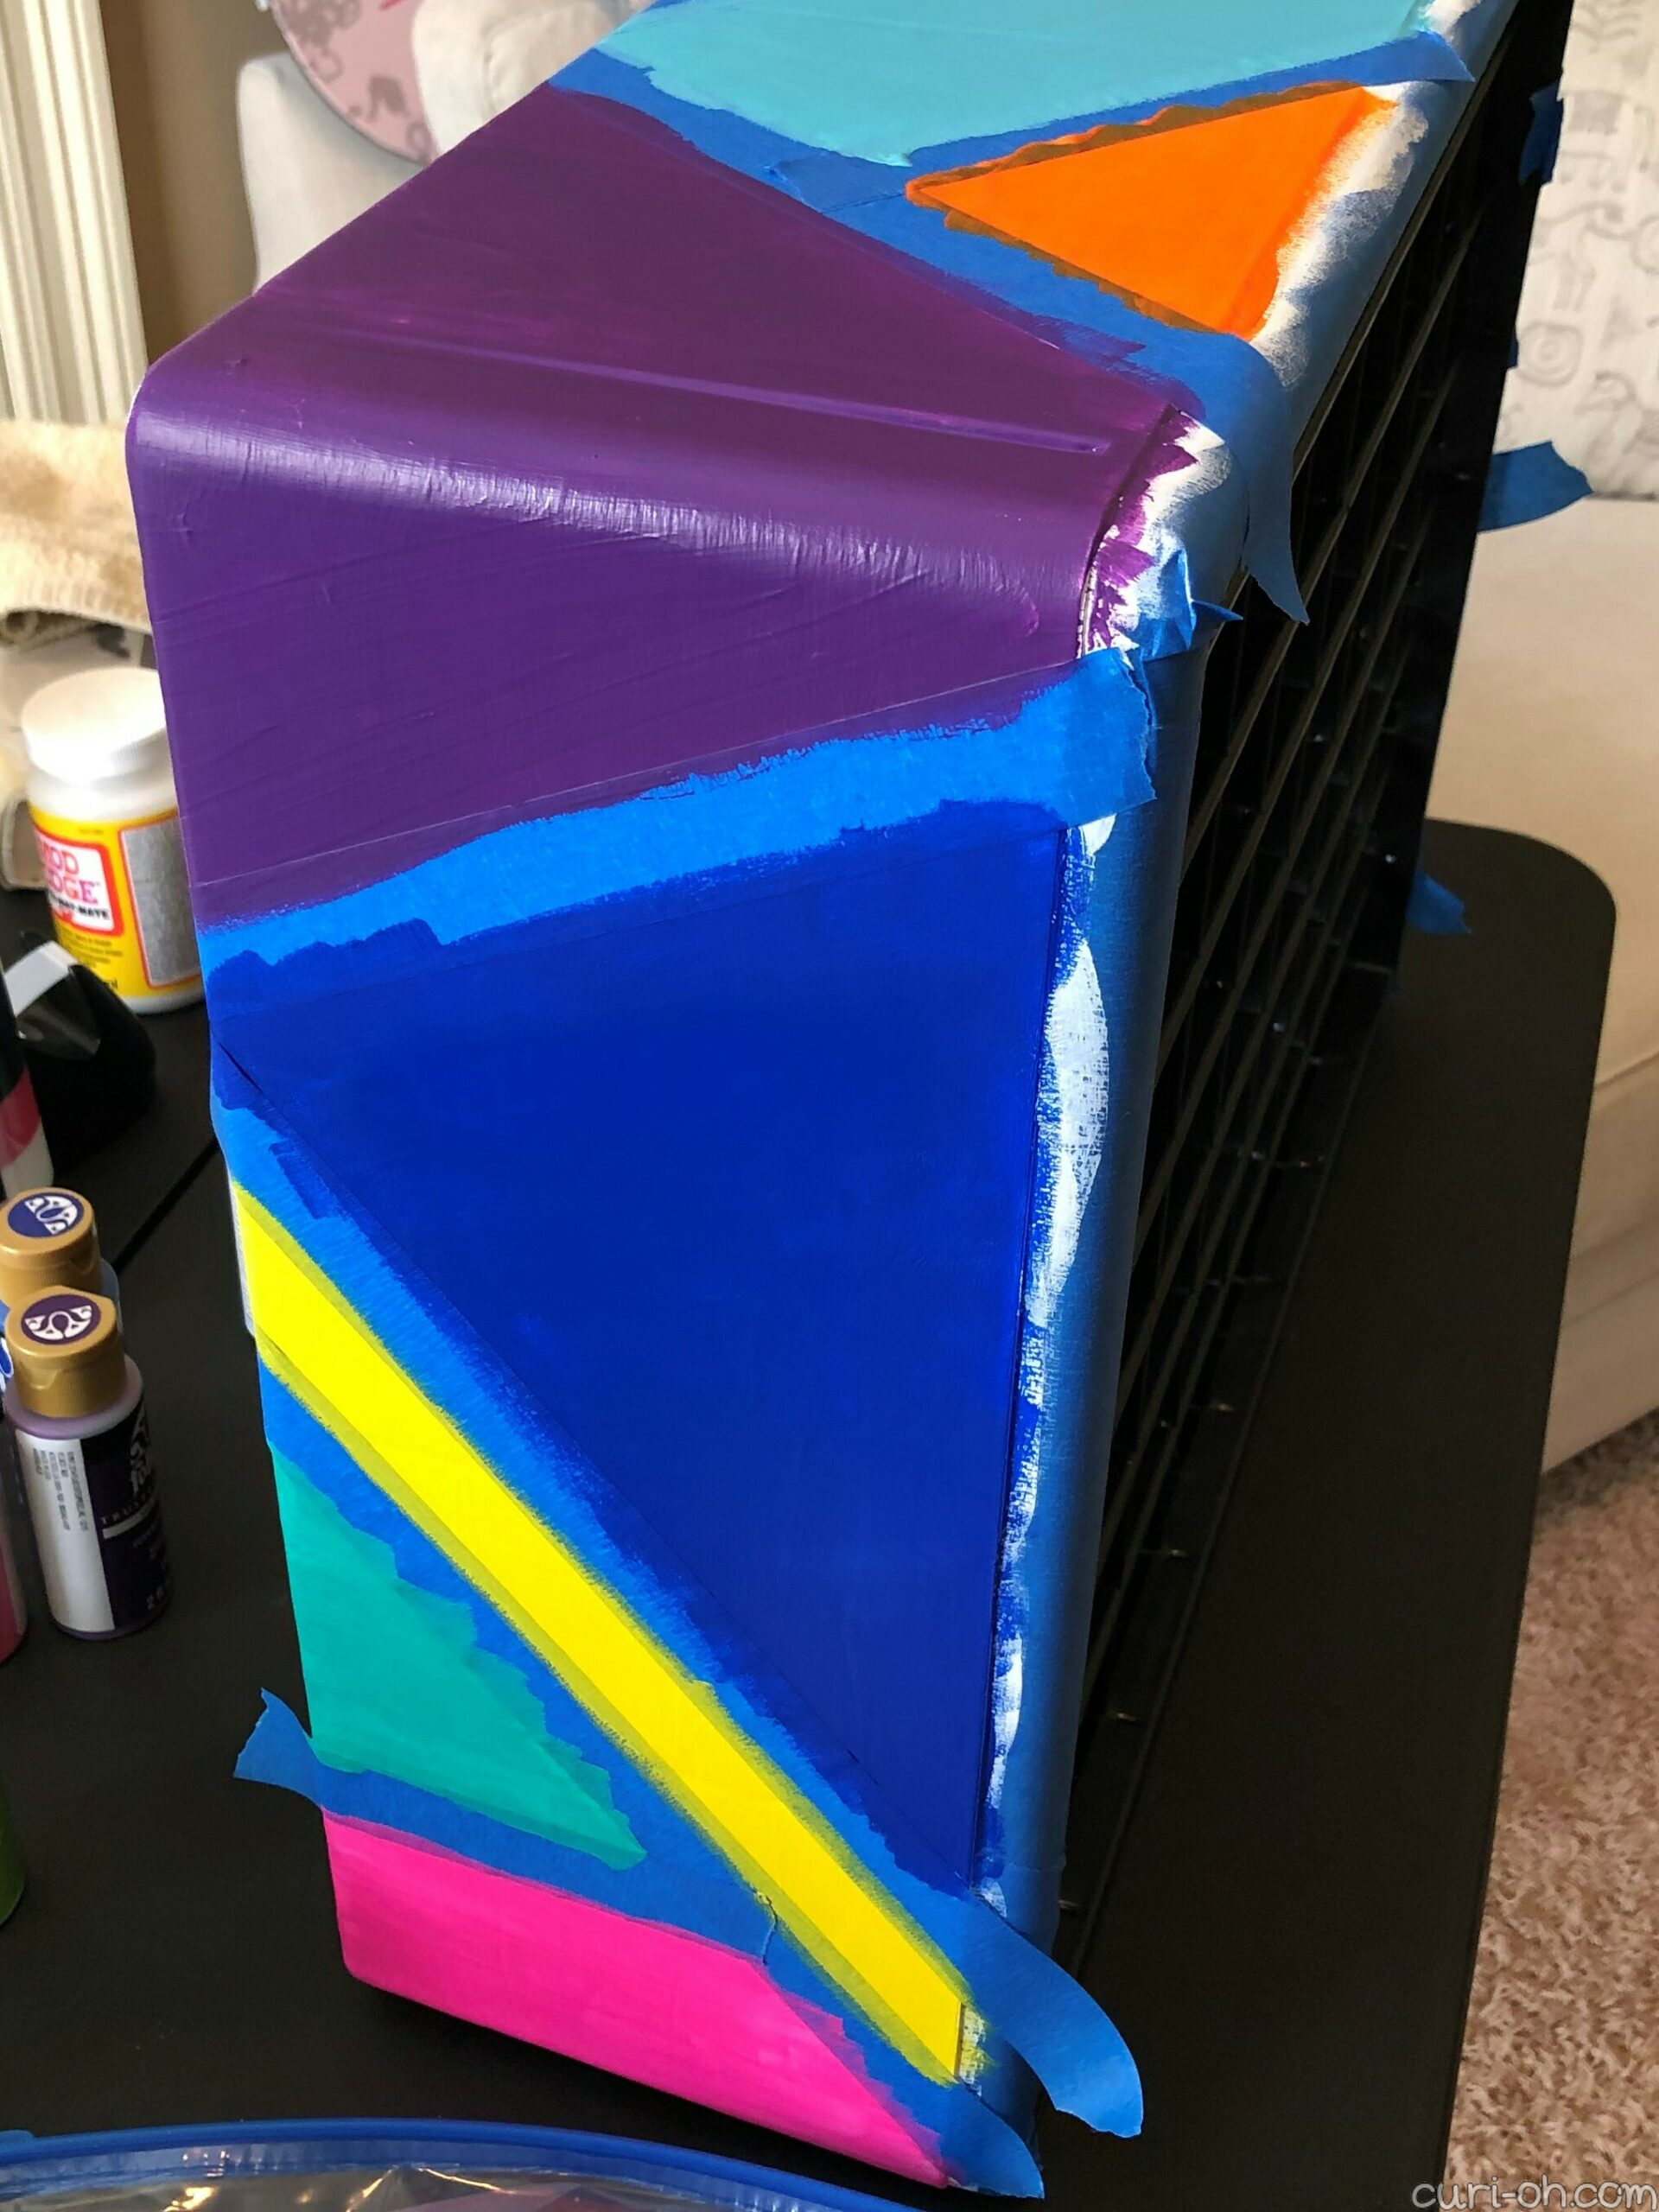
Feeling very screw-it-I-should-have-just-spray-painted-it by this point, I pulled out my acrylic paints and just dove in. I taped off the edges and covered the whole thing in gesso, reapplying coats until the surface was a solid white. Then I used tape to section off areas for a fun geometric look. I used craft acrylic paint inside the sections, reapplying coats as necessary. Once that was fully dry and set I removed the tape and then taped along those lines so that I could paint the remaining strips black. It required a lot of touch-up, but eventually I got it to a place I was happy with.
To seal it, I still had the giant cup of Mod Podge I had poured back when that was still my plan. Since I did not want to waste it, I chose to use it as the sealer, and applied several coats to get it nice and thick.
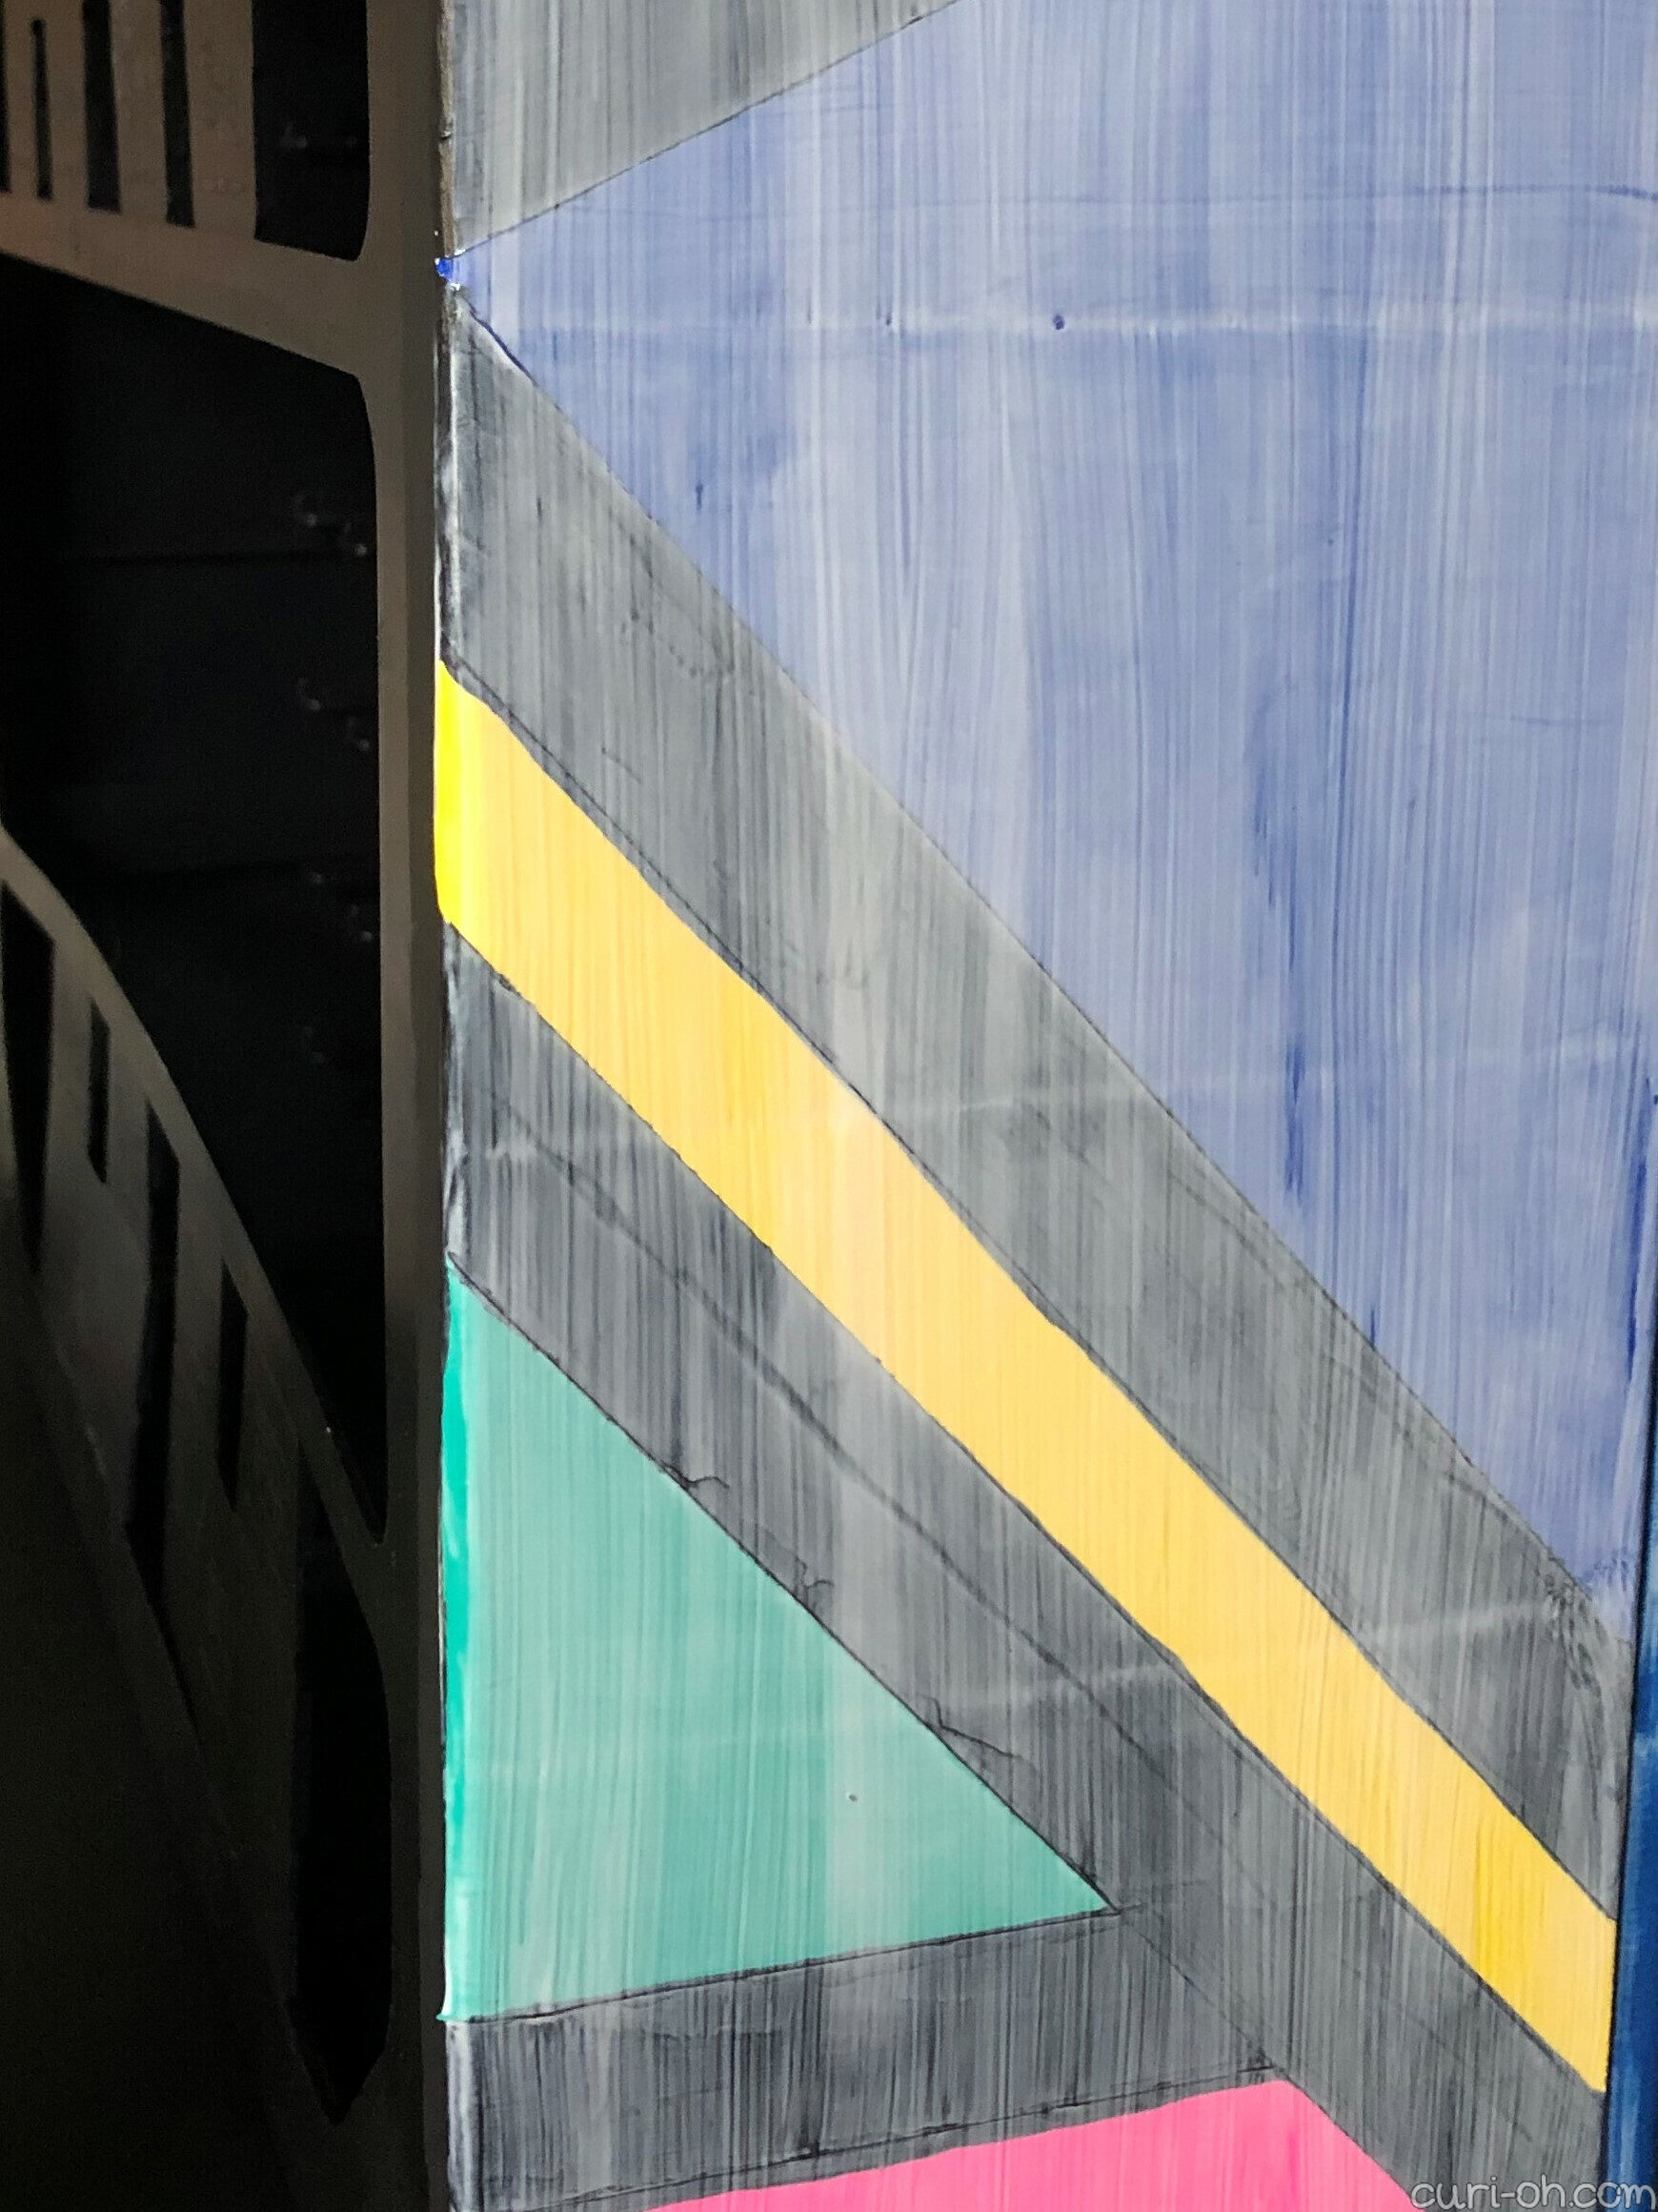
I’m very much a novice when it comes to painting. There are all these confusing rules about what paint will stick to what surface and when it should be used and how it should be sealed… except people generally can’t agree on these things most of the time it seems. Sanded plastic surface + gesso (white acrylic paint) + acrylic craft paint + Mod Podge = what I did. Hopefully it remains durable! No problems so far.
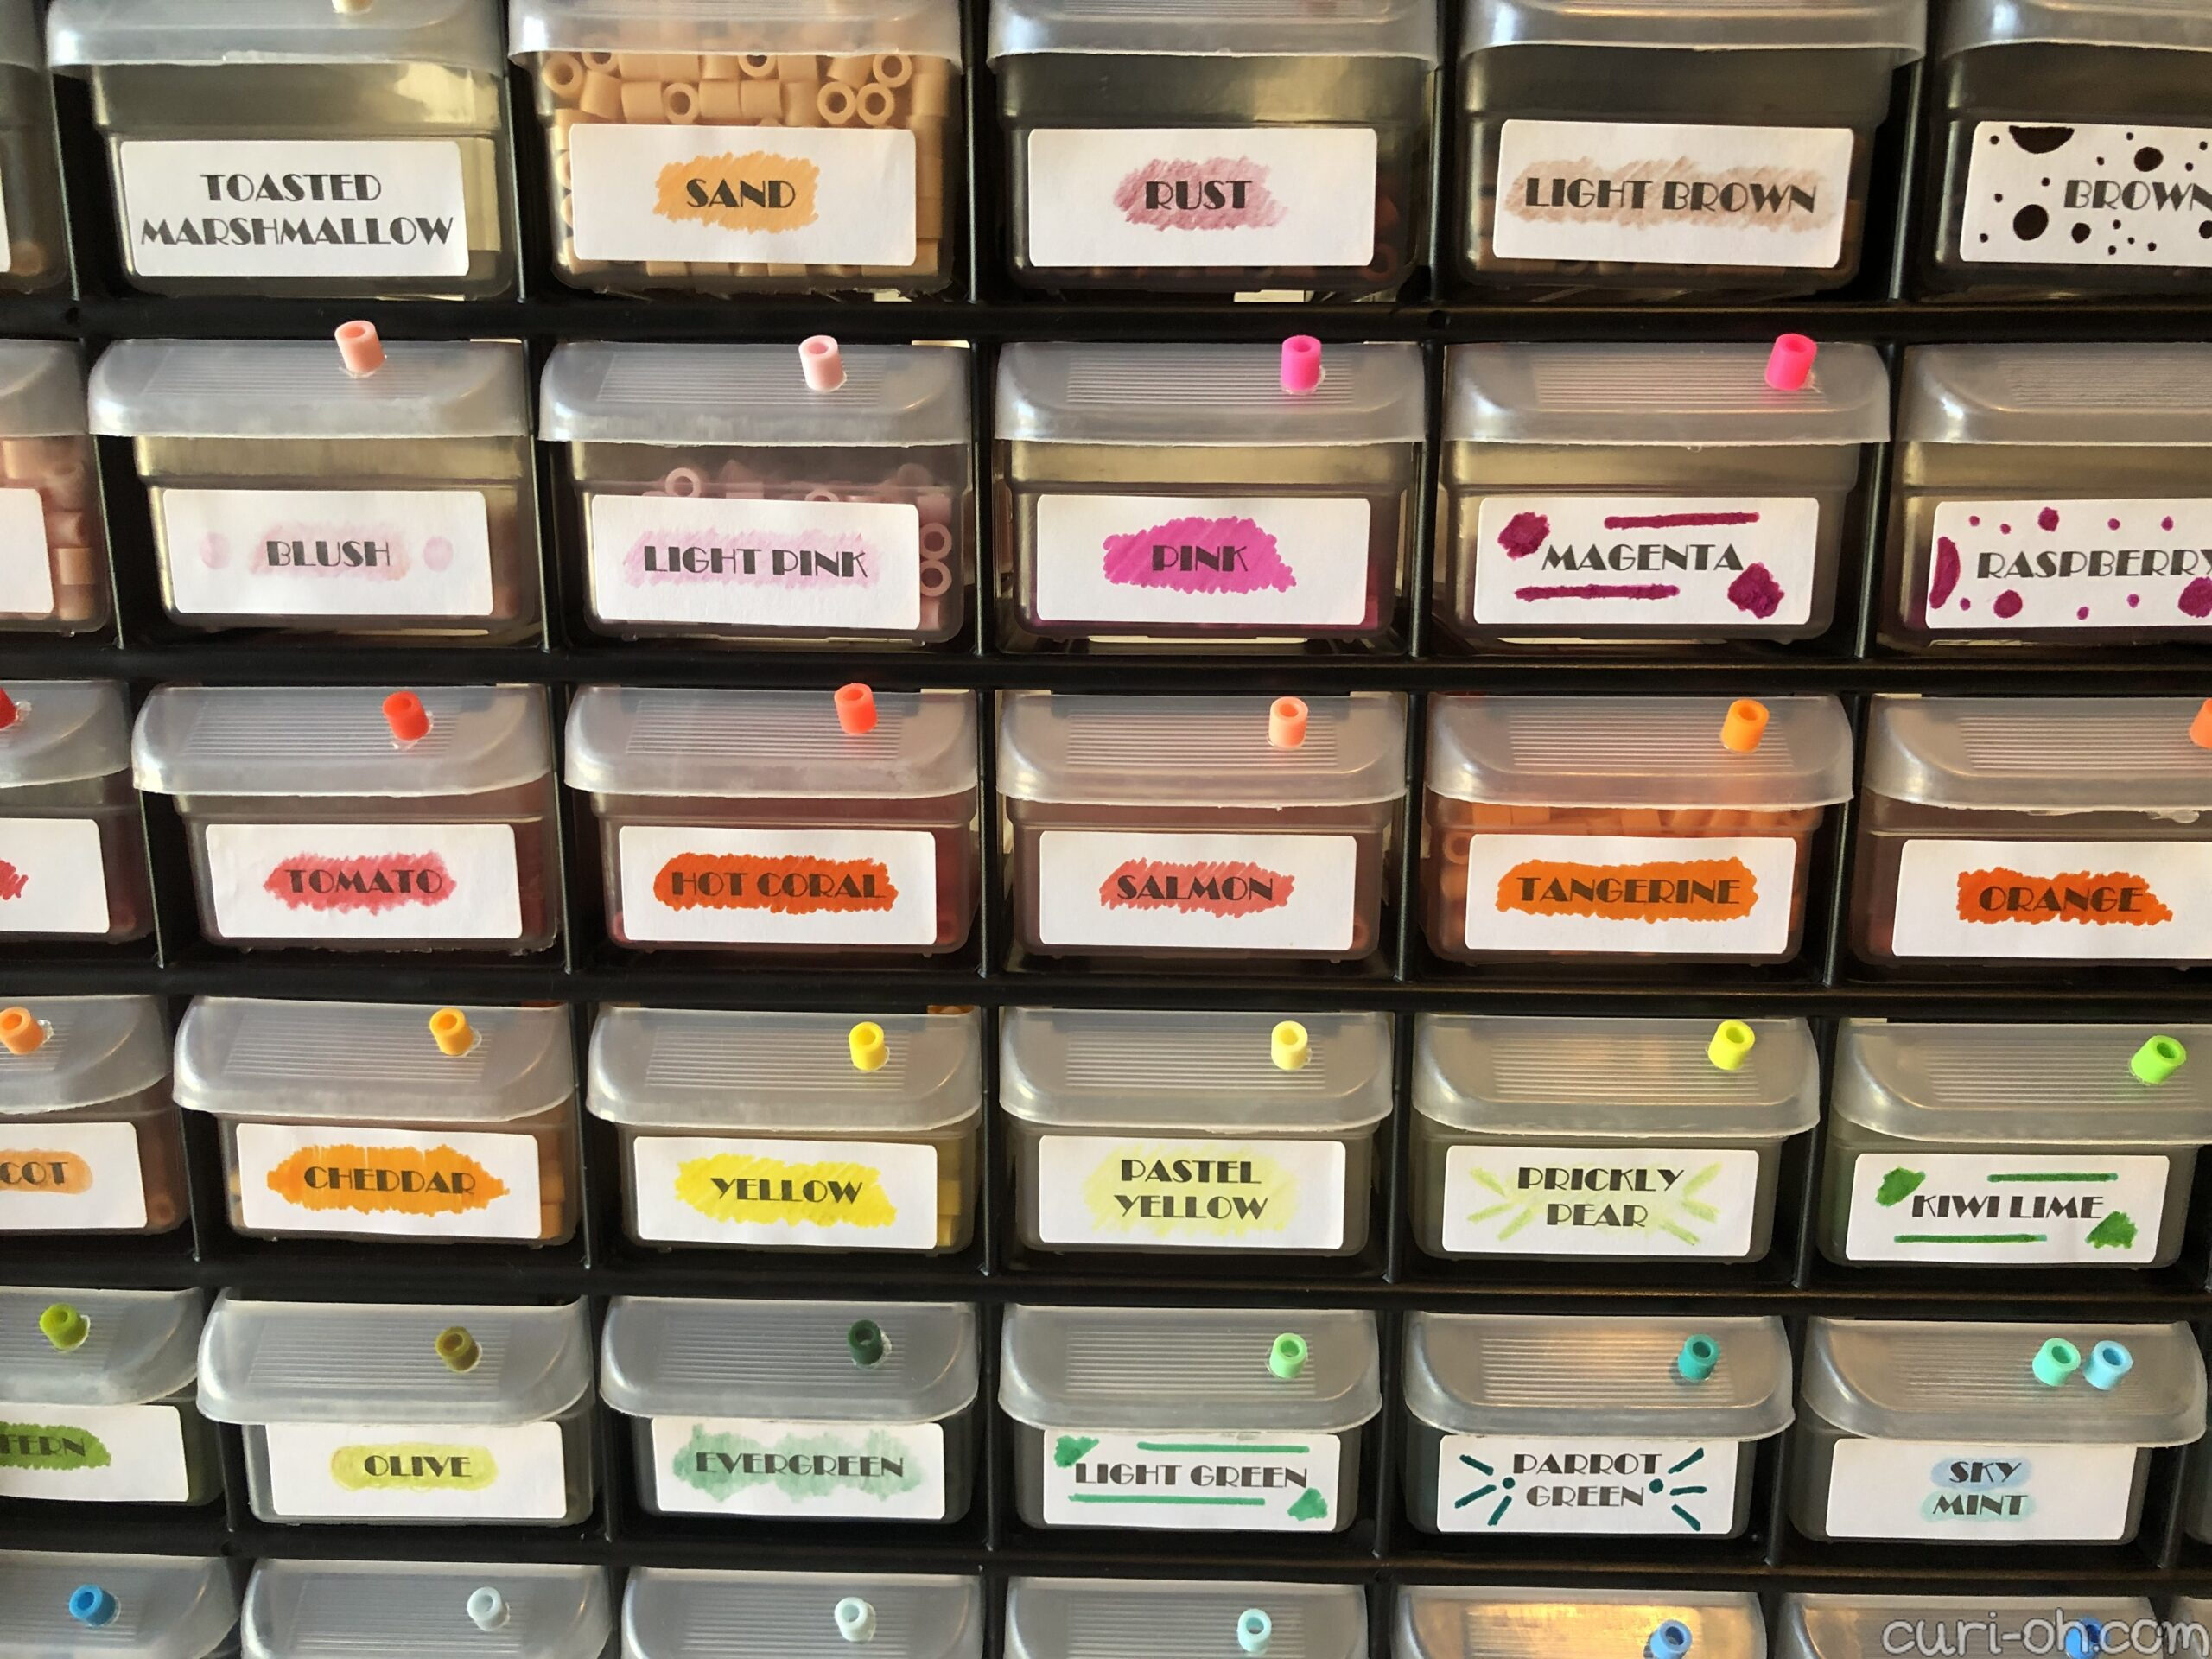
I placed a sample bead of every color on each of their drawer pulls by attaching with a mini glue dot. I printed the name of each color on Avery Easy Peel 2/3″ x 1 3/4″ labels. Neither of these is particularly sticky and both are easy to remove. I colored on the labels with the closest matching colored pencil or marker I had, though that was hit or miss.
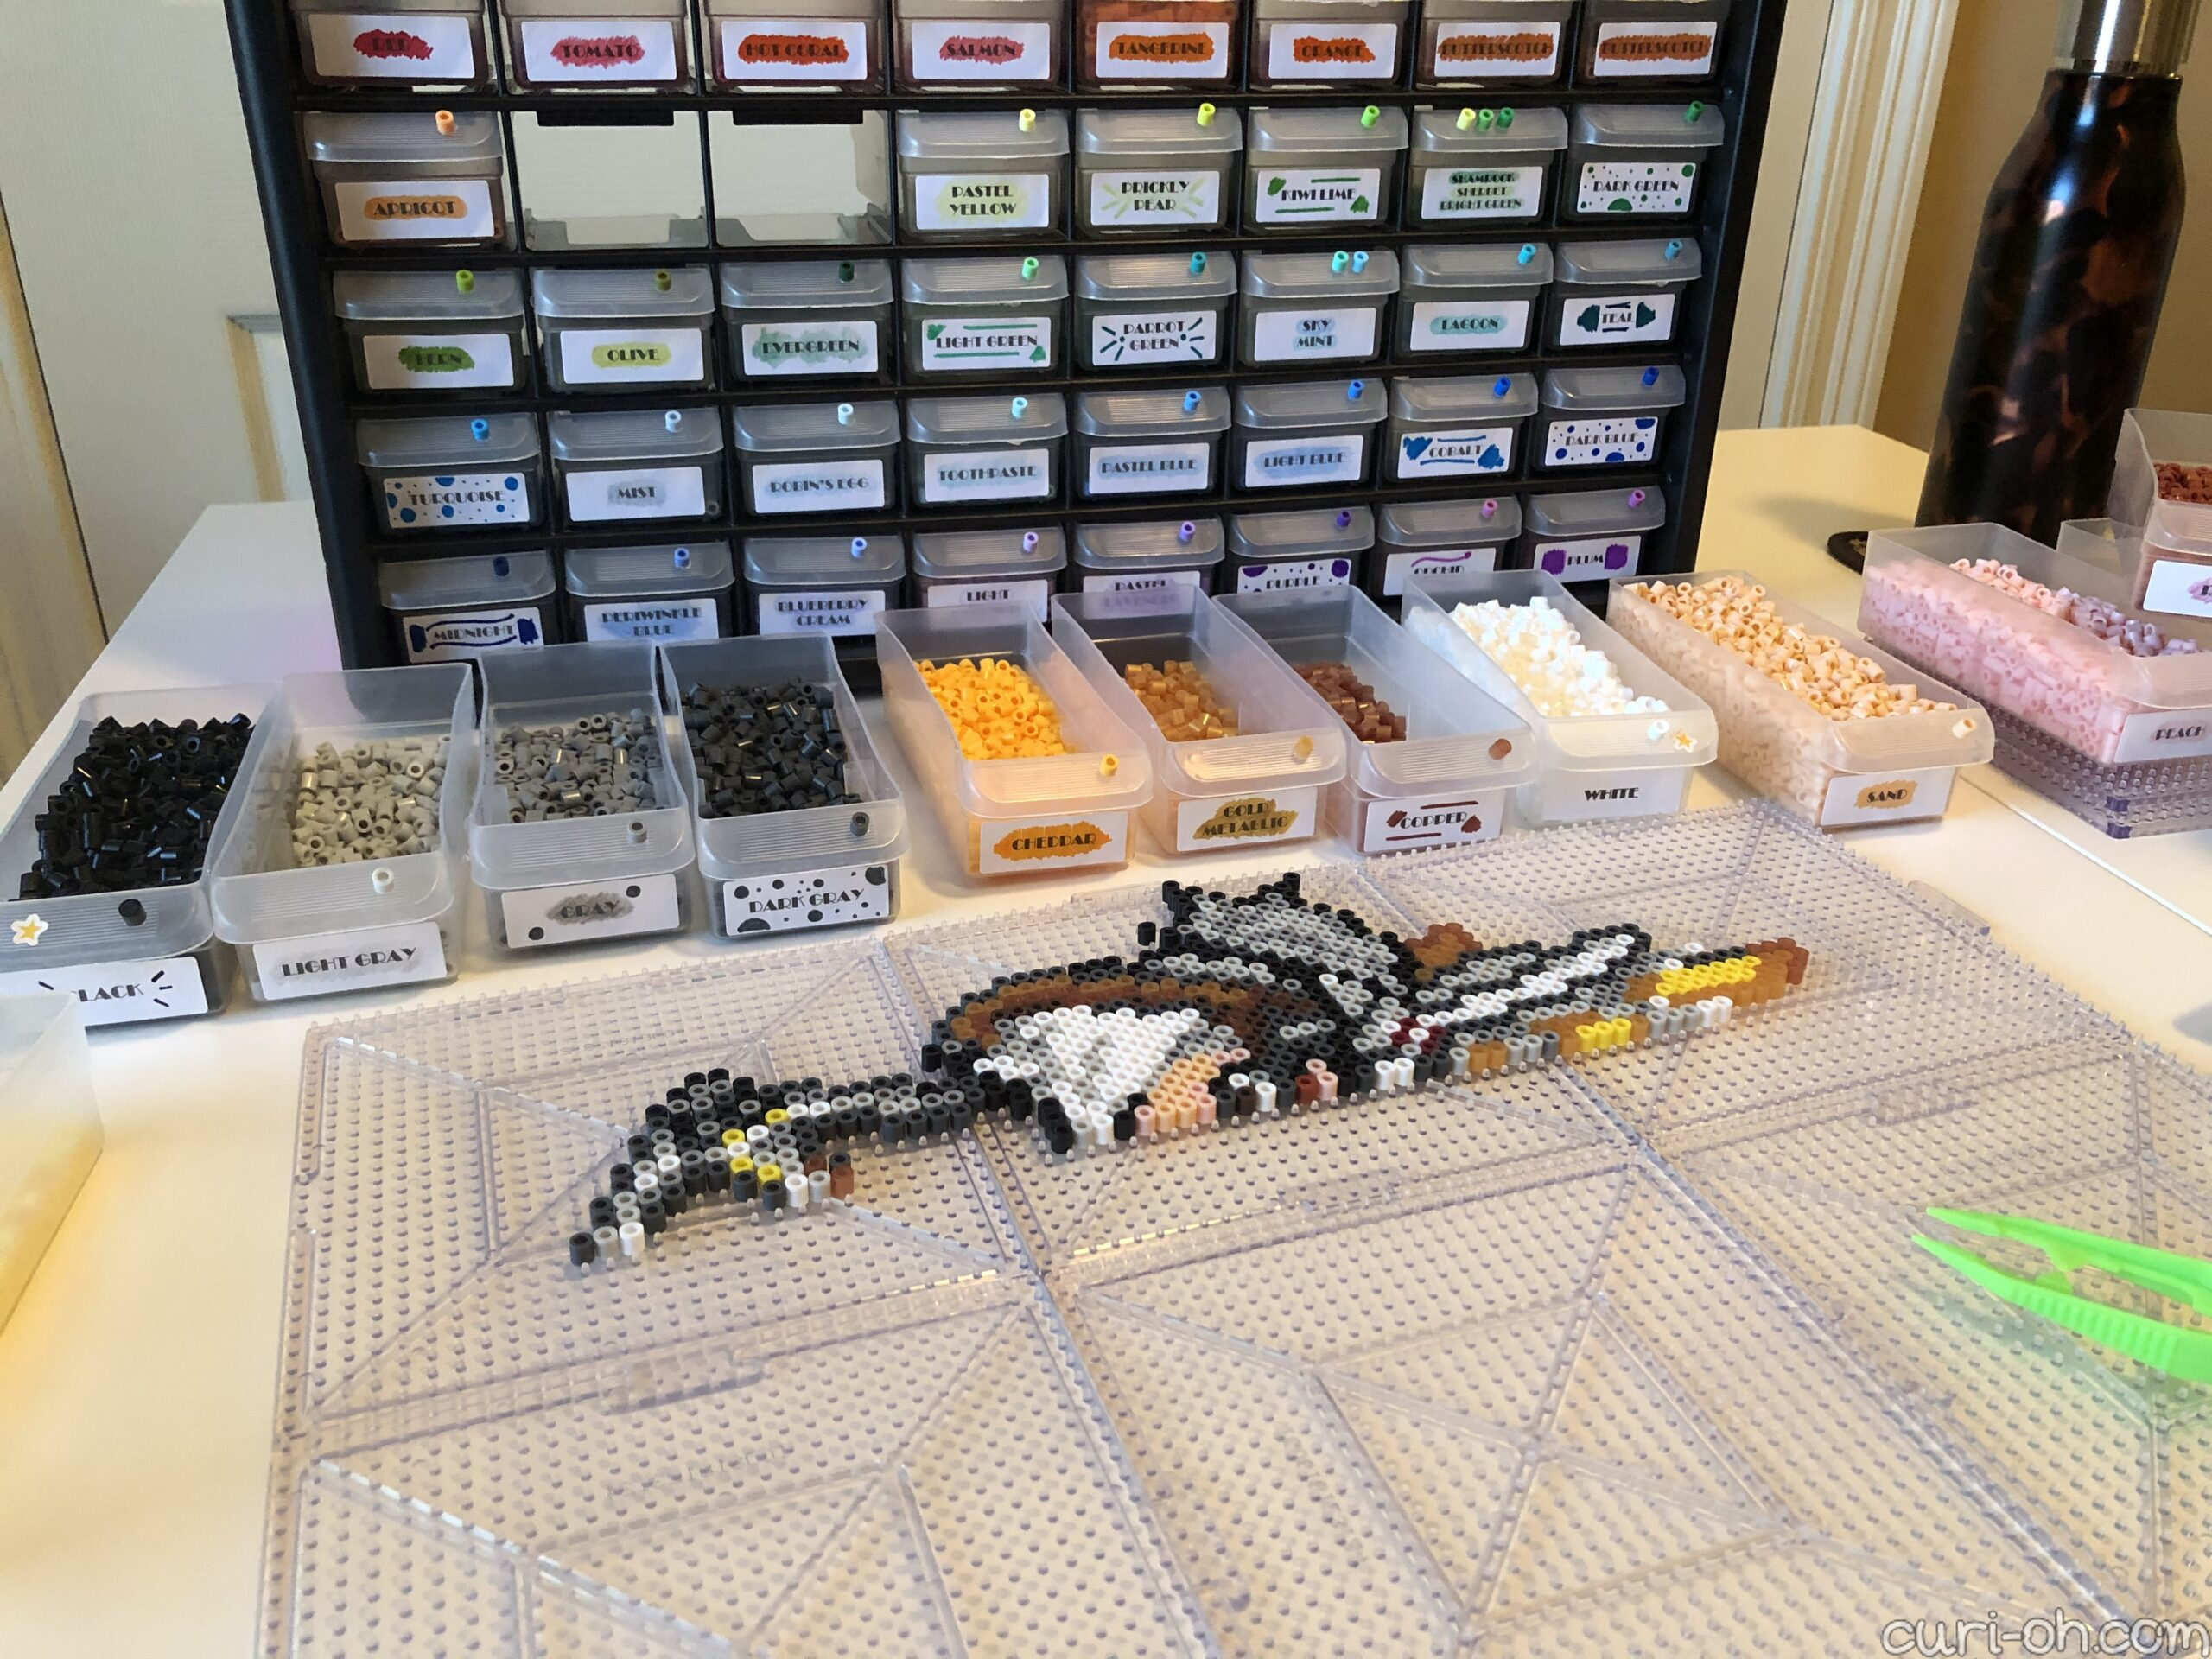
I am so pleased with this nifty storage solution for fuse beads! My new setup is very convenient. I love how my customization turned out, despite my many early troubles. Let me know how you store your beads in the comments!